AI Studio Guide

How to create
scroll-stopping
AI social videos.

Watch our 40 second demo video or scroll down for each step.

Scroll to start

Pick your starting point.

Same editor either way. Blank prompt, or pre-filled from a remix.

โ†’ Path 01

Create from scratch.

A blank canvas. Your prompt, your uploads.

  • Write your prompt
  • Upload photos, logos, or products
Start creating โ†’
โ†’ Path 02

Remix a video.

Edit a video someone else made. Their prompt pre-filled.

  • Swap in your own photos, logos, or products
  • Tweak anything, or run as-is
Browse community โ†’

Idea to published clip.

First video in under 3 minutes. Here's the flow.

01
Choose your starting point
From scratch, or remix.
Start fresh, or hit Remix on any video in the Community Showcase.

Same editor either way, just a different starting point.

02
The prompt step
Write your prompt.
From scratch, or pre-filled from a remix. Tweak, edit, or replace.
  • Upload images (logos, products, pets, yourself)
  • Use "quotes" for sign text
2.1 Starting from scratch

Write your prompt from scratch. Create anything.

2.2 Remixing

Prompt pre-filled from the original. Swap text in "quotes", change the subject, replace images, then submit.

Don't ship
their branding in your video.

When you remix a video and click "Keep this character", the prompt step is skipped - so the original creator's logos, sign text, and uploaded images stay pre-filled (if they exist in the scene). If you don't go back and swap them out, they'll carry straight through into your generated video.

Scene preview showing a logo placed on a board within the scene
Example - Logo in scene Logo on a board, sign, or product. Want your logo there instead? Swap the uploaded image at the prompt step before you animate.
Scene preview showing text on a banner within the scene
Example - Text in scene Text on a banner, flag, or sign. Want different wording? Edit the text in "quotes" at the prompt step before you animate.
Step A

Get back to the prompt

From the Layout step, click the Prompt breadcrumb at the top. The prompt step is where text and uploaded images live - this is the only place you can swap them.

Step B

Swap, then resubmit

Replace any text in "quotes" with your own. A logo on a hat, shirt, or storefront - uploaded by the original creator? Delete it, and upload yours. Submit the prompt to update the scene.

If you don't update the prompt, the original branding stays in your generated video.

Walkthrough

Watch the swap happen end-to-end, then try it yourself in the editor.

Runtime 0:42 Step 02
Quick check

Before you hit generate, scan your scene preview. If you can still read someone else's text or see their logo, you missed a swap.

Scene preview doesn't use credits
03
Style the social post
Pick the platform layout.
Instagram, Facebook, LinkedIn. Add username, caption, likes, comments.
04
Multi-generation
Pick how many videos you want.
All render in parallel, ready in ~60 seconds.
  • Pick 2 - uses same credits as only 1 video
  • Pick 4 - uses same credits as only 2 videos
  • 1 free regeneration on every video
05
Download & share
Export. Share. Repeat.
Download and share. Then, head back to the Community Showcase page to discover fresh ideas, get inspired & remix your favorites.
How to share your video to social media

How to write a prompt that actually delivers.

Pro tip

Write your prompt like you're explaining it to a five-year-old. Step by step, in order, with details about what each thing does.

Vague: "A dog with a sign."

Better: "A golden retriever sitting in a field of sunflowers, holding a wooden sign that says 'HAPPY BIRTHDAY' in big black letters, close-up shot."

Specify what the subject is, where it is, and what it's doing.

Check this before you animate.

Animating uses credits. Scene previews don't. Catch these at the Prompt step and skip most re-renders.

How it works

Your scene is built at the first Prompt step.

Everything in the preview is what the AI will animate from - so use it as a checkpoint. If you can't make out the text in your scene without squinting or your logo isn't clear, the AI has to use some imagination to render it in the final animation, and that's what leads to distortion. Scene previews don't use any credits - edit your prompt or regenerate until everything is clearly visible.

How to find the Prompt step โ†—
Rule of thumb

If you want text or a logo to come through with clarity, it needs to be big, bold and visible in the scene preview.

Visual reference

What to look for in your scene preview

Scene preview where the open house flag is too small to read
Text too small Text on flag is too small to read. If you can't read the text in the preview without squinting, the AI can't either. When the subject is brought forward, it'll be forced to guess, and the text may distort.
Scene preview where the open house banner is partly blocked by the subject
Text obstructed Half the word on flag is hidden. The subject covers part of "HOUSE". The AI has to invent what's behind her - which can lead to garbled letters in the final.
Scene preview where the open house flag is big, bold and fully visible
Ready to animate Text on flag is big, bold & fully visible. This is what the AI needs to render it cleanly. Same would apply to a logo.
Text rules
  • Keep text short (2-4 words)
  • Make it big ("text is big and bold")
  • 100% clearly visible (no squinting to read)
Big bold text + close-up shot holding a sign with big bold text saying "MERRY CHRISTMAS", close-up shot
Still not close enough?Ask the AI to focus directly on it - like this example for a book cover.
Extra focus example (book cover) close up so the book cover is big, bold and visible. Focus on making the book headline large.
Text blocked by something? Add: "Make sure the text is not obstructed by the primary subject, fully visible, in big bold letters."
Logo rules
  • Logo is big, bold and visible
  • Logo is not obstructed
  • Logo doesn't have a long slogan (why?)
Placement + close-up shot holding a sign with my uploaded logo, close-up shot
Still not close enough?Ask the AI to focus directly on it - like this example for a logo on a t-shirt.
Extra focus example (logo on t-shirt) close up so my uploaded logo on the t-shirt is big, bold and visible. Focus on making the logo large.
Logo missing? Upload it at the first Prompt step - we don't drop one in automatically. (Brand Kit logo lives in the social post layout, not the scene.)
โœ“
Scan your scene preview before you animate - it's free.

If text or logos aren't extremely clear before, they won't be clear after. Fix it now, not after burning credits.

More videos. Same credits.

All videos render at the same time. Compare variations, pick your favourite, ignore the rest. The extras didn't cost you anything.

Pick 2 videos Uses same credits as only 1 video
Pick 4 videos Uses same credits as only 2 videos

Every video includes 1 free regeneration.

Meet Director Mode.

More control. Describe how each scene plays out.

  • Audio, baked in SFX or music on every scene.
  • Faster renders Iterate without losing steam.
  • Direct the ending A wave, a spill, a dance. Anything.
  • Smart suggestions Stuck? We'll suggest endings.
Prompt Layout Animate Download
Select Mode
Director Mode
How would you like this scene to end?
At the end, she smiles at the viewer and takes off her sunglasses

Questions, answered.

Most issues are covered below. Click the ? in the bottom right for the rest.

Download Credits are for hand-crafted animations made by our in-house motion crew. AI Credits are for AI videos. Totally separate, never double-charged.

We always show you exactly how many credits you're using, right above the Animate button.

You get multiple videos at no extra credit cost:

  • Pick 2 videos - same credits as only 1 video
  • Pick 4 videos - same credits as only 2 videos

Free regeneration: Every video includes 1 free regeneration.

The initial view is a static scene preview - confirm the subject, caption, and overall visual setup before animating.

There's no way to preview motion beforehand. The animation step is where the heavy AI rendering happens, which is why credits are consumed here - rather than at download. This is standard across all AI video platforms (Runway, Pika, Higgsfield, Google Veo, Luma Dream Machine all work the same way).

Make the most of your scene preview: Use it as a checkpoint to ensure everything looks perfect. Scene previews don't use any credits - edit your prompt or regenerate until you're happy. Before you animate, check these points.

Yes. Upload logos, products, photos, or designs at the Prompt step. Important: you must tell the AI how to use it in your prompt. Say "my uploaded image" and specify where/how it should be integrated into the scene.

Example prompts:

"Show my uploaded corgi playing in the snow wearing a bandana that says 'I โค๏ธ Mom', close-up"
"Make a friendly bear hold my uploaded real estate sign with 'JUST SOLD' text, suburban house background"

Before you animate, check your scene preview and ask yourself two questions:

  1. What is the obvious subject that will pop out? There should be one clear answer - not multiple competing subjects, not a fixed object that can't physically move, not an empty scene.
  2. Can it easily and naturally move toward camera? Nothing blocking its path, no awkward arm angles if holding something, and the subject isn't framed too close - for best results, they should be visible from hip to head, or full body.

If you can answer both questions confidently, you're good to animate. If either answer makes you hesitate, regenerate your scene preview - it's free, and it's easier to fix now than waste credits on a broken animation.

Scene to avoid ยท No clear subject

No subject that can pop out.

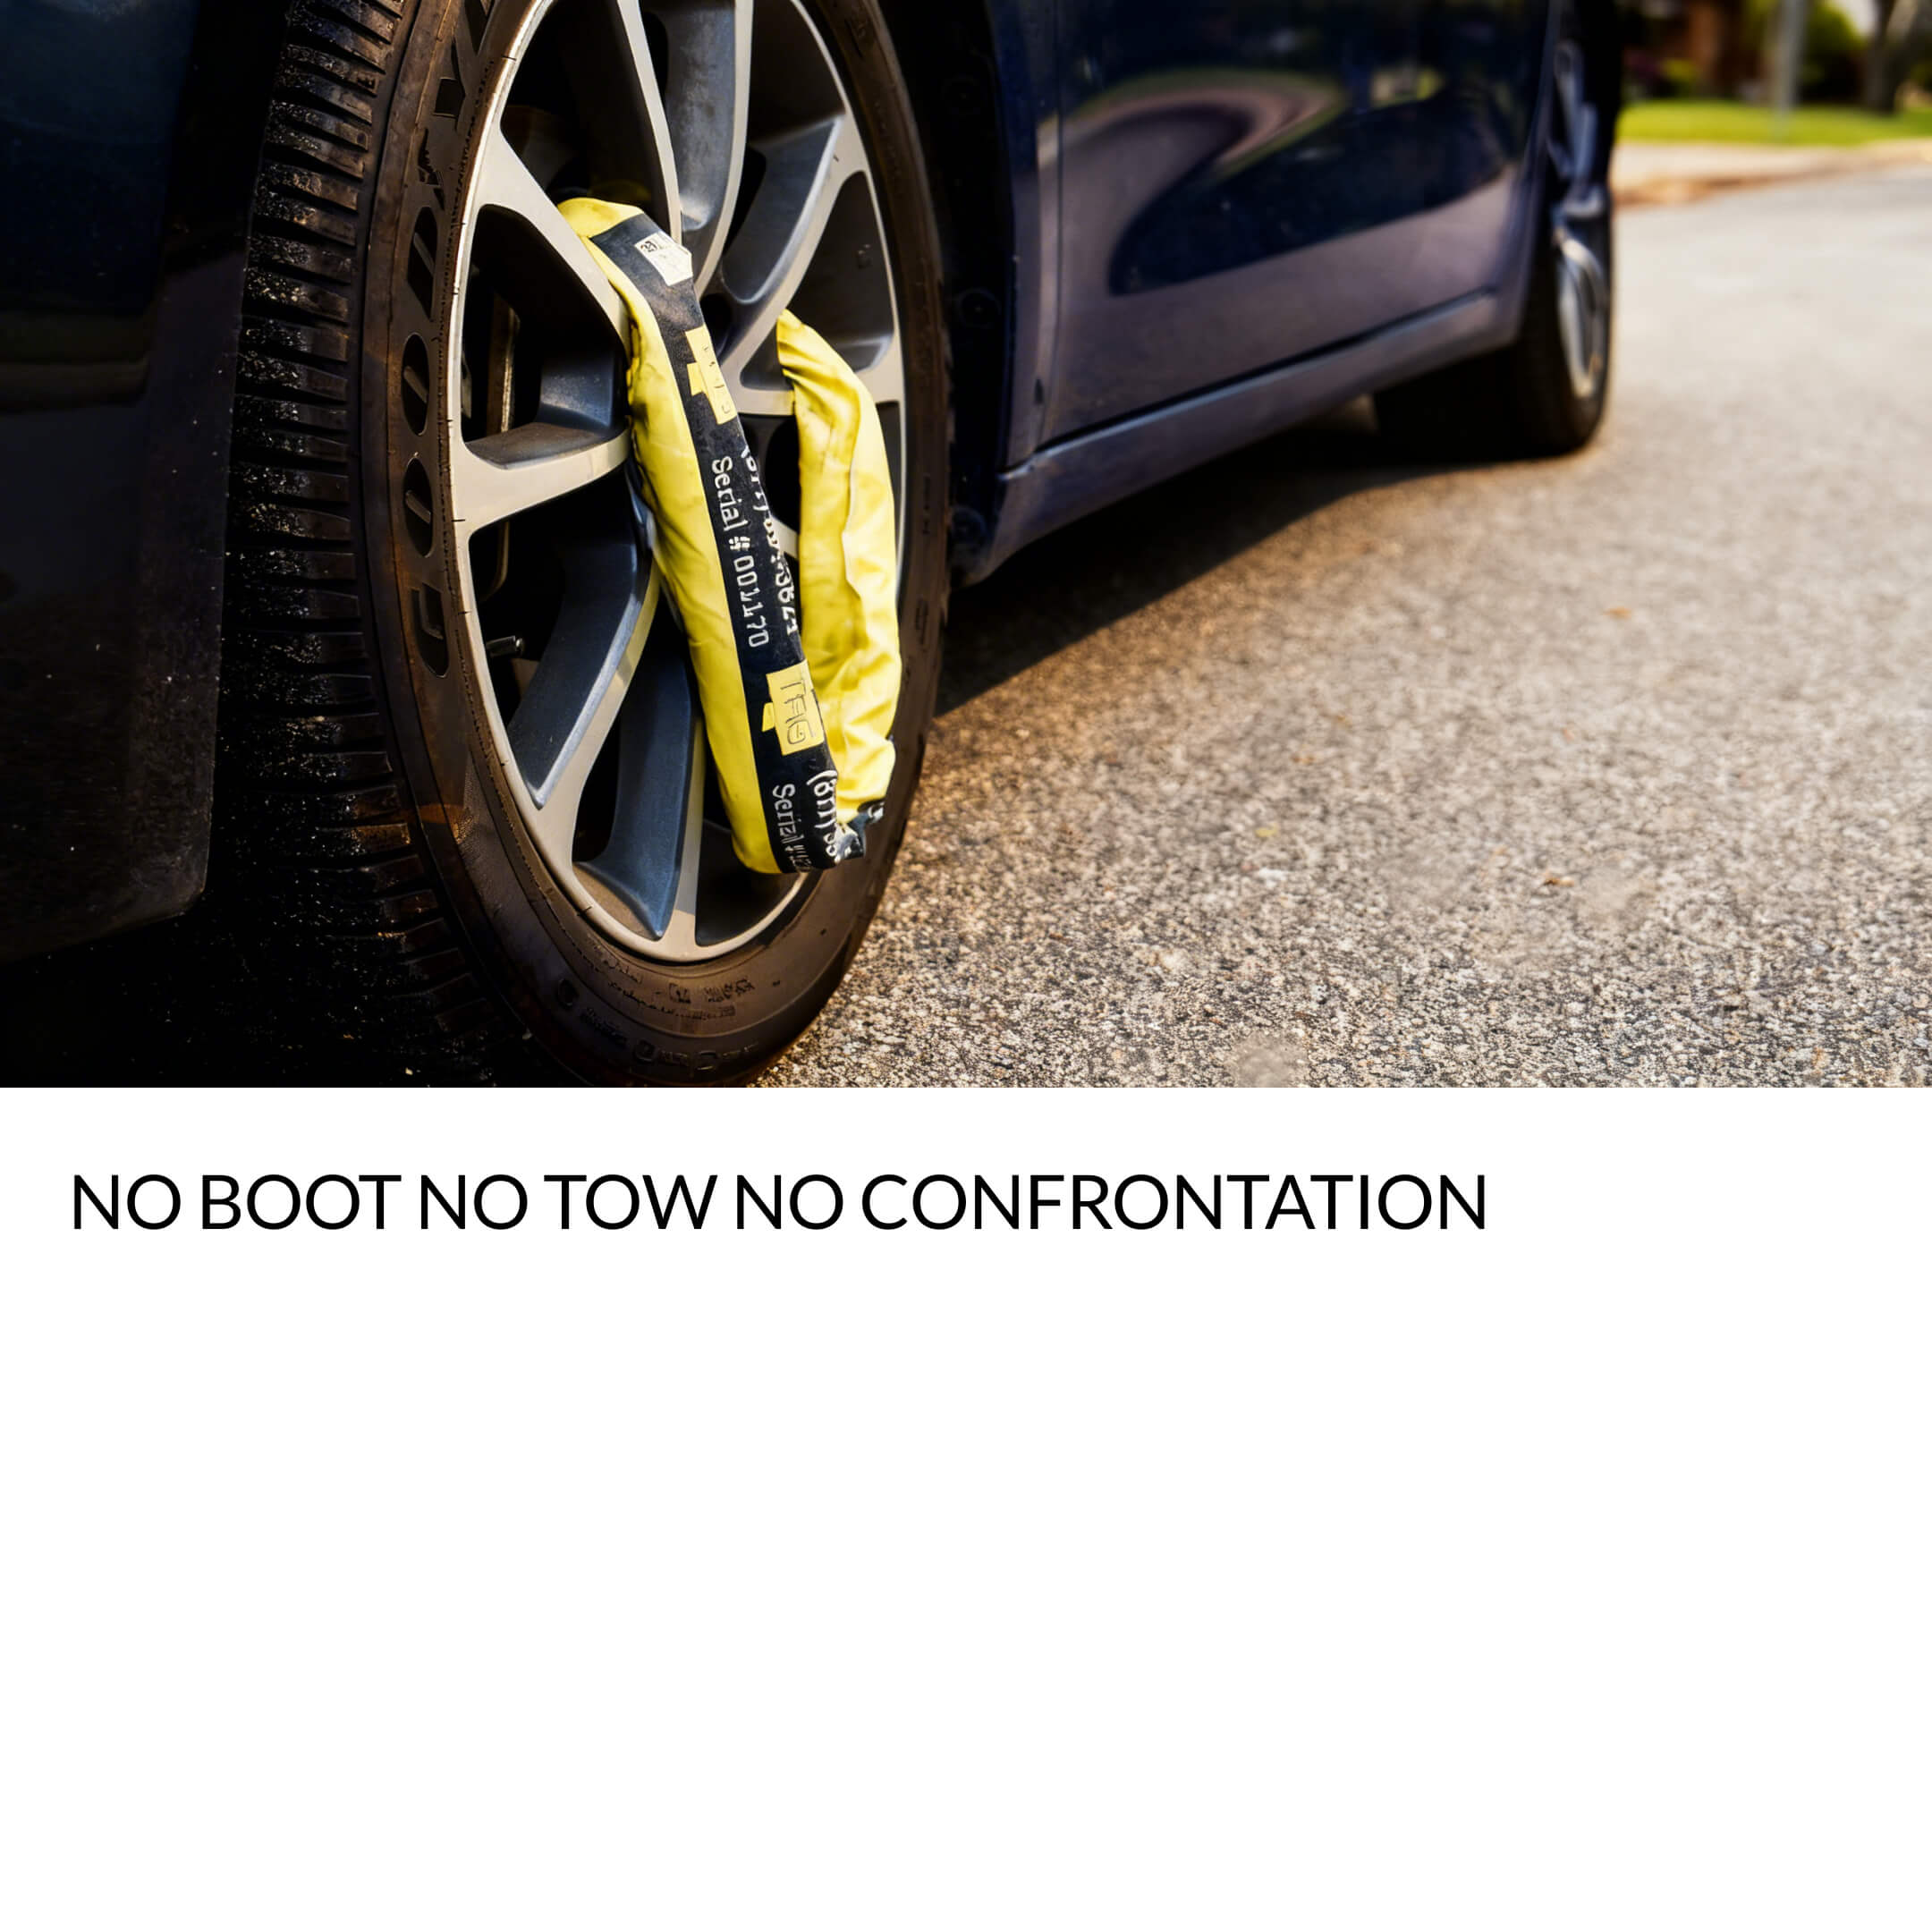
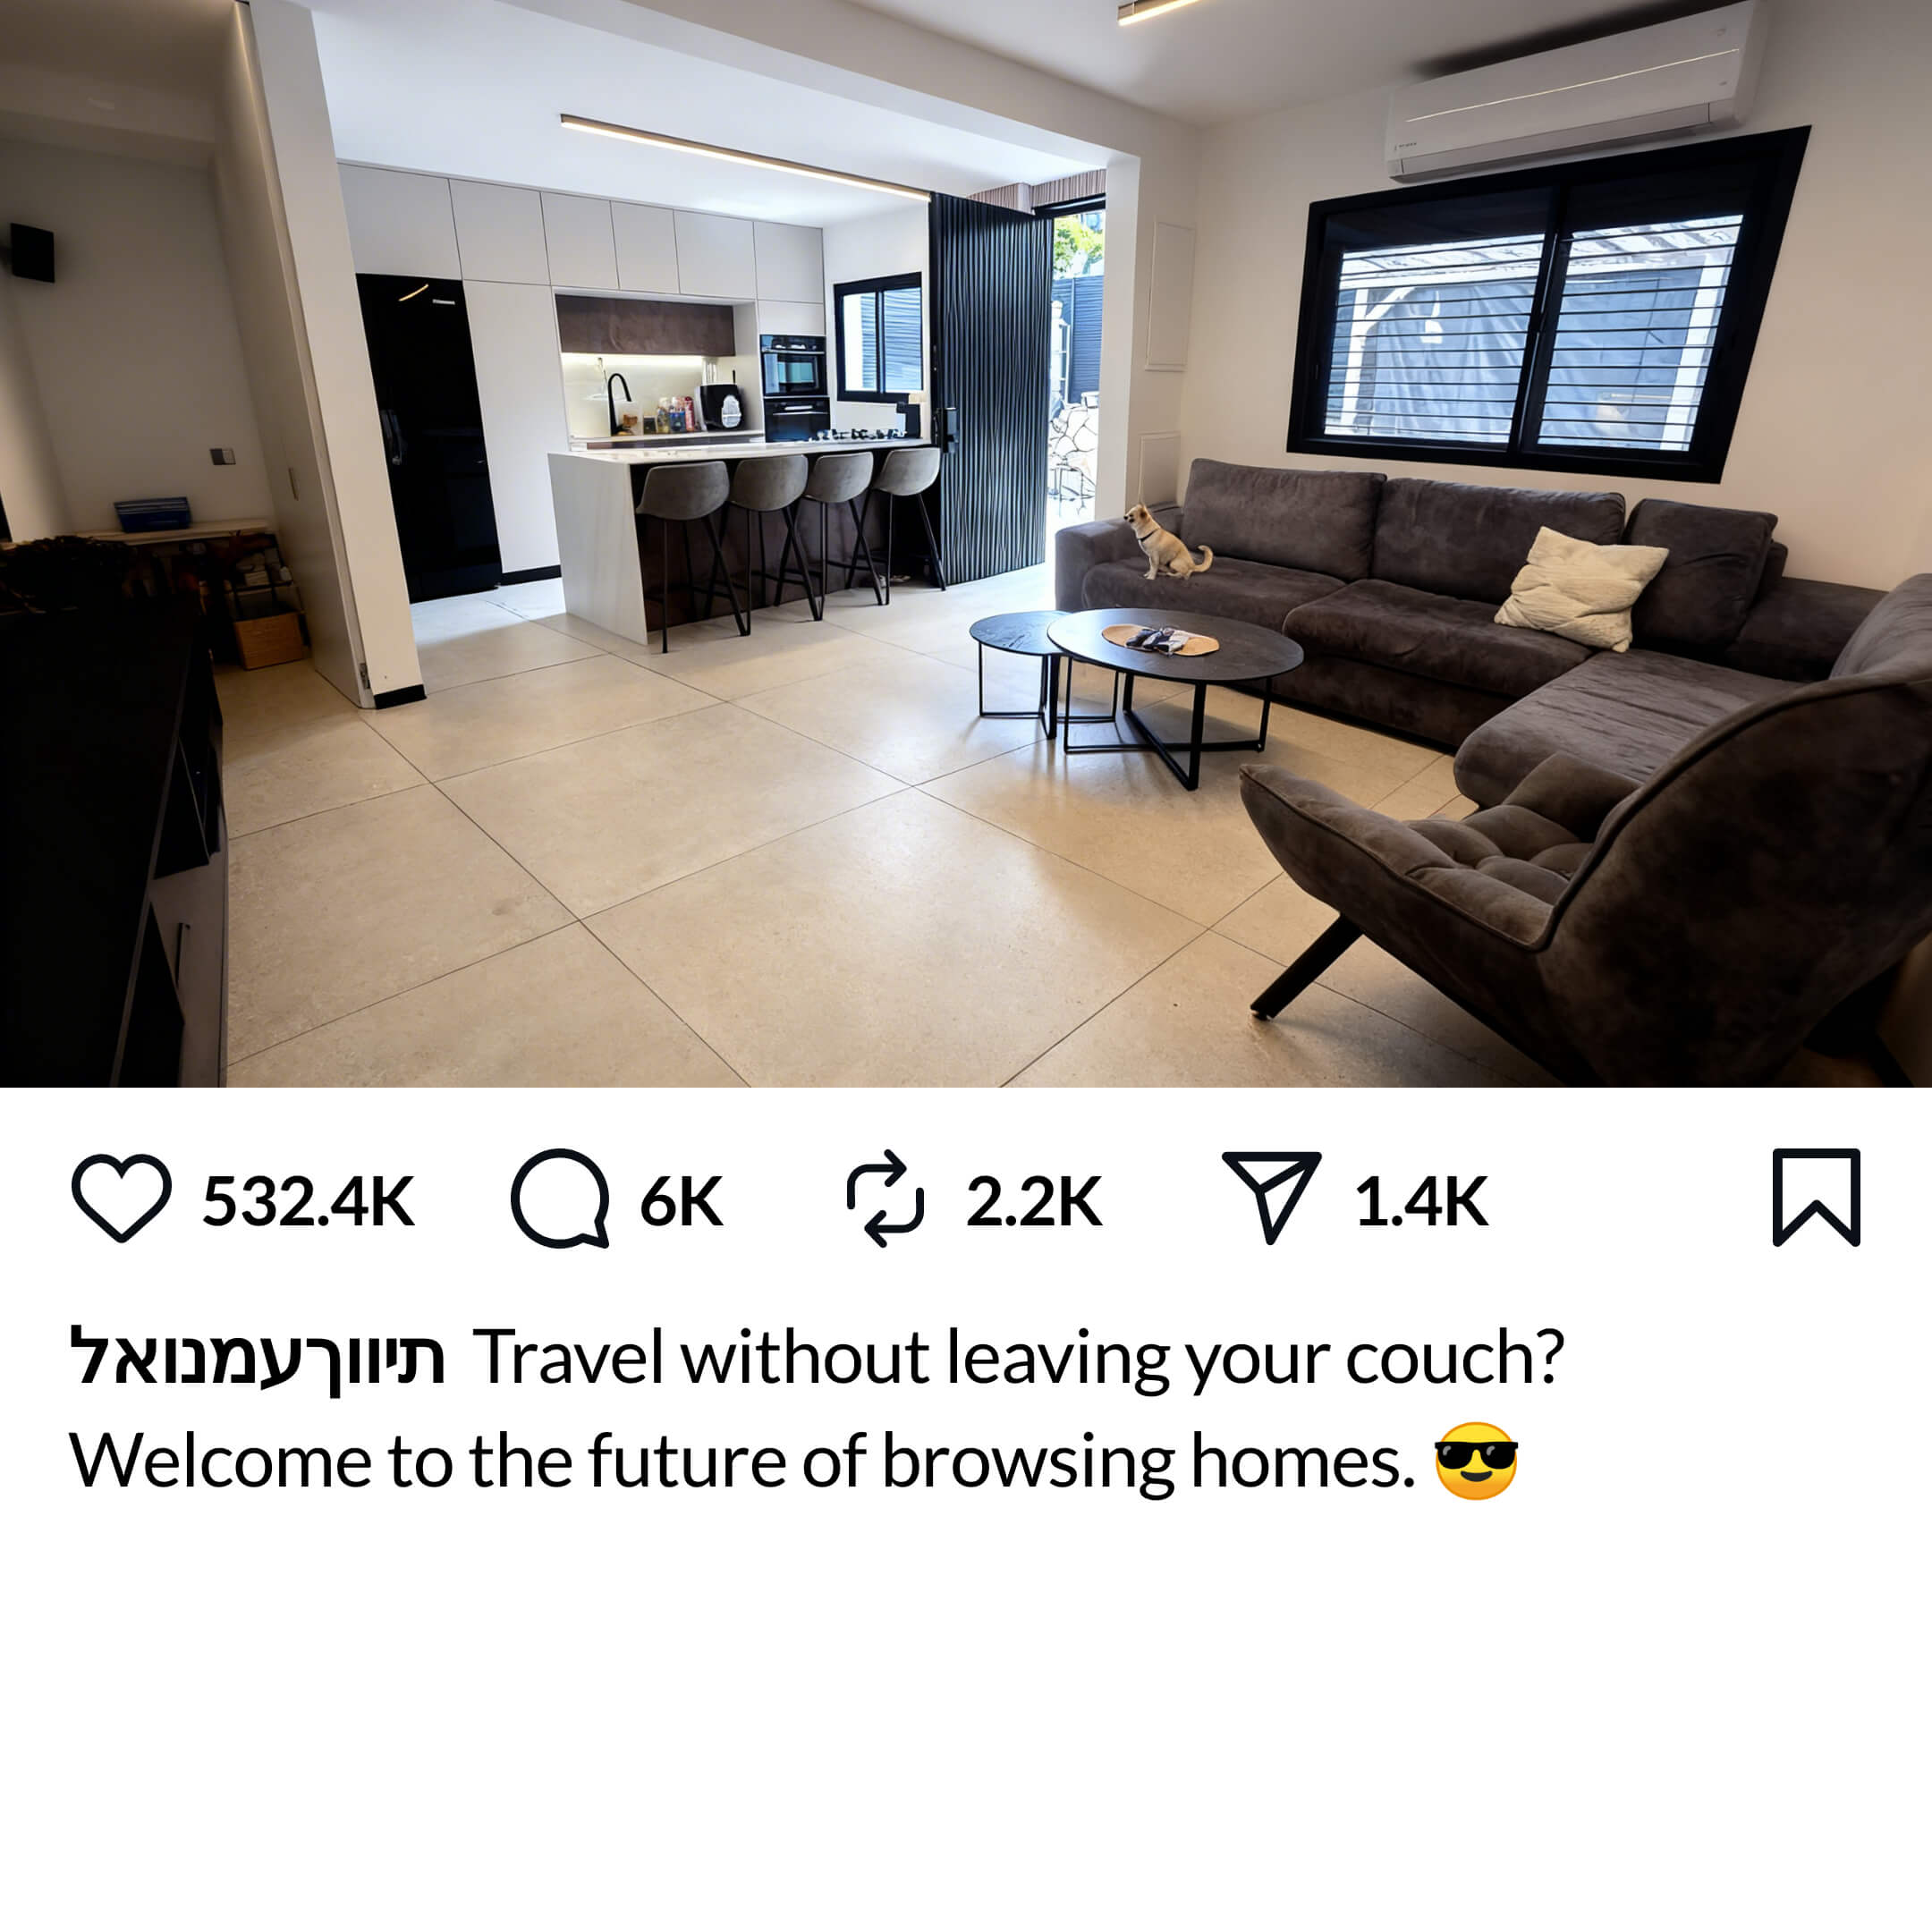
The pop-out effect needs something that can physically move toward the viewer. An empty room, a building exterior, or a fixed object like a sign bolted to a wall or a clamp locked to a wheel - these can't pop out in real life, so they can't pop out in your video either.

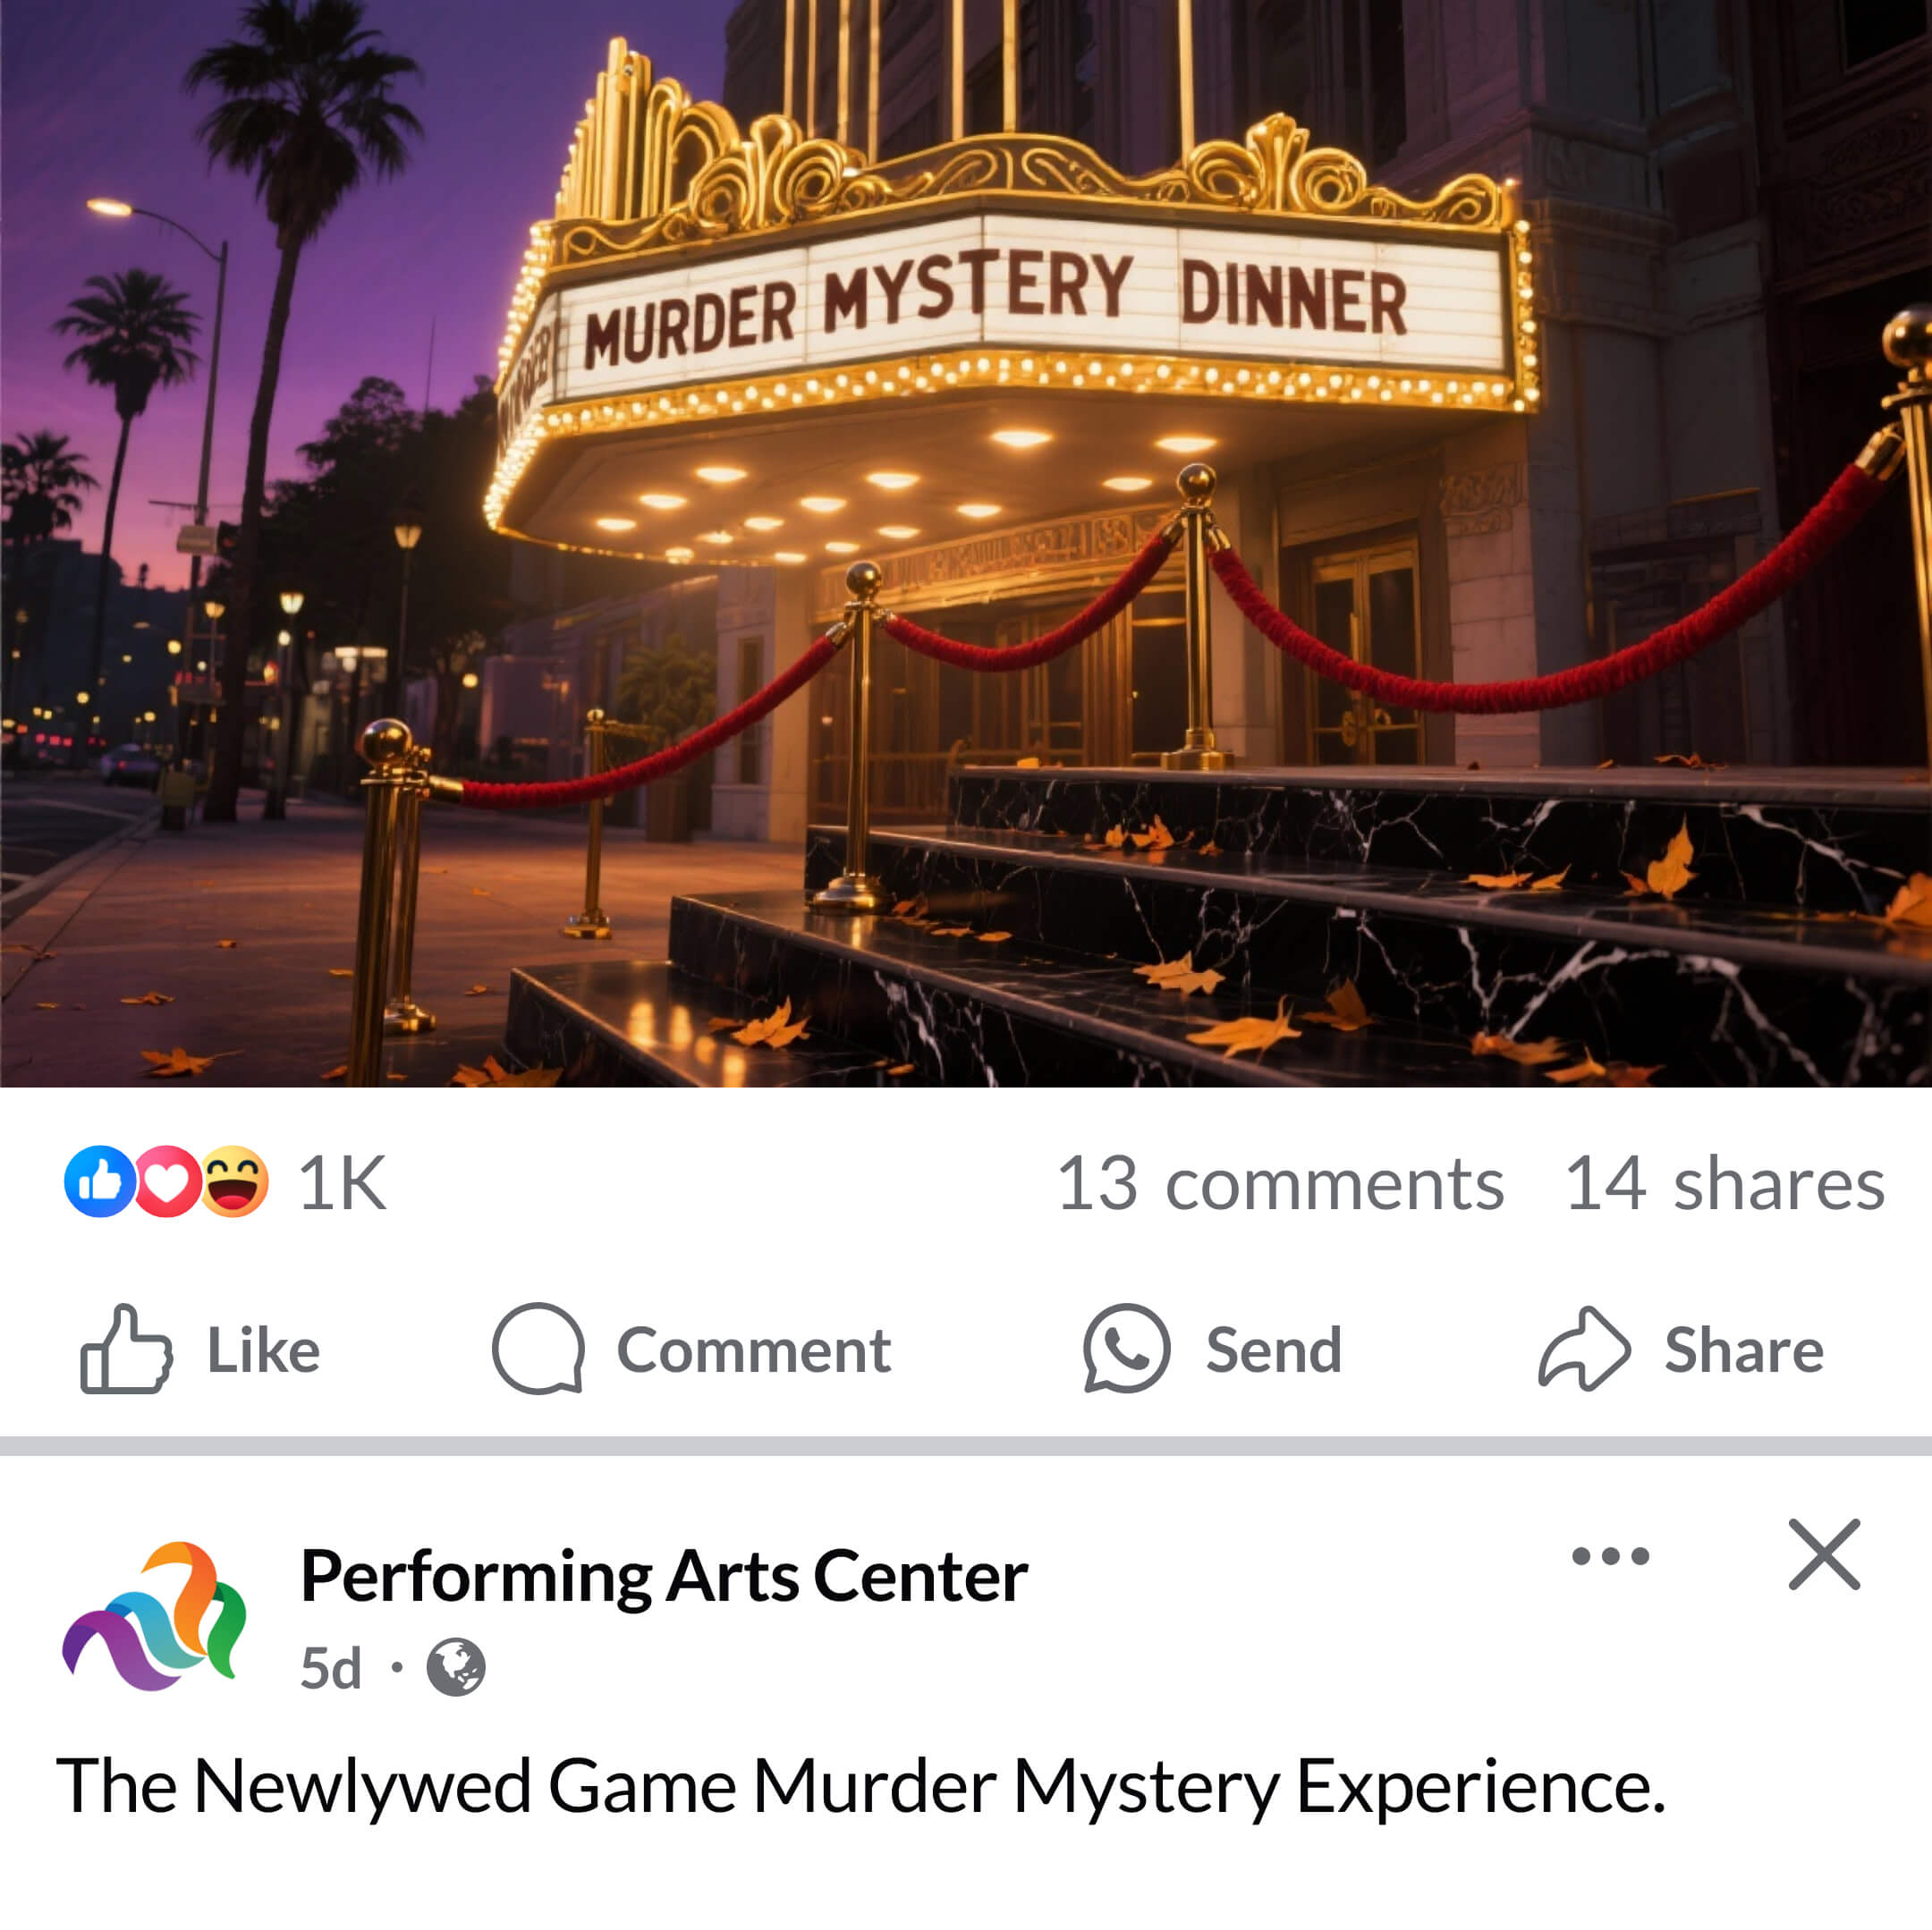
Stationary theater sign mounted to a building - cannot pop out
Fixed sign - nothing can move
Wheel clamp locked onto a tire
Locked clamp - can't move
Empty living room with no subject
Empty room - no subject

Fix: Add a subject to your scene that can realistically pop out - a person, animal, character, or movable object.

Scene to avoid ยท Barrier blocking the path

Something is between the subject and the camera.

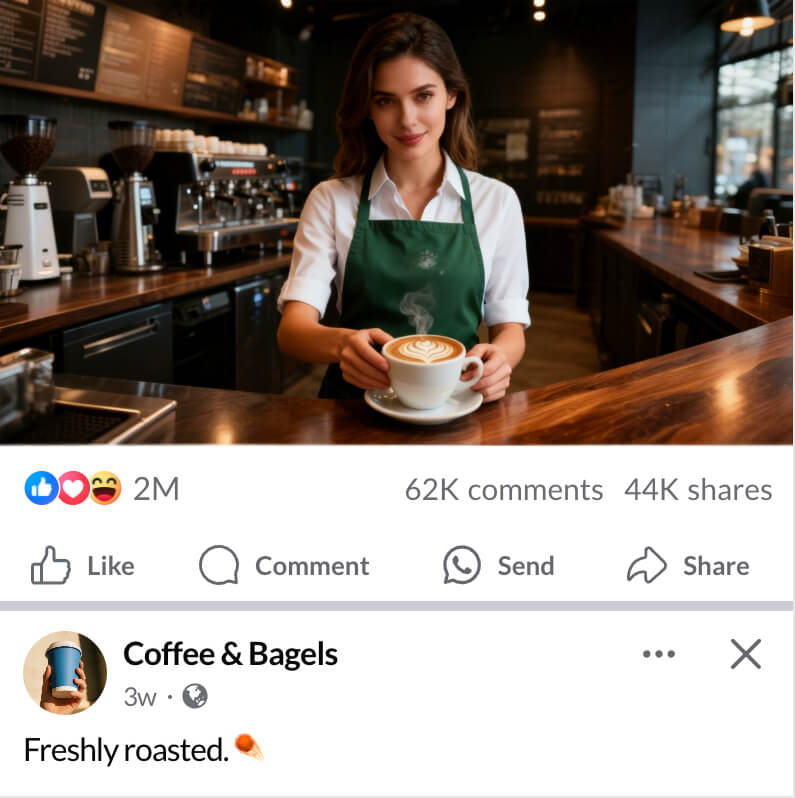
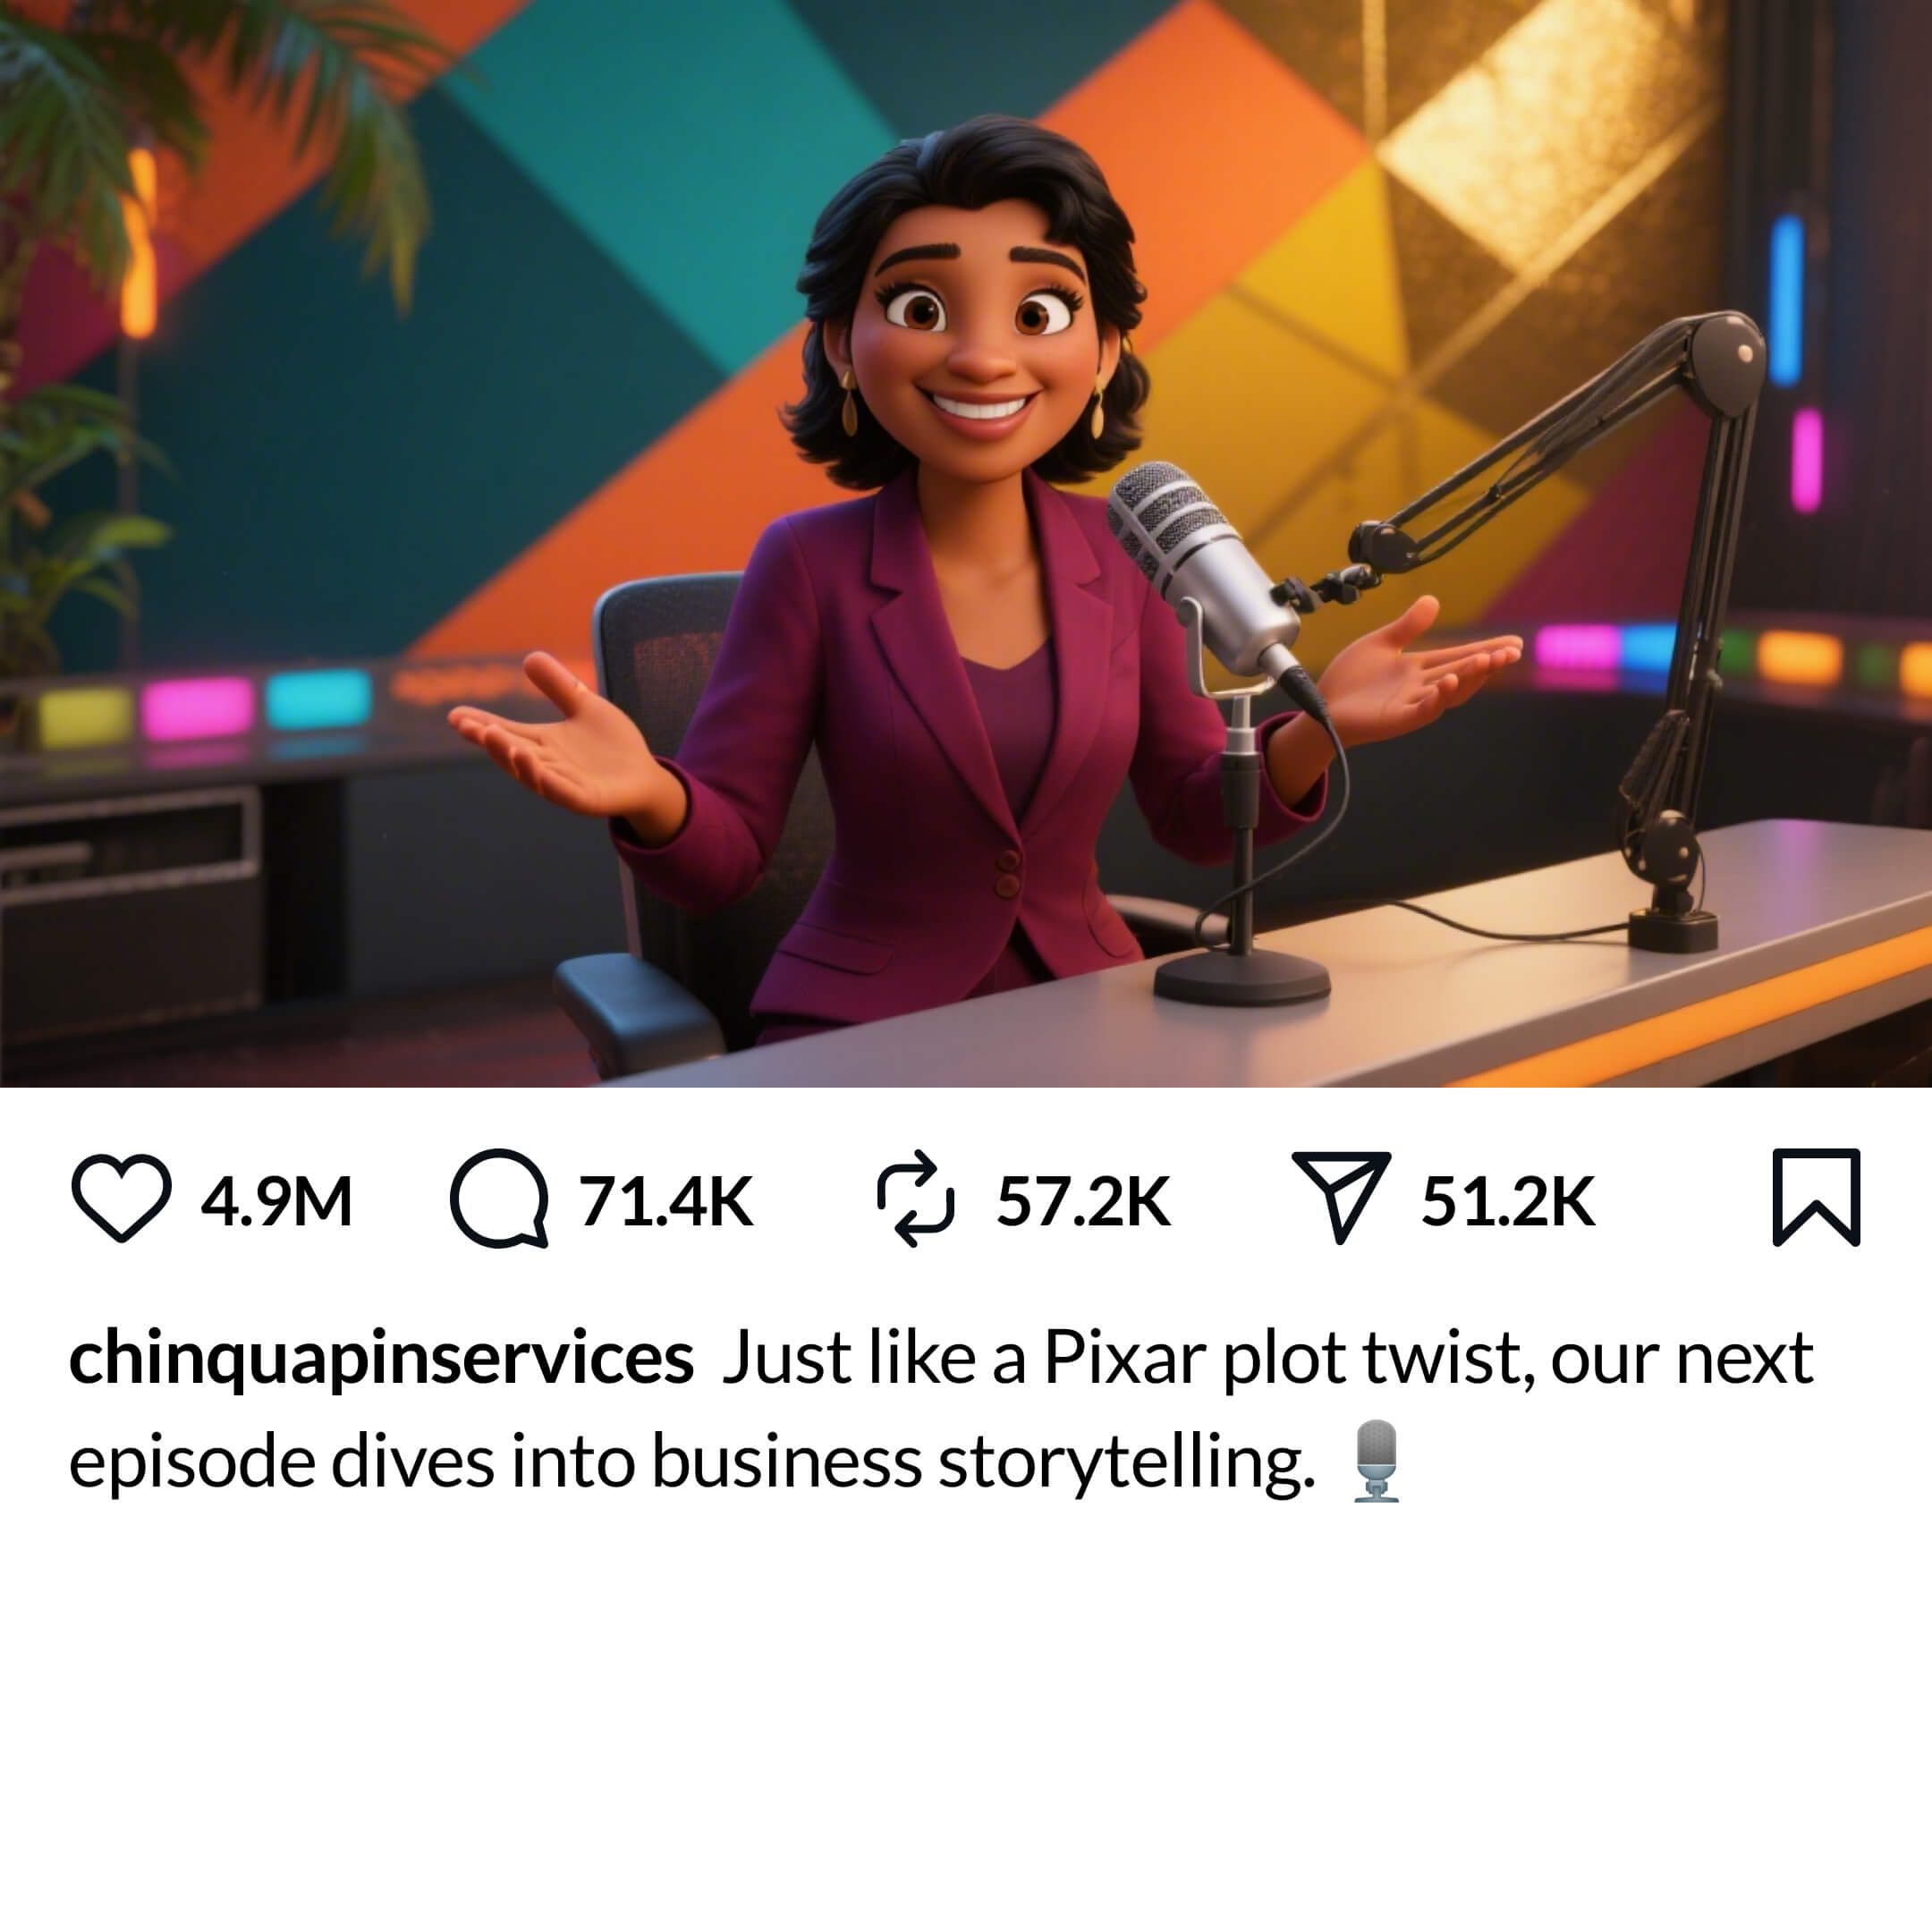
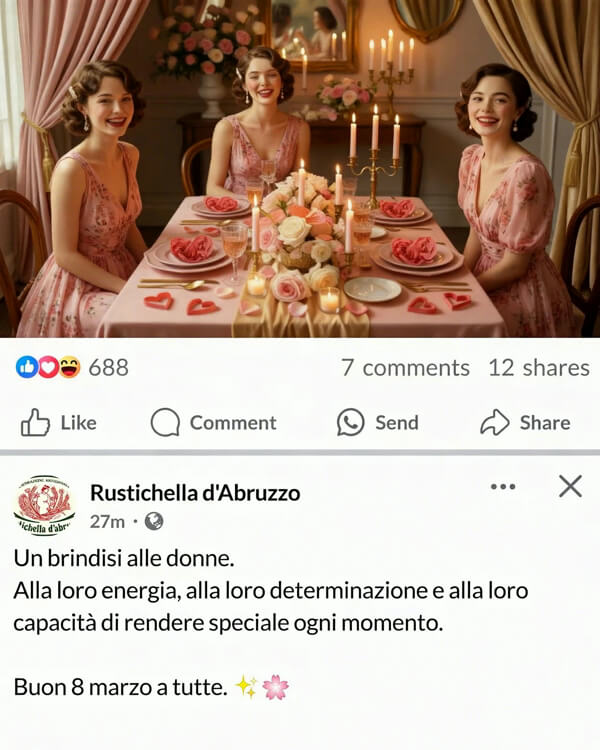
If there's a desk, counter, table, or any object between your subject and the camera, they can't pop through it. The subject needs a clear path forward. Think of it this way: the AI follows real-world physics - if a barrier would stop someone walking toward you in real life, it will stop them in your video too.

Barista standing behind a coffee bar counter
Counter blocks forward movement
Podcaster sitting behind a desk
Desk blocks pop-out path
Three women sitting behind a dinner table
Table blocks all three subjects
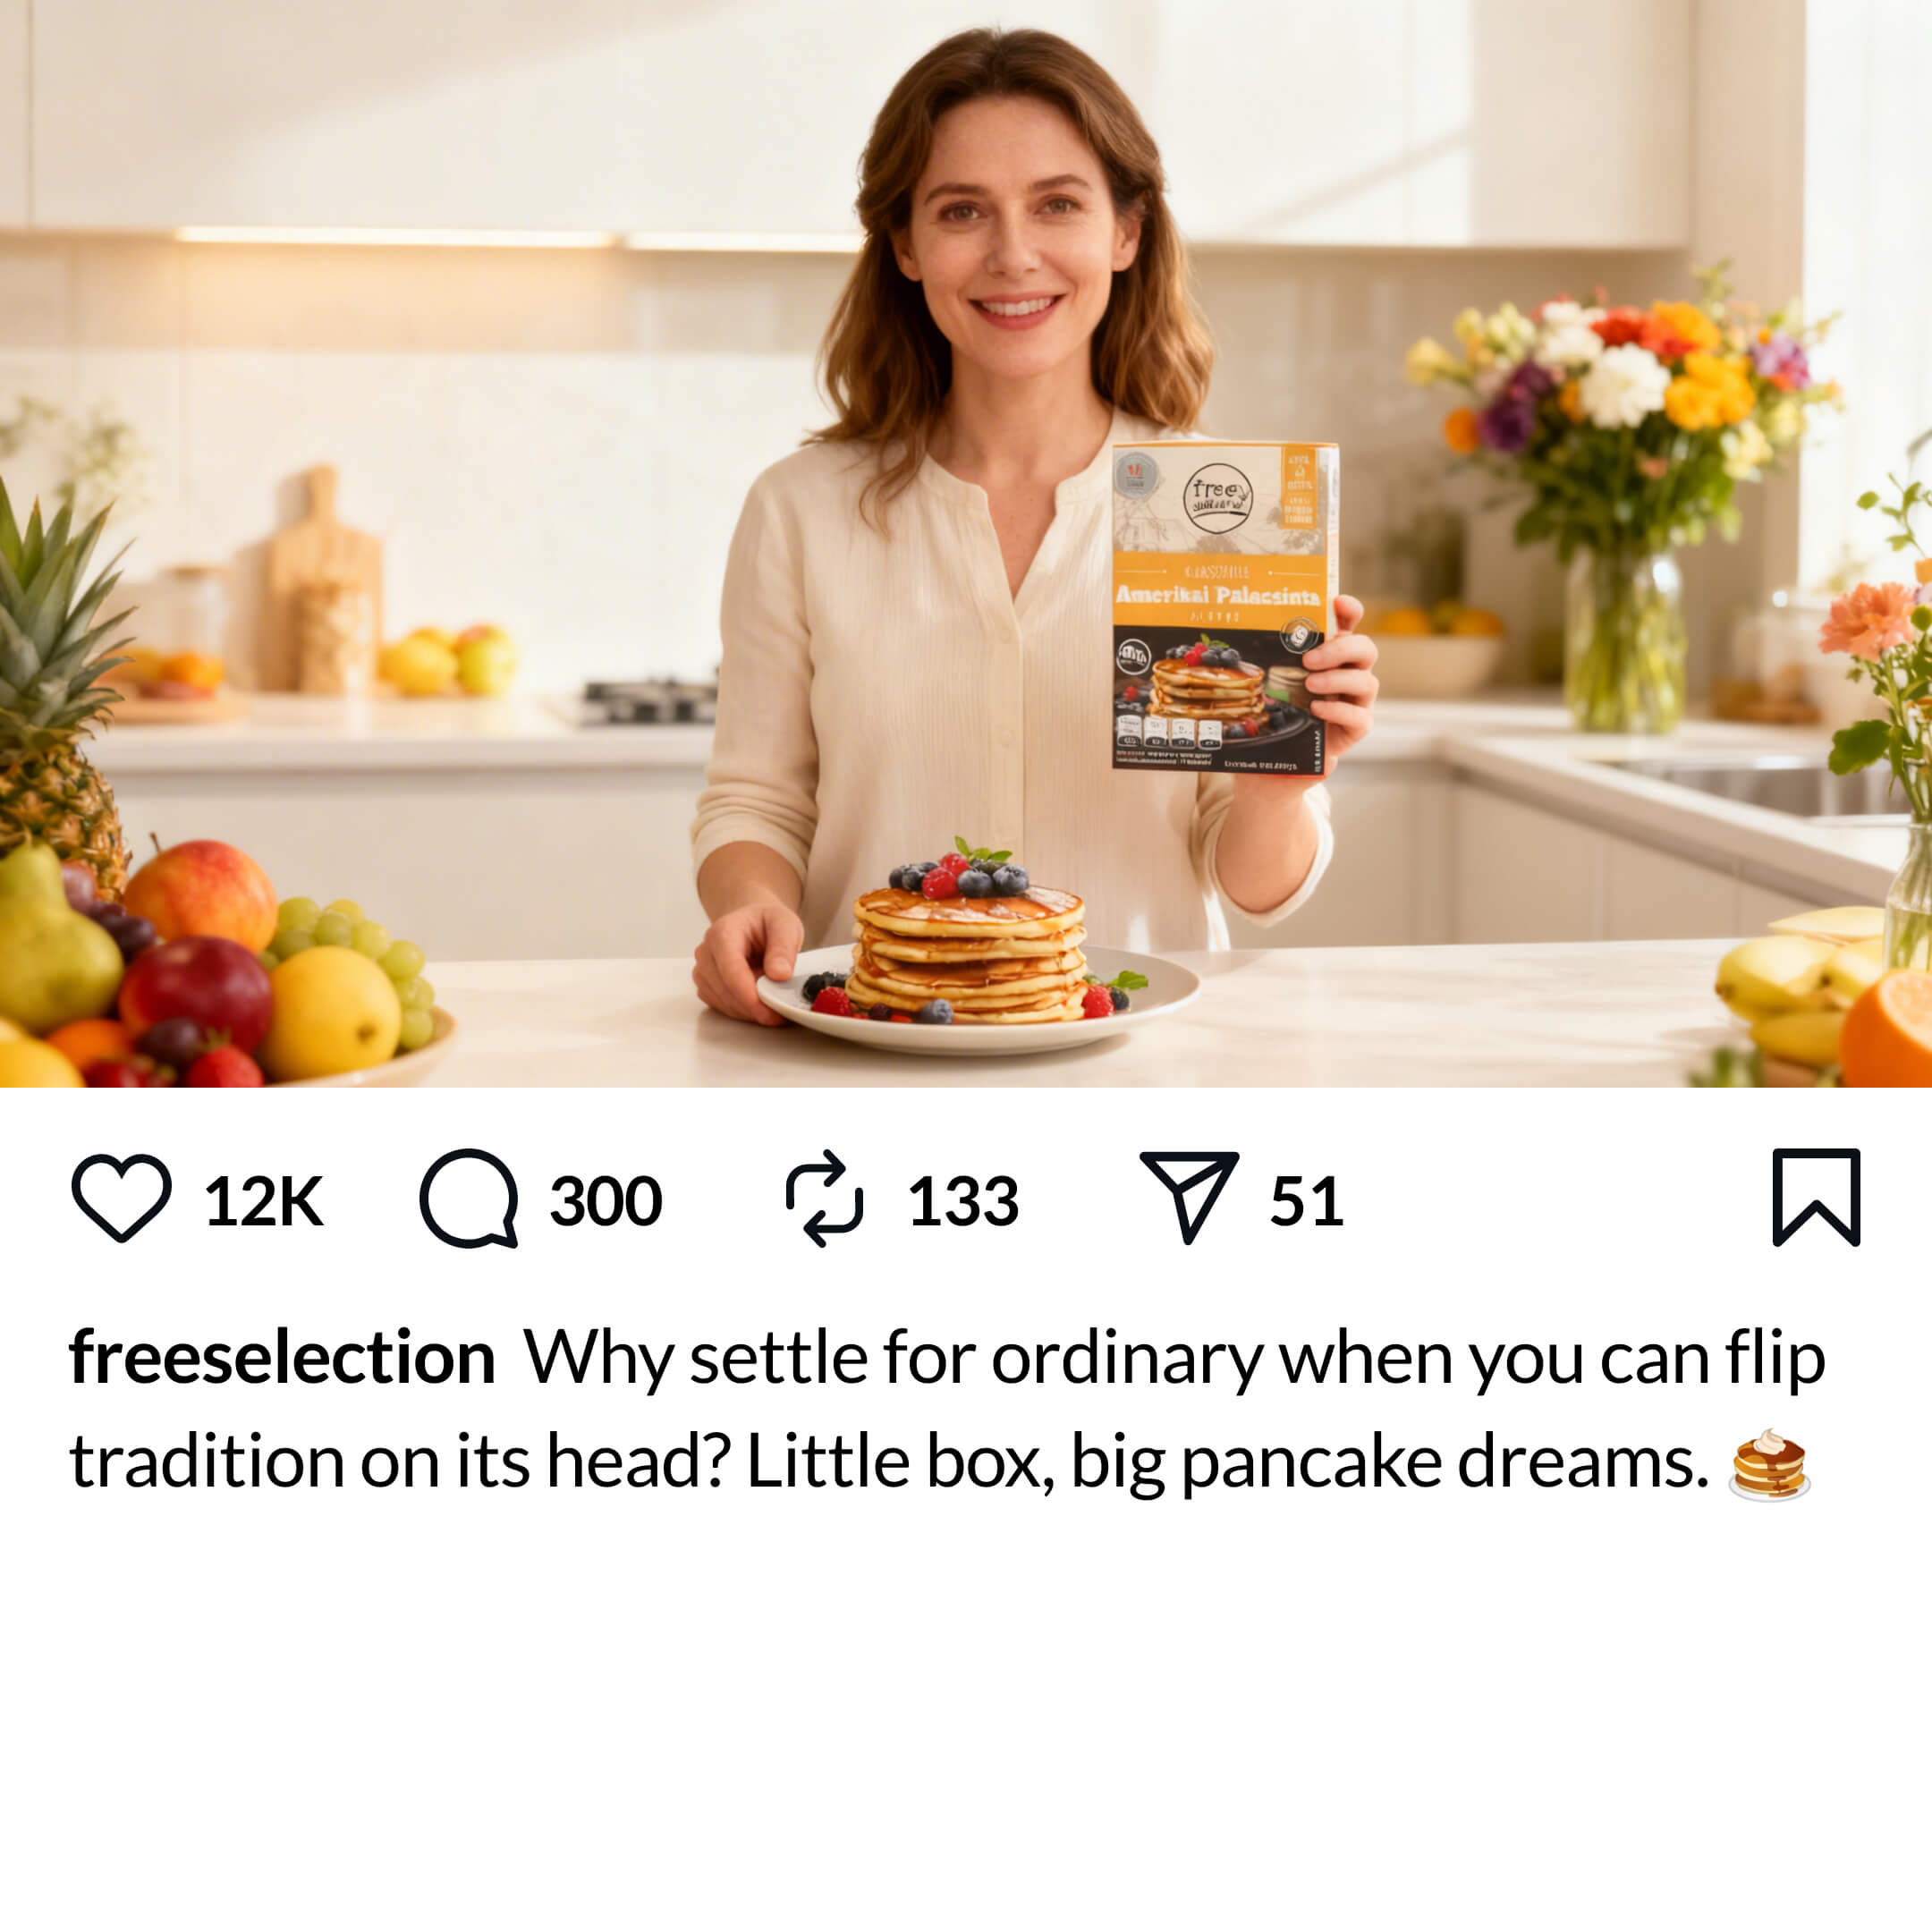
Woman standing behind a kitchen island
Kitchen island blocks path

Fix: If the AI keeps adding a barrier, be explicit in your prompt: "no desk", "standing in open space", or "nothing between subject and camera".

Scene to avoid ยท Awkward angle

Product held at an awkward angle.

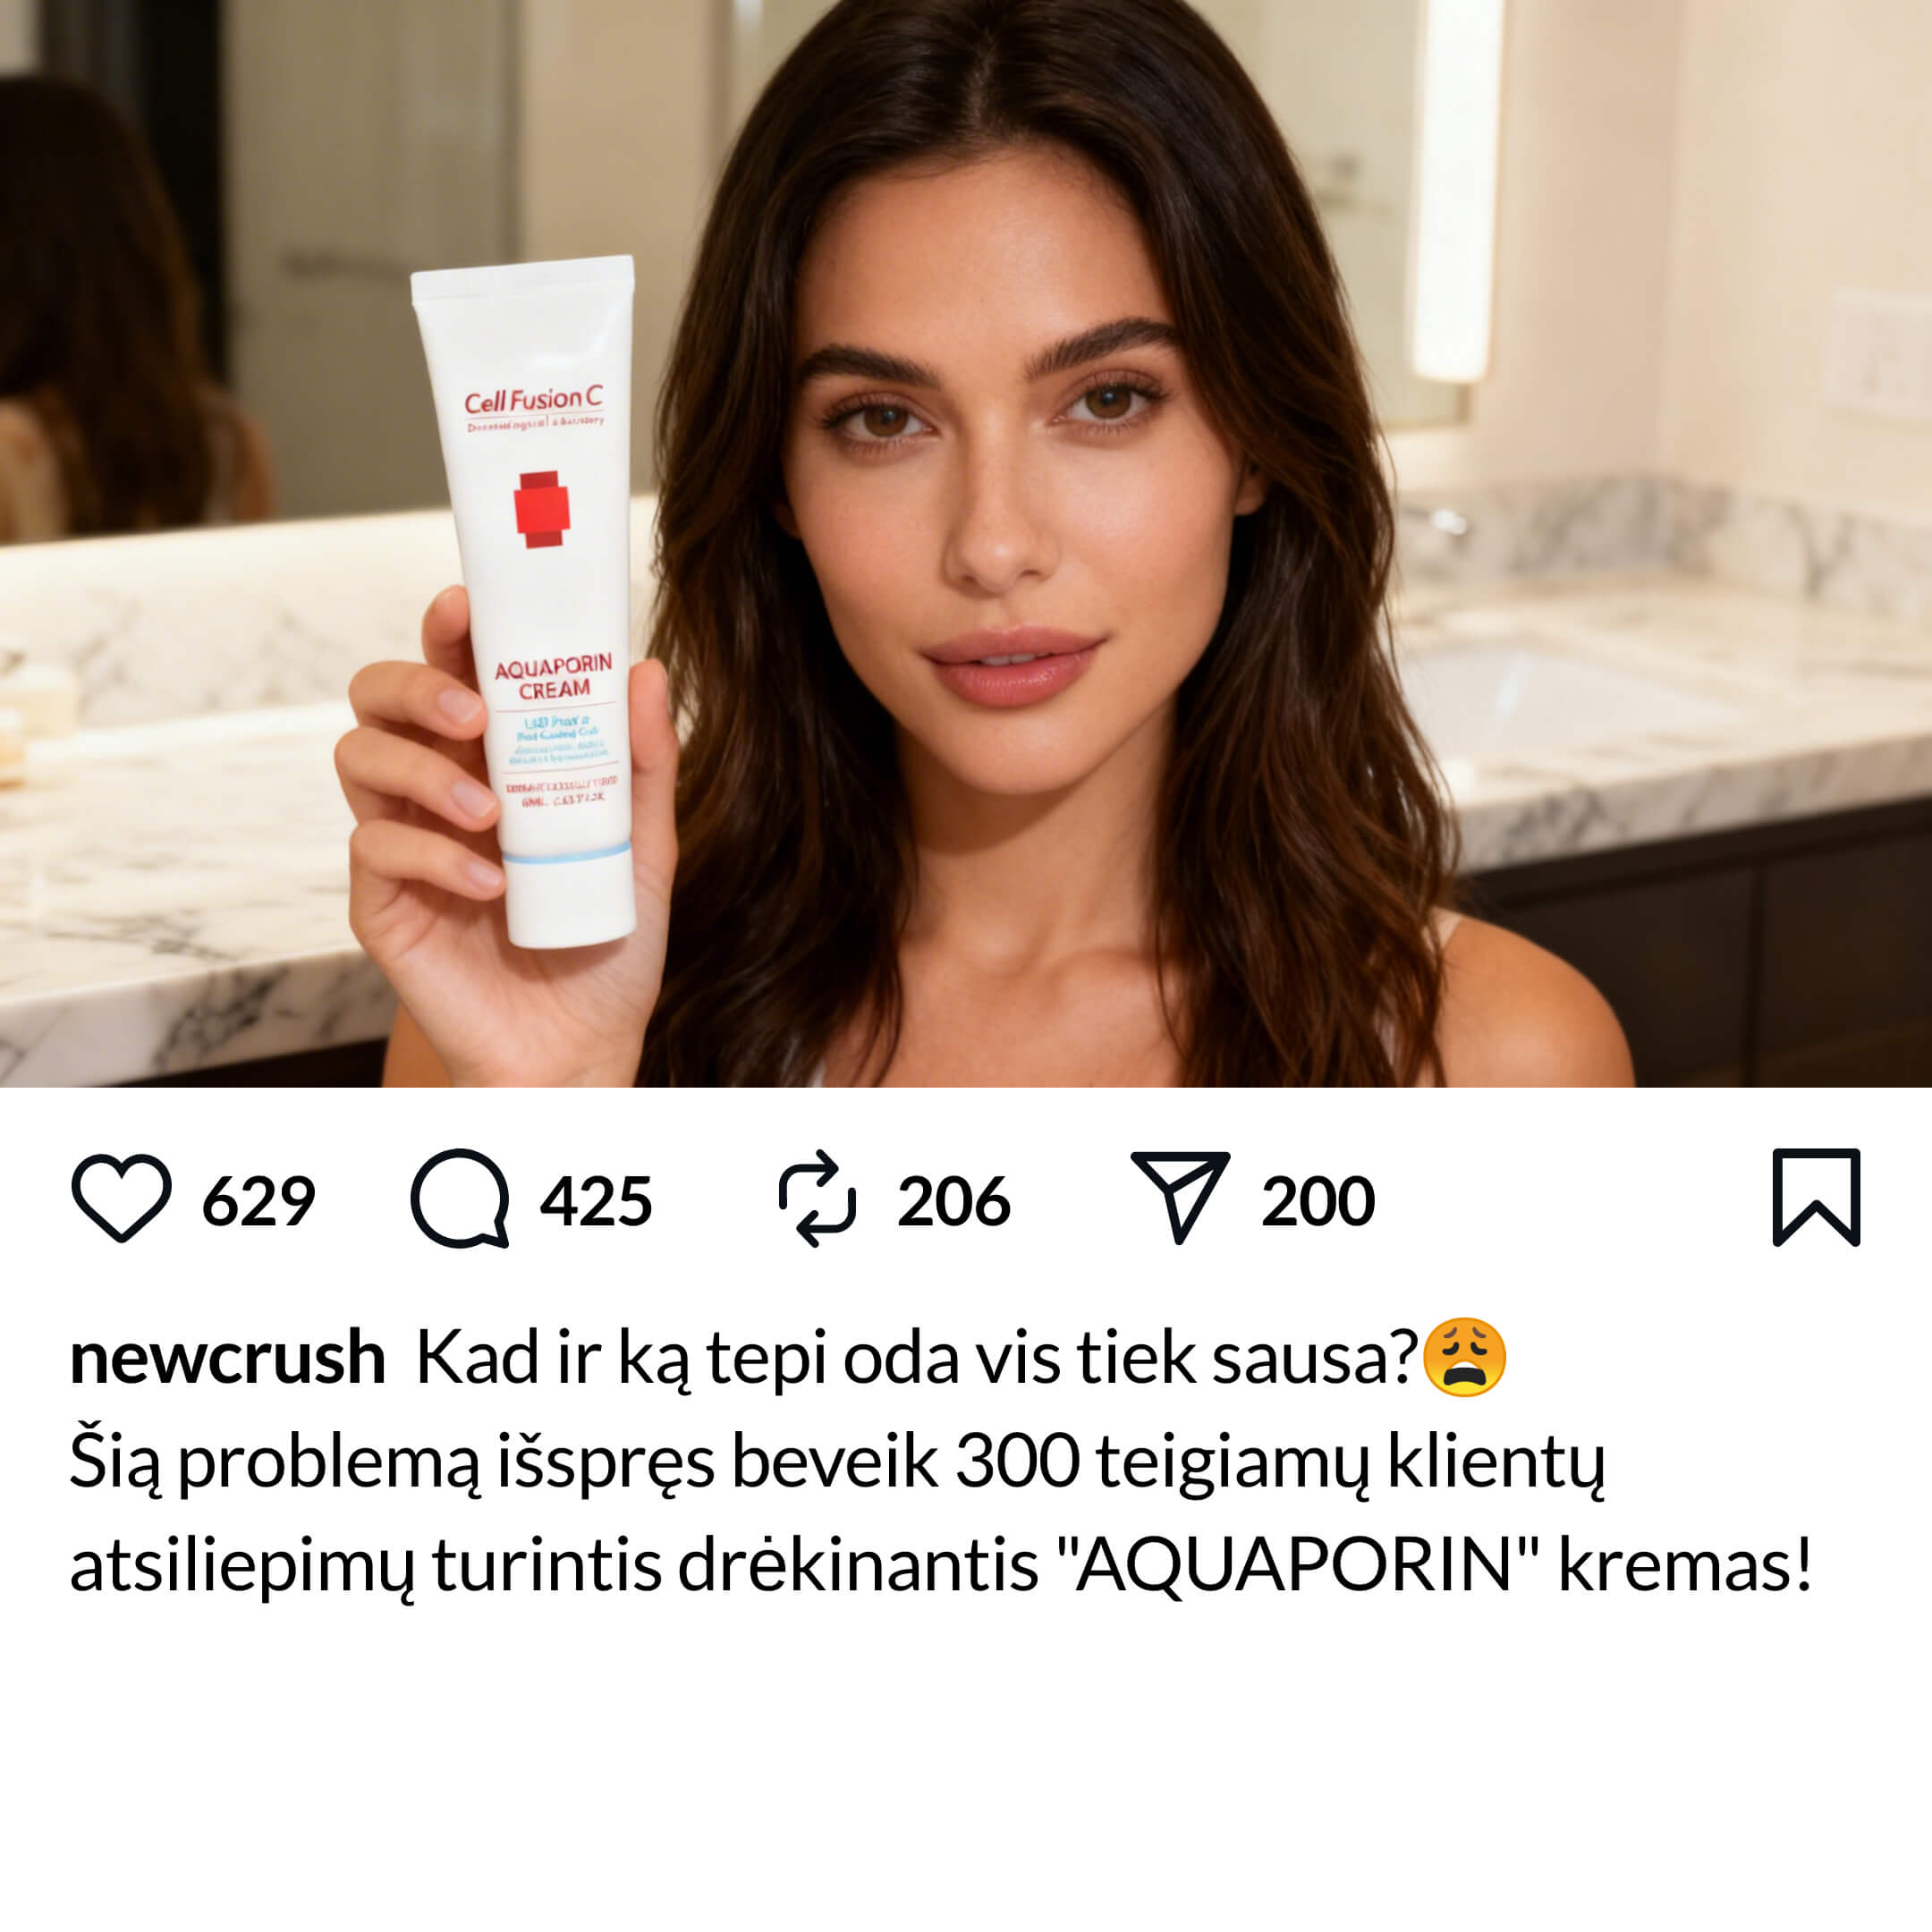
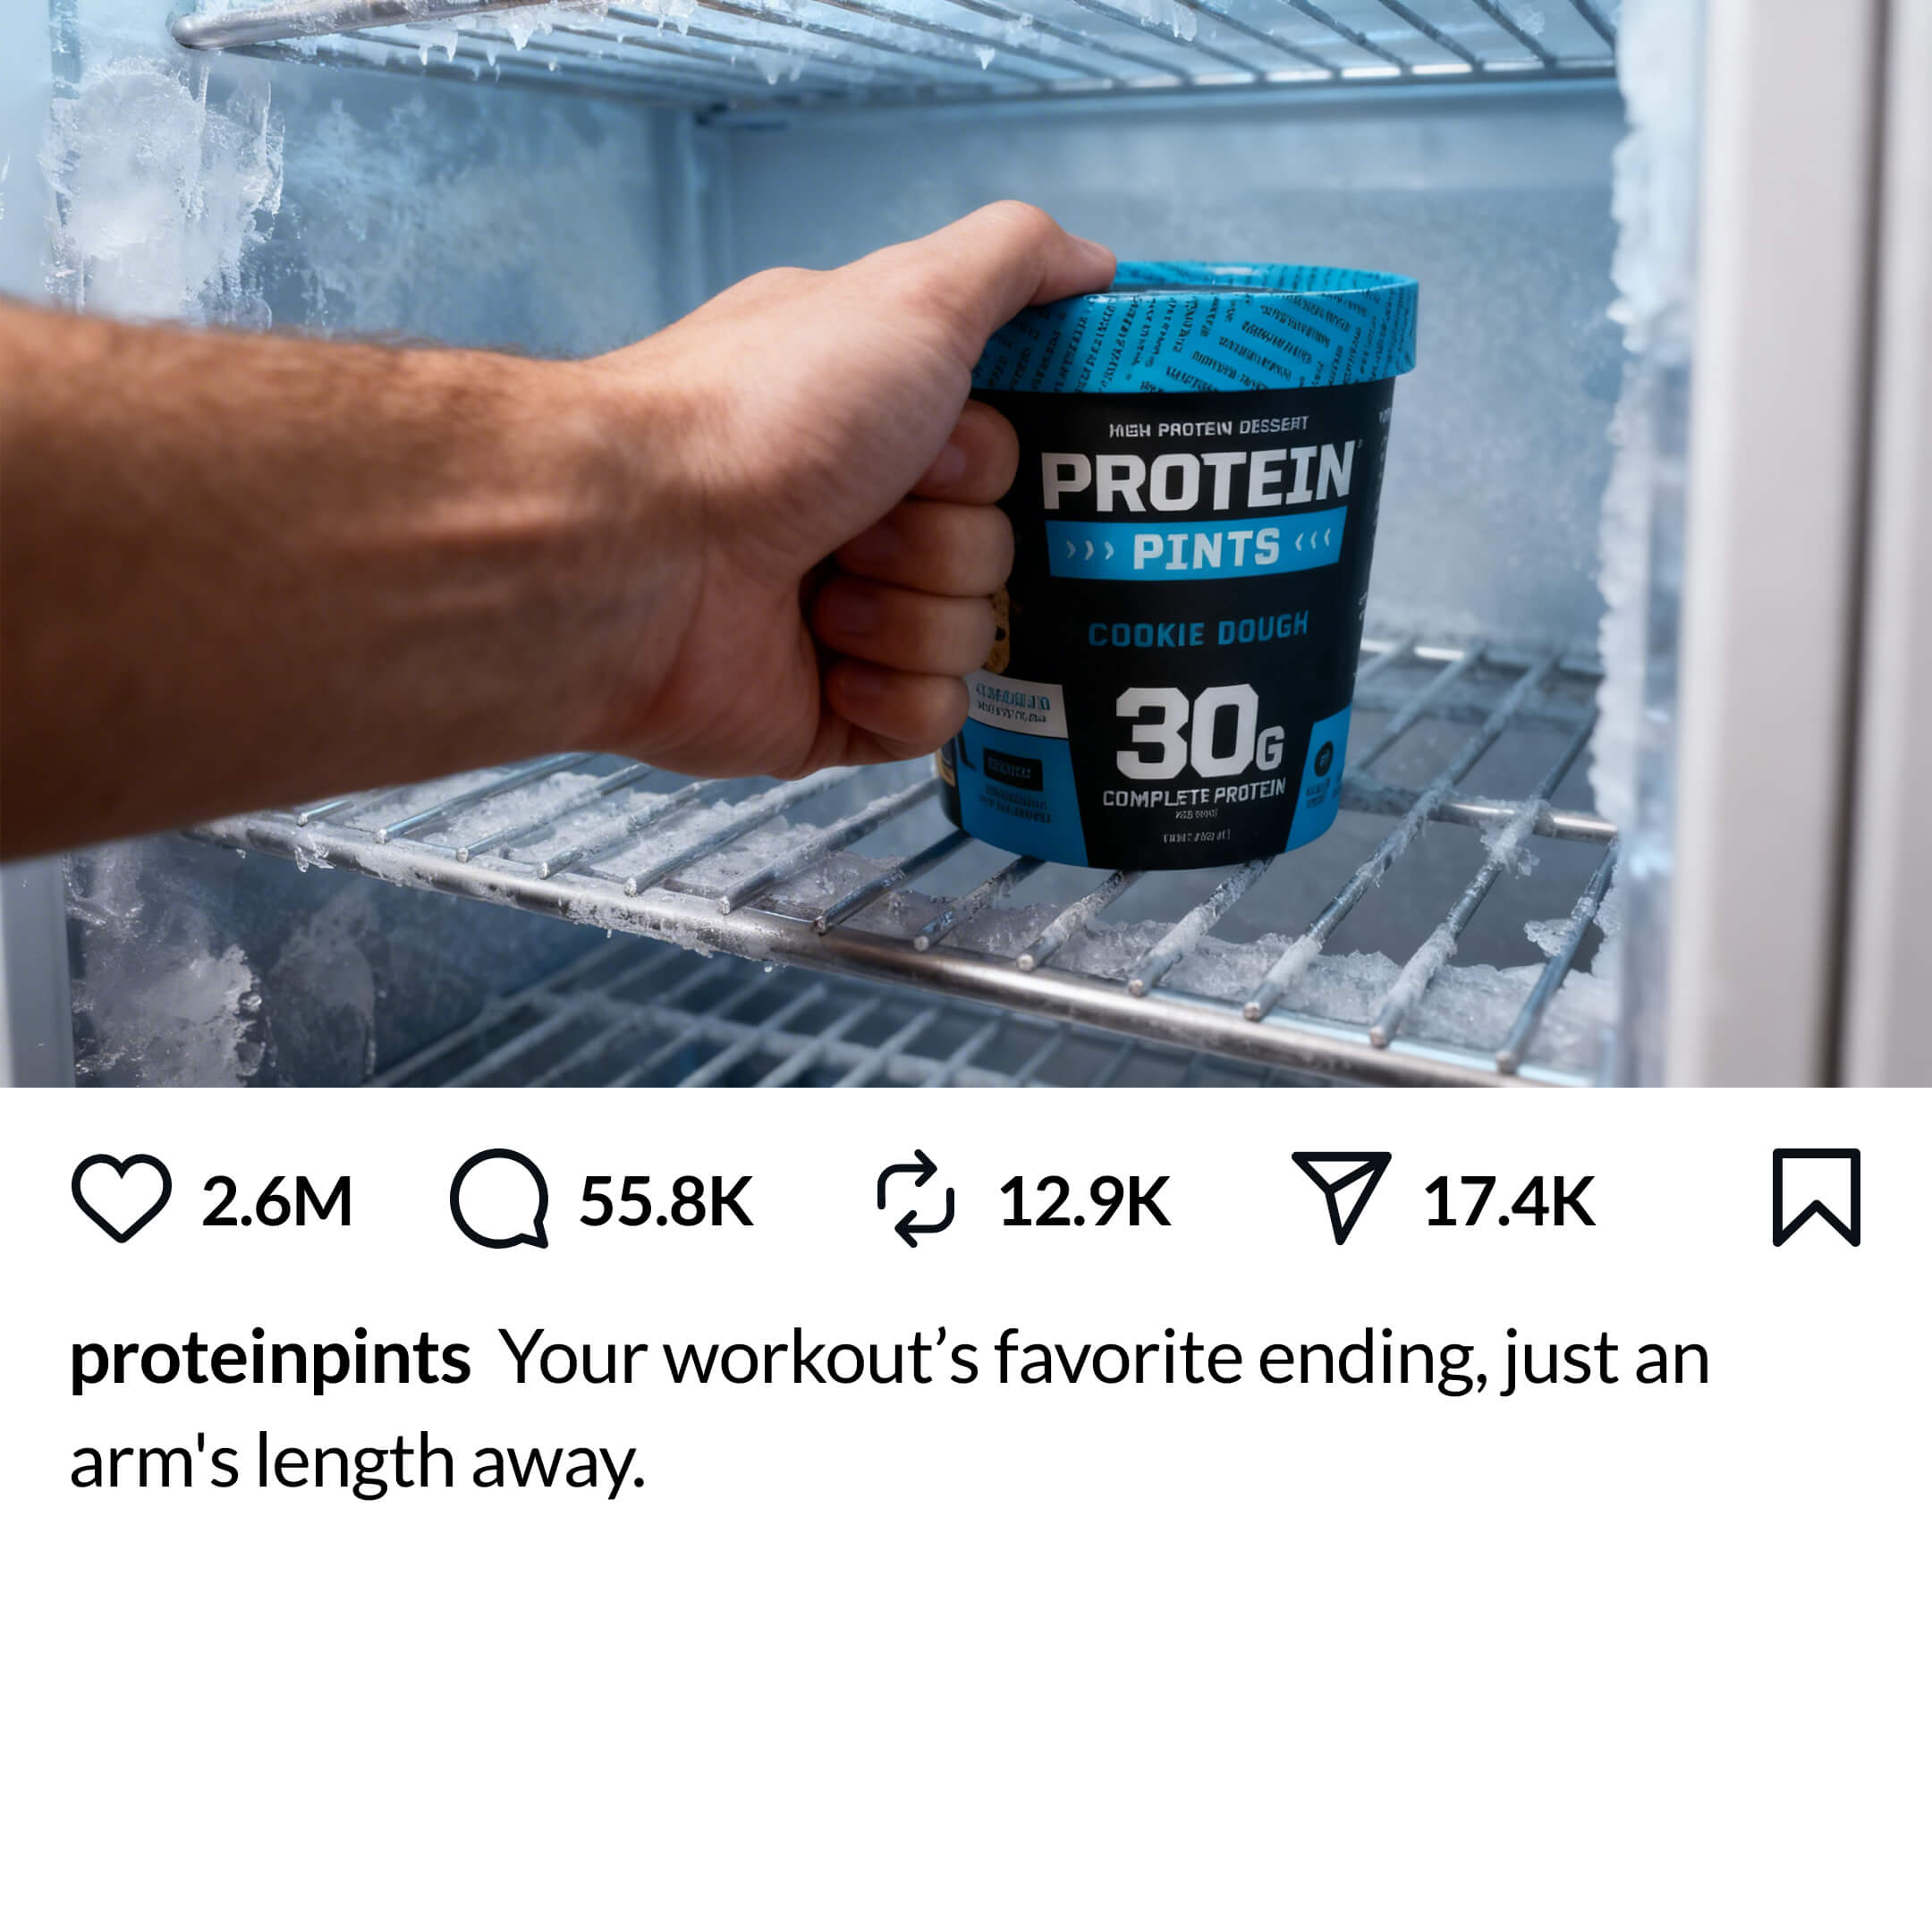
Look at the woman holding the product below - how would that product naturally pop out? If she brought it forward, her arm would need to pass directly through the white social post area below instead of over it, which doesn't make for a good pop-out. The framing is too tight. You need to zoom out and allow more space, giving her arm the room it needs to extend naturally toward the camera.

Woman holding a product up near her face
Arm raised up - can't extend forward
Hand reaching into a freezer
Reaching away - arm would need to reverse

Fix: Position the product at chest or waist level, with enough spacing in the scene for everything to naturally pop out. Add the below phrases to your prompt to force the right framing.

Close up shot
Add close up shot for hip-to-head framing (more space to allow a clean pop-out). Best for product shots.
Full body shot
Add full body shot. Best when holding a big enough product - small products held far back won't be clear when they pop out.
Scene to avoid ยท Framing too close

Camera is too close to the subject.

If the camera is so close that only the face fills the frame, what exactly would pop out? A disembodied head flying toward the viewer isn't the effect you're after. The pop-out works best when there is adequate spacing - you can see the subject's upper body (at minimum their arms, torso and head) so there's something substantial to pop out.

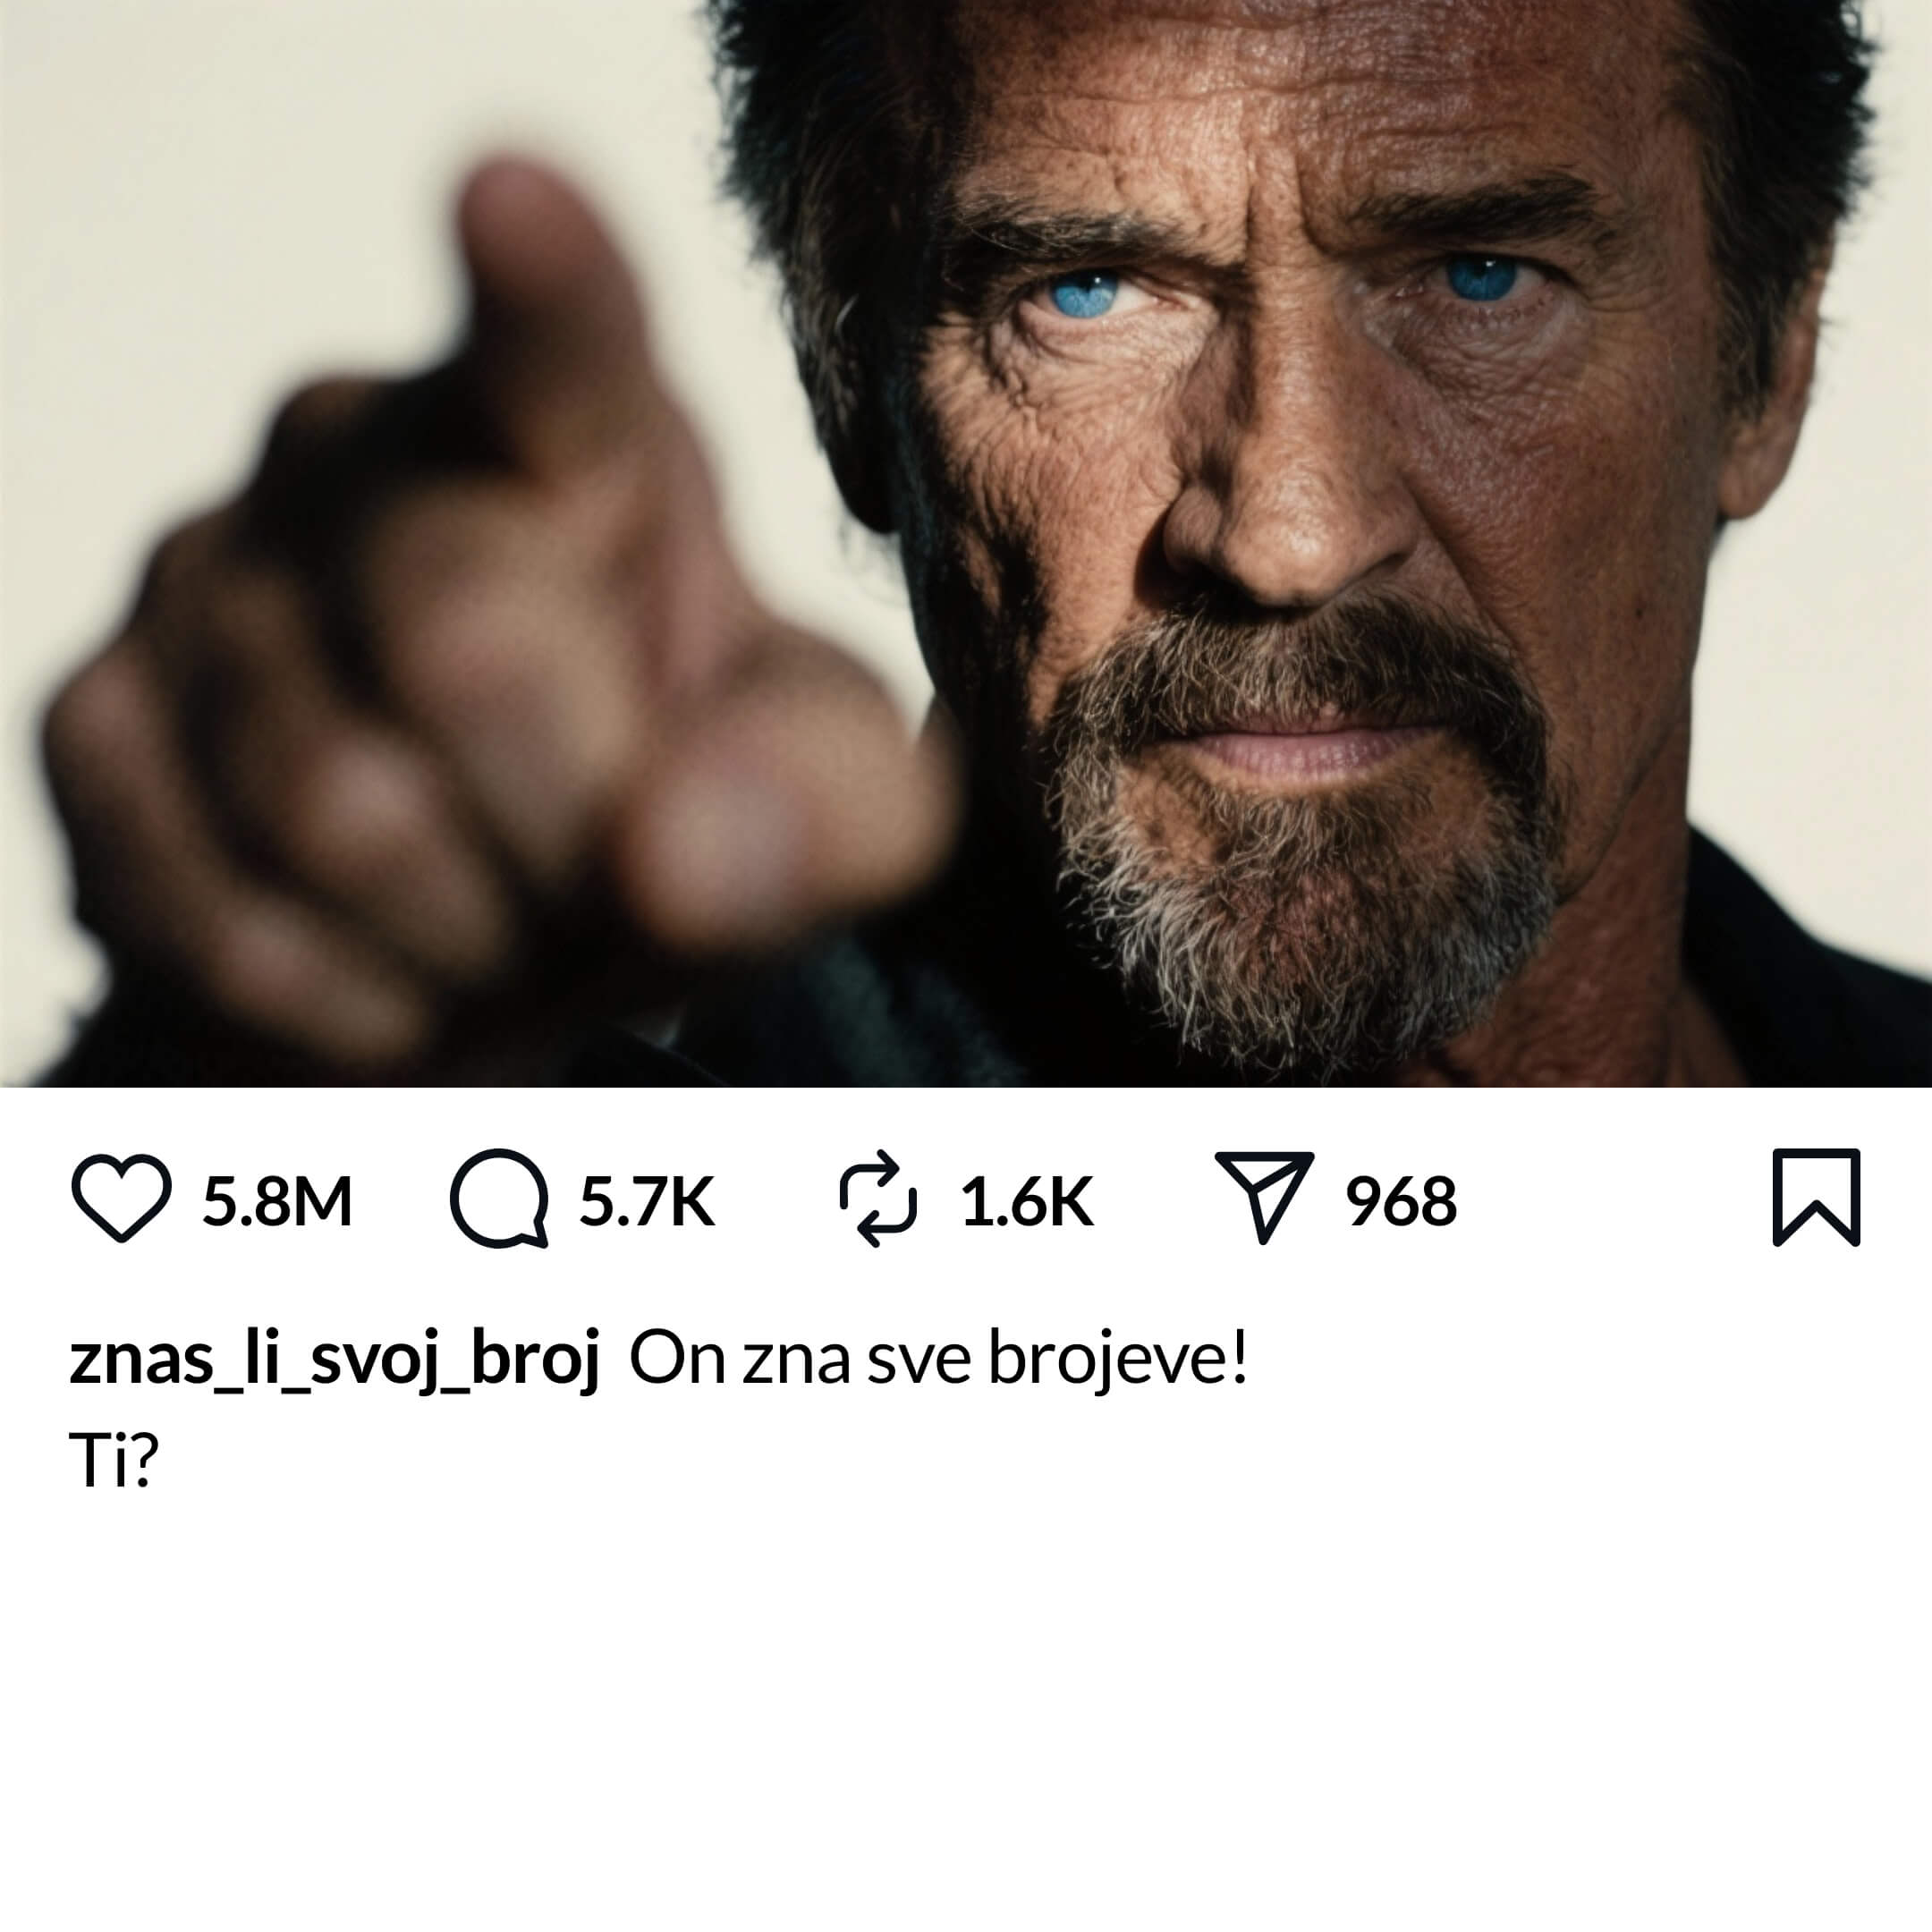
Extreme close-up of a man's face
Just a face - nothing to pop out
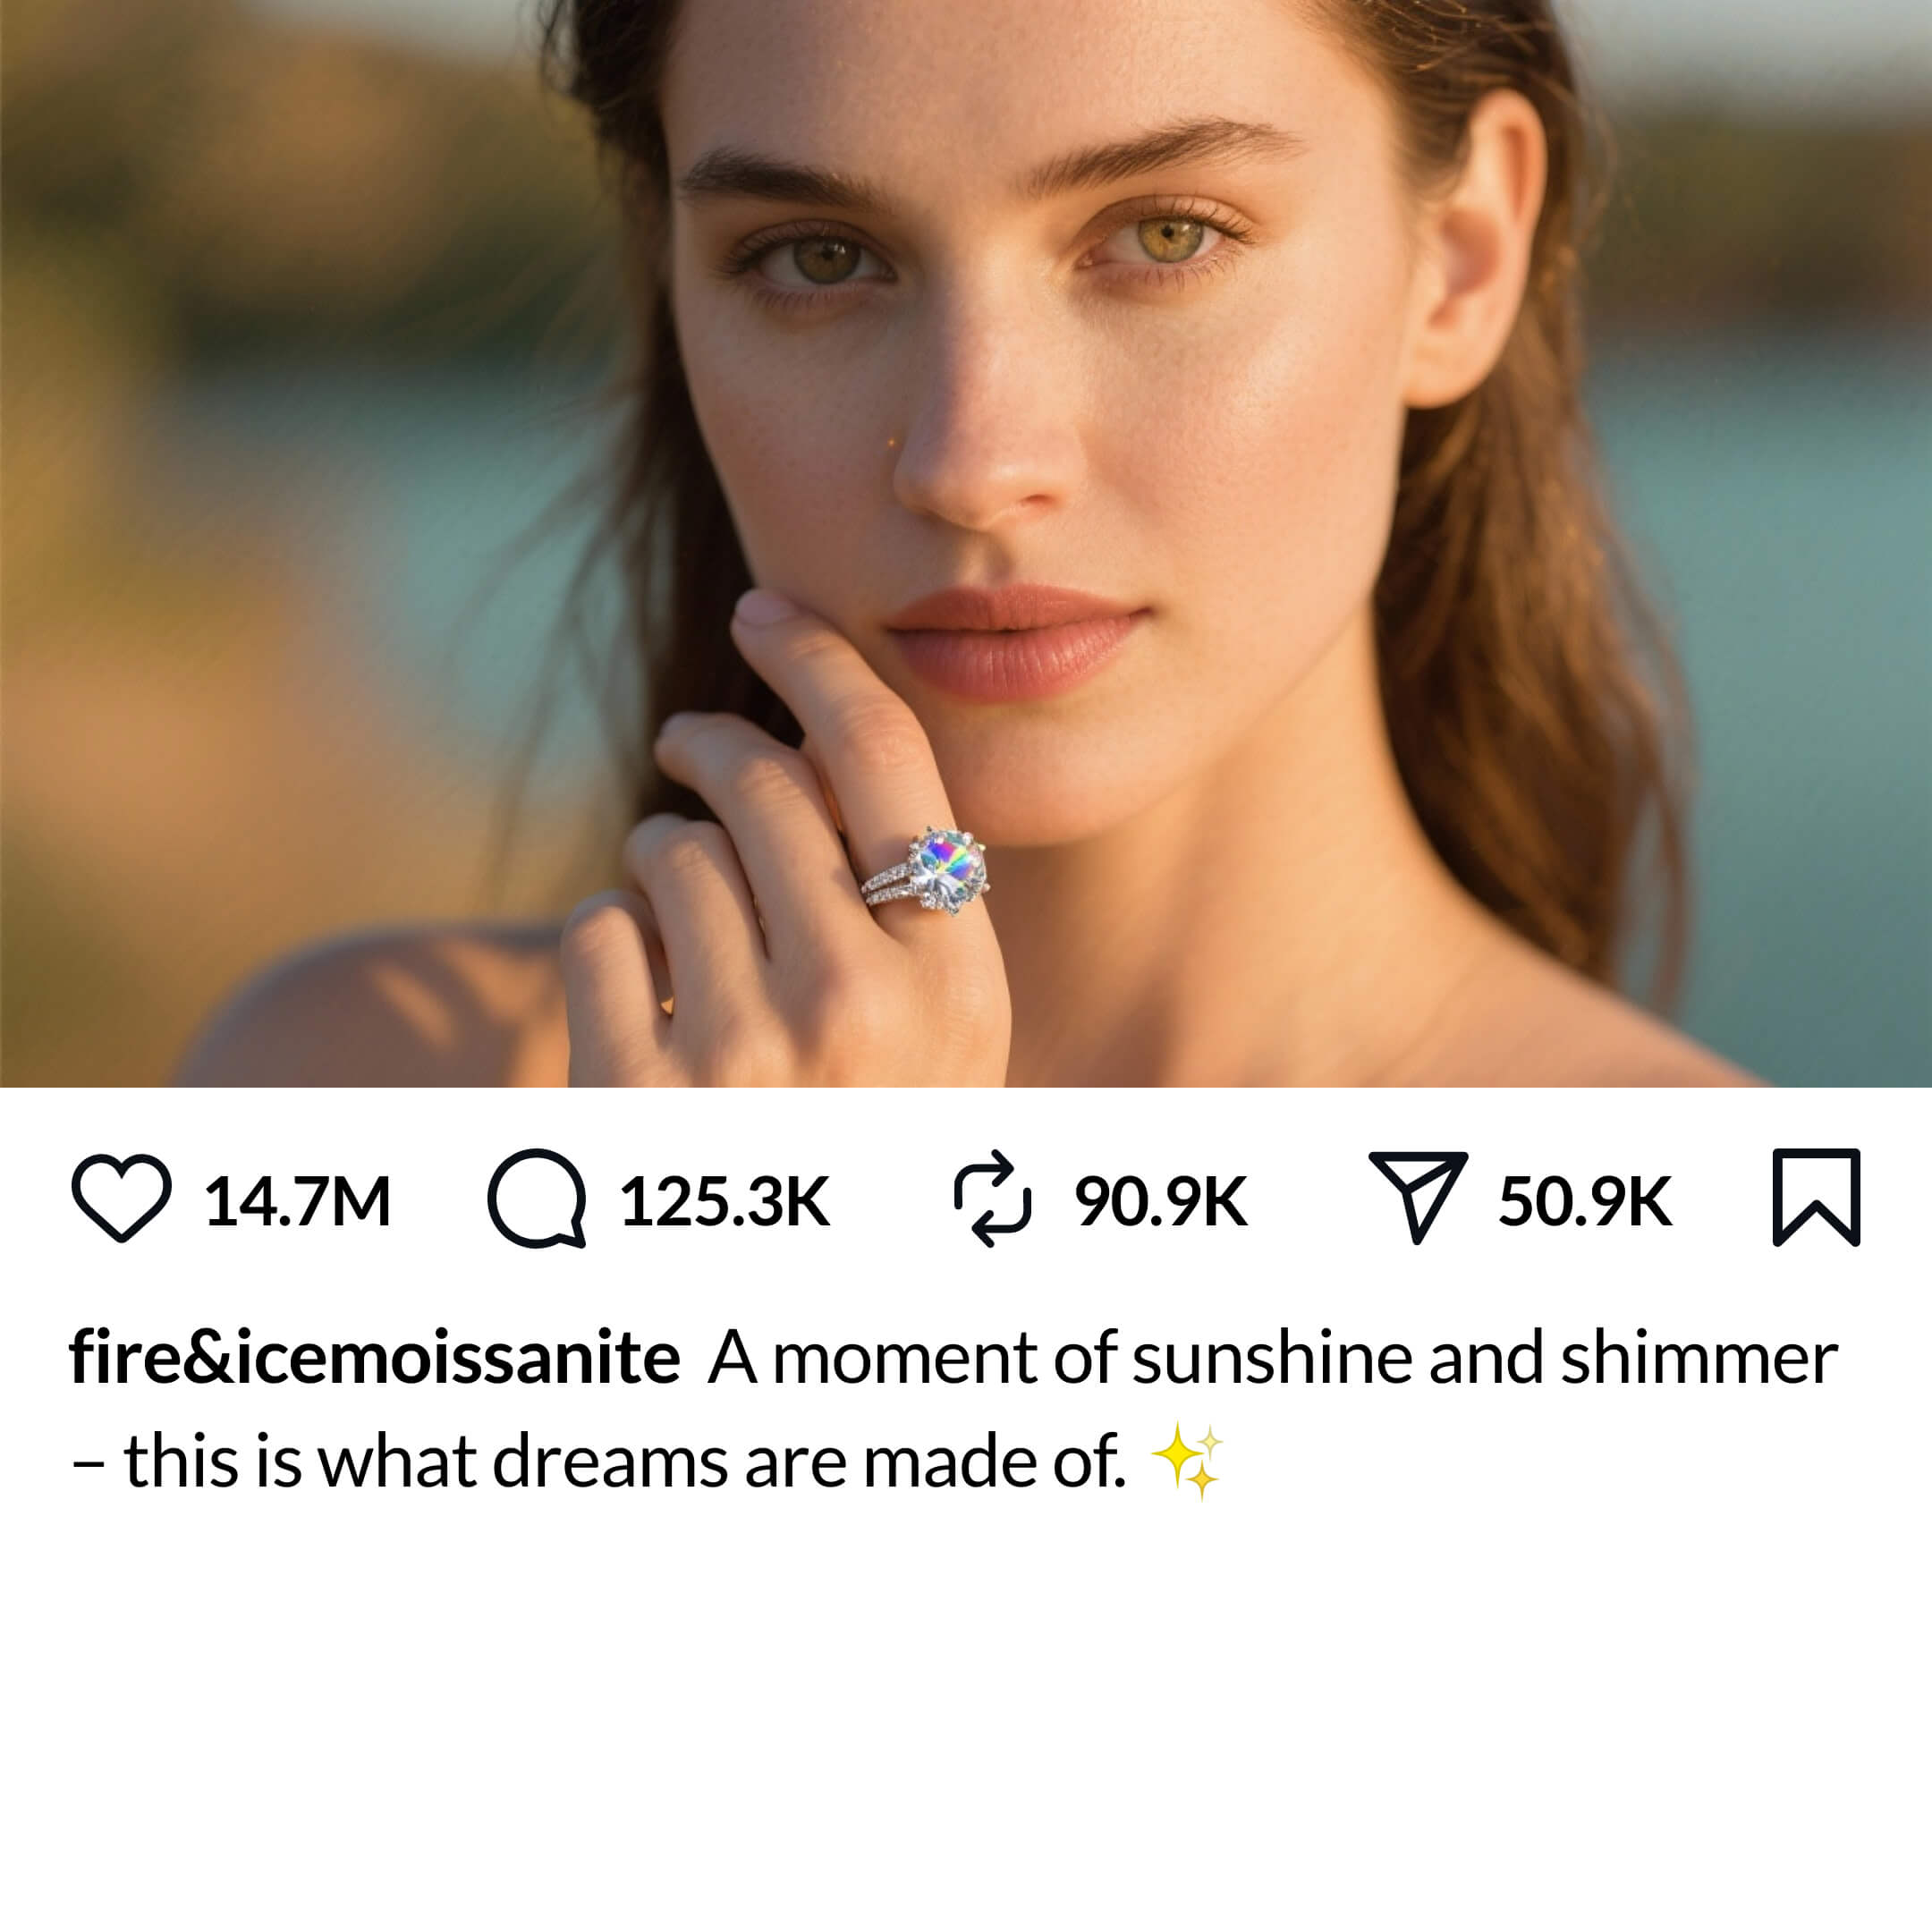
Tight portrait of a woman
Too tight - need to see body
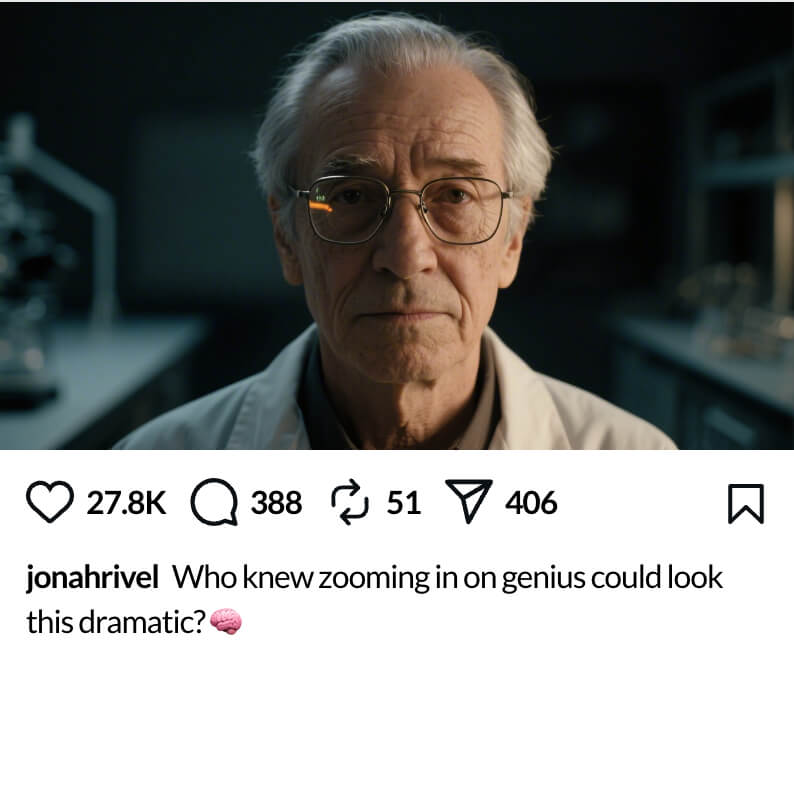
Scientist cropped at the shoulders
Cropped - need more body visible

Fix: Pull back the camera to allow more space in the scene. Add the below phrases to your prompt to force the right framing.

Close up shot
Add close up shot to get hip-to-head framing.
Full body shot
Add full body shot to get full body framing.

The rule: If you can't immediately answer both questions when looking at your scene preview, regenerate until you can. Scene previews are free - use them.

That branding lives in the original prompt. Go back to the Prompt step, find the text in quotation marks or the uploaded logo, replace it with your own, then regenerate. Learn more.

This happens when text isn't clearly readable in the scene preview presented to you prior to animating.

If you want text or a logo to come through with clarity, it needs to be big, bold, visible, and not obstructed by anything in your scene preview. Scene previews don't use any credits - edit your prompt or regenerate until everything is clearly visible.

The fix: If you can't easily read the text in your preview, try adding "close-up shot" to your prompt to bring it closer. Or, write your prompt around the focus point, emphasising that it needs to be big, bold and visible, like in this example for a book cover:

"close up so the book cover is big, bold and visible. Focus on making the book headline large."

Same rule as text - if a logo isn't big, bold, and clearly readable in the scene preview, it won't render cleanly in the final video.

The edge case: logos with a high text density. If your logo has small text - a tagline beneath the brand name, a slogan, or just a long brand name that has to shrink to fit - it often becomes too tiny to render clearly once placed in a scene. The AI is then forced to guess at that text, and as a result it may look distorted.

The source plumbing brand logo showing a brand name with a slogan beneath it
Source logo Text-heavy logo. Brand name is fine because it's big, bold and visible. The tagline below it isn't - too small to render cleanly once placed in a scene.
Scene preview showing the text-heavy plumbing logo placed on a sign with the slogan distorted and unreadable
Tagline distorts Tagline is too small. Once placed in the scene, the tagline is too small to be readable. When the character comes forward, the AI can't bring the small text with it - the brand name survives, but the tagline garbles.
Scene preview showing the brand name rendered cleanly as big bold text on the character's overalls
Brand name in quotes Big bold text, no slogan. Drop the tagline. Either upload a slogan-free version of your logo, or skip uploading and just put the brand name in quotes in your prompt.

Example prompt using the brand name in quotes instead of uploading the full logo:

A pixar-style plumber in blue overalls, "24/7 PLUMBING" printed in big bold letters on his chest, holding a toolbox. In the background, a burst pipe is visible. Close up shot.

We have features baked into the experience to solve most issues, and they're included with every video.

You get more videos, without using any extra credits:

  • Pick 2 videos - uses same credits as only 1 video
  • Pick 4 videos - uses same credits as only 2 videos

All videos render at the same time. Compare variations, pick your favourite, ignore the rest. The extras didn't cost you anything.

AI video is creative and unpredictable - sometimes it nails it, sometimes it doesn't. That's why we give you multiple videos at no extra credit cost + free regens upfront instead of charging per try.

If every video has the same issue, it's usually a prompting problem.

Submit a ticket to [email protected] with:

  • Your exact prompt, and the video name in your account
  • What is wrong with the video
  • Whether this happened in all variations or just one

One of our friendly team members will assist you further :)

Every AI-generated video is unique - even with the exact same prompt, you'll never get a 100% identical result twice. This is how all AI video platforms work (Runway, Higgsfield, Google Veo, Pika, Luma included) - submit the same prompt twice on any platform and you'll get two different videos. Think of it like asking an artist to paint the same scene twice - the overall composition will be similar, but the details will always vary.

When you remix, you're reusing the same prompt and scene setup as a starting point - you're not copying the final animation. The text, images, and motion in an AI video are all generated together in a single pass rather than as separate layers, so there's no way to freeze the animation and just swap one element. Every render produces a unique result.

Use multi-generation to get several variations and pick the one closest to what you're after.

Need exact consistency? Use our hand-crafted animations made by our in-house motion crew - 2,000+ templates with predictable results.

Unfortunately not - with AI video generation, the text, images, and motion are all generated together in a single pass rather than as separate layers. There's no way to freeze the animation and just swap one element - any edit means a fresh render with a new, unique animation. This is how all AI video platforms work (HeyGen, Google Veo, Higgsfield and others all work the same way).

To change text, it depends on where the text is:

  • Text inside the scene (signs, billboards, t-shirts) - Go back to the Prompt step, find the text, replace it, and resubmit the prompt.
  • Text in the social post caption (username, caption, reactions) - Edit at the Layout step.

Every change requires a re-render. This is why you get a scene preview first - so you can double-check everything before using credits.

Yes, it's available in the Prompt step. There's a pill button directly below the prompt box where you can select your preferred aspect ratio.

Ready to create?

Browse the community, or start with your own idea.