We have a full step-by-step guide that walks you through everything - from writing your first prompt to downloading your finished video: View the Guide
If you want to see what's possible first, browse the Community Showcase. It's the best way to evaluate animation quality, see different use cases, and get inspiration. You can also remix any video you find there - using the prompt and scene as a starting point and making it your own.
We have a built-in prompt optimizer inside the prompt box - make sure the checkbox is switched on. It flags issues with your prompt and suggests improvements before you generate.
The golden formula is: a [subject] in [environment]. One focal subject + where it's located. Keep it simple and focused - the AI handles the animation style automatically.
For a full prompting guide with examples and best practices: Prompting Guide
Yes - up to five of your own images: logos, product photos, personal photos, pet photos, designs, anything you want the AI to bring to life. Add them at the Prompt step, inside the prompt box.
How it works
Every picture you add gets its own name tag. The first is @img1, the next is @img2, and so on. You'll see the tag sitting right on the picture.
To use a picture, you put its tag in the prompt box (that's where you type what you want to see):
- Type the
@symbol and a small list of your pictures pops up - click the one you want. - Or just click the picture itself, and its tag drops into the box for you.
Then say where it should go - for example, "put the logo in @img1 on the sign." The tag is how the AI knows which picture you mean.
Example
- ✕ Incorrect "Use my logo."
- ✓ Correct "Make a friendly pixar-style realtor holding a sign with the logo in
@img1on it."
Using more than one image at once? See Can I use more than one reference image? for remixing, the scene-preview sidebar, and multi-image prompts.
Aspect ratio is available at the Prompt step - there's a pill button directly below the prompt box.
- 1:1 (square) - Works across Instagram, Facebook, LinkedIn, and X. Most versatile if you're posting the same video across multiple platforms.
- 4:5 (tall portrait) - Instagram feed, Facebook feed. Takes up the most screen space in the feed. Recommended for feed posts.
- 9:16 (vertical) - TikTok, Instagram Reels & Stories, Snapchat, YouTube Shorts, Facebook Reels.
Video walkthrough:
Yes - Director Mode lets you control how your scene plays out and ends.
If your instruction didn't follow, it was almost certainly in the wrong box. Action written in the scene prompt (the first Prompt step) won't work - that prompt only builds your static scene. Action belongs in the "How would you like this scene to end?" box at the Animate step:
- Scene prompt - what's in the scene: your subject, the background, props, text.
- Custom ending prompt - what happens: "it meows and waves at the camera", "he spray paints the wall", "she hands the viewer the toothbrush" all work here.
Every time you animate, we create multiple videos from the same prompt - not just one. The videos won't be identical, but they will be similar, as they use the same prompt. Pick your favorite, or use as backup if one of your videos has an issue. Here's where to find it:
Here's how it works:
- Pick 2 videos - Get 2 videos, uses the same credits as 1 video
- Pick 4 videos - Get 4 videos, uses the same credits as 2 videos
On top of that, every single video includes 1 free regeneration. So if you pick 4 videos, you use credits for 2, receive 4 different videos, and can regenerate each one once - that's up to 8 videos to choose from.
Why does this matter? AI video generation is unpredictable by nature. Sometimes the first video nails it, sometimes another does. Pick your favorite, or if one of your videos doesn't come out as expected, you simply pick the other one that did - you didn't use any extra credits, and you didn't need to go back, edit, and render all over again.
All videos render at the same time, so you're never slowing down your workflow. Picking 4 videos takes the same amount of time as picking 1 - they all arrive together in about 60 seconds.
This also solves most common issues - unwanted elements, imperfect pop-outs, text rendering differences. If one video has an issue, chances are another variation got it right. However, if every variation has the same problem, that's usually a fundamental prompting issue - further regenerations are unlikely to fix it. You'll need to adjust your prompt or try a different type of video.
That's expected. Both videos are built from the same prompt, so they share the same scene and style - similar, but never pixel-for-pixel identical. Think of them as two takes of the same shot.
The point is the safety net. If one take has an odd frame or a small glitch, you already have a second finished video ready to use - no going back to edit and render again, and no extra credits used. This is communicated at the step where you choose how many outputs you want. Both are made together, upfront, for the same credits as one video.
If both videos work as expected, simply pick your favorite one.
If you'd prefer just one video, you can select "1" under outputs.
There are two types of credits, and they're completely separate:
- Download Credits - for videos made with pre-made animations
- AI Credits - for generating AI videos
If you're creating AI videos, only AI Credits are used - Download Credits are not involved at all in the AI video creation flow. AI credits are consumed at the animation step, not at download. The number of credits per generation is shown to you before you animate, right above the "Animate" button. This lets you see exactly how many credits will be used for each generation (as it depends on your settings) - so there is never any confusion about how many credits are being used.
Multi-generation (learn more):
AI video generation is creative and unpredictable - sometimes it nails your vision, sometimes it interprets things differently.
This is why we give you multiple videos, without using extra credits:
- Pick 2 videos - uses the same credits as 1 video
- Pick 4 videos - uses the same credits as 2 videos
All videos render at the same time, so you're never slowing down your workflow.
Review the outputs, and pick your favorite. If one of your videos doesn't come out as expected, you simply pick the other one that did. You didn't use any extra credits, and you didn't need to go back, edit, and render all over again. Both videos were rendered at the same time, upfront, saving you time and credits.
Free regeneration: Every single video includes 1 free regeneration. Here's how to regenerate a video.
Edits use credits? Yes, learn why here.
Full breakdown: Credit System Help Article
The initial view is a static scene preview - this lets you confirm the subject, composition, text, and overall setup before generating.
There's no way to preview motion beforehand. The animation step is where the heavy AI rendering happens, which is why credits are consumed here. This is standard across all AI video platforms (Runway, Pika, Luma Dream Machine all work the same way).
Make the most of your scene preview: Check it carefully before animating. You can regenerate your scene preview as many times as you want - scene previews don't use any credits.
Before you animate, check for:
- Text clarity - can you read all text easily? If you're squinting, the AI will struggle too. (Why does my text look different?)
- Logo visibility - is your logo big, bold, and not hidden behind the subject? (Why does my logo look different?)
- Subject framing - is the subject fully visible with at least torso + head showing? Nothing blocking their path forward? (My subject didn't pop out)
- Obstructions - if you have text or a logo on a banner, wall, or background element, make sure it's not covered by the subject. When the subject pops out, the AI will try to reconstruct whatever was hidden behind them (Text obstruction)
- Background colour - avoid predominantly white backgrounds, they conflict with the social post area below (Unwanted elements)
See what's possible: Community Showcase
Credits are only used when you animate your video. Everything before that is free.
Before you animate: edit your prompt, regenerate your scene preview, and change your captions as many times as you want. All free. The scene preview is your last checkpoint before credits are used - use it to catch typos, composition issues, or anything that looks off. Check these points for common issues to avoid.
After you animate: any change - even one word - means the AI generates a completely new video. An AI video has no layers - it's not like a Canva template where you can swap out one element and keep everything else the same. The text, the images, and the motion are all baked together in one pass. So a "small edit" doesn't exist. A change = a brand new video = credits. That's why we show you a scene preview before animating - so you can double-check everything looks good before any credits are used.
If you rendered a video with Kling AI or Google Veo and wanted to edit it afterwards, it would use credits too - that's standard across every major AI video platform, not just Breakout Clips.
It's the same as when you ask ChatGPT or Claude to rewrite a reply - the new reply uses new tokens.
And you're never surprised: The exact number of credits used (whether you're creating a new video, or editing an existing one) is shown directly above the "Animate" button, before you press it.
We also give you more chances than any other platform:
- Pick 2 videos and get both for the credits of 1, or pick 4 and get all 4 for the credits of 2 (learn more).
- Every video includes 1 free regeneration - so if your video comes out wrong, your first redo is already free (watch here to see how to regenerate your video).
Full feature guide: breakoutclips.com/ai-video-maker/guide
Credits are only used when you animate your video.
This is simply how AI video generation works - everywhere, on every platform. If you're coming from a template-based editor and are new to AI video, the switch can feel strange: in a template app, all the clips and assets already exist - nothing needs to be generated - so it makes sense to pay when you export. With AI video, the generation itself is the product.
Before you click Animate, only your static scene preview exists - the video itself doesn't. The AI creates all the motion from scratch, rather than playing back a fixed template - and that creation is what costs us to run. It's an intensive process, and it's fundamentally why AI video platforms (not just Breakout Clips - Kling, Google Veo, Higgsfield, etc.) use credits at generation, not download. Every generation - first version or edited version - is a brand new creation request.
Before you animate: edit your prompt, regenerate your scene preview, and adjust as many times as you want. All free. Check these points before animating to catch issues while it costs nothing.
When you animate: this is the moment your video gets made. The AI builds every frame from scratch - this is the work your credits are for. The exact number is shown directly above the "Animate" button, so you're always aware of how many are used.
After you animate: downloading doesn't use any credits - download as many times as you like.
That said, Breakout Clips bakes in many features to help you get the most bang for your buck - including multi-generation, where you get multiple videos at no extra credits: pick your favorite, or use as backup if one of your videos has an issue. On top of that, every single video includes 1 free regeneration.
Remember: use your scene preview as a checkpoint before any credits are used.
That's our multi-generation feature - and it's working in your favour. You weren't charged extra.
Every time you animate, we automatically generate multiple variations so you have more to choose from. The pricing works like this:
- Pick 2 videos - You get both, uses the same credits as 1 video
- Pick 4 videos - You get all 4, uses the same credits as 2 videos
On top of that, every video includes 1 free regeneration. So if you picked 2 videos, you used credits for 1, received 2, and can regenerate each once - that's up to 4 different AI videos from the credits of a single video.
AI video generation is unpredictable by nature - and so we want you to get the best video, as quickly as possible. That's why multi-generation gets you multiple videos, without the extra credits. Pick your favorite, or use as backup if one of your videos has an issue. So if one of your videos doesn't come out as expected, you simply pick the other one that did. You didn't use any extra credits, and you didn't need to go back, edit, and render all over again. Both videos were rendered at the same time, upfront, saving you time and credits. We eat this cost for you.
Learn more here:
You can explore the entire platform on the free plan - the only limitation is rendering, which is where the heavy AI processing happens.
If the tool isn't for you, you'll know before buying a plan - not after. A plan doesn't unlock new features or extra steps. It simply unlocks the render button. By the time you reach it, you've already completed the entire creation process, which is enough to decide if the tool works for you.
You can learn more about how the free plan works here, or view a breakdown of our pricing here.
If you won't be continuing and you'd like us to delete your free account, submit a request to [email protected] and we'll remove your data promptly.
Starter is $39/mo and comes with more than the headline number suggests. Here is exactly what your money buys, including the parts most people miss.
The short version
- 50 AI Studio Credits per month
- Multi-generation: every animation returns multiple videos, not one
- 1 free redo on every delivered video
- Unlimited free AI image generation
- 10 Download credits for our ready-made animation library
How far do 50 AI Studio Credits go?
A 5 second video uses 10 credits. A 10 second video uses 20.
Your 50 AI credits cover 5 animations (5 second variants), and multi-generation turns those into 10 finished videos to choose from - every month.
You always see the exact credits a generation will use before you animate, so there are no surprises.
Multi-generation: the part most people miss
Every time you animate, we create multiple videos from the same prompt - not just one. Each video is a different interpretation of your scene. Pick your favorite, or use one as backup if a video has an issue.
- Pick 2 videos - get 2 videos, using the same credits as 1
- Pick 4 videos - get 4 videos, using the same credits as 2
This is on by default in the composer. You are not using extra credits for it, ever.
Free redos
Not happy with a result? Every delivered video includes 1 free regeneration. It replaces the output without using any credits. Use it before spending fresh credits on the same idea.
Free, unlimited image generation
AI image generation on Starter is completely free and uncapped. Generate as many images as you like - product shots, thumbnails, scene stills - without touching your credit balance.
Download credits
You also get 10 Download credits each month for our ready-made animation library - templates that render instantly and never touch your AI Studio Credits. Find them by clicking Templates (not AI Templates) in the top menu inside your account.
What does that work out to per video?
Around $4 per AI video. Your 50 AI credits cover 5 animations (5 second variants), and multi-generation turns those into 10 finished videos to choose from - every month.
On top of that, you get 10 Download credits, which add 10 more videos from our ready-made library each month - and they never touch your AI credits.
These are the same pattern-interrupt video ads Disney, Lego, and Red Bull use to capture attention - almost certainly how we caught yours. An agency or motion designer charges a few hundred dollars per video and takes days. Yours renders in a minute, fully customizable, no designer needed.
A tip from us: plan your keeper
Experimenting is half the fun - and these four habits make your credits go further while you do it:
- Watch your balance - 20 credits left means roughly 2 more videos (or 4 if you're using multi-gen).
- Do your testing on shorter 5 second renders, then spend on your keeper.
- Use the scene preview checklist for how to make a good scene.
- Check the real-time credit counter at the animation step before you generate - credits are used at generation, not download.
When Starter stops being enough
Starter is for occasional videos and light testing. If you need more volume, Pro gives you 4x the AI Studio Credits at a better per-credit rate, plus 1080p. But if you are posting a few videos a month, Starter is built for exactly that.
Alternatively, we offer very affordable top-up bundles inside the app.
For the current numbers on every tier, see the pricing page.
Animating uses credits. Scene previews don't. Catch these at the Prompt step and skip most re-renders.
Your scene is built at the first Prompt step. Everything in the preview is what the AI animates from. If text or a logo isn't clear here, the AI has to guess - and that's what leads to distortion. Scene previews are free - edit or regenerate until everything is clearly visible. How to find the Prompt step ↗
What to look for in your scene preview
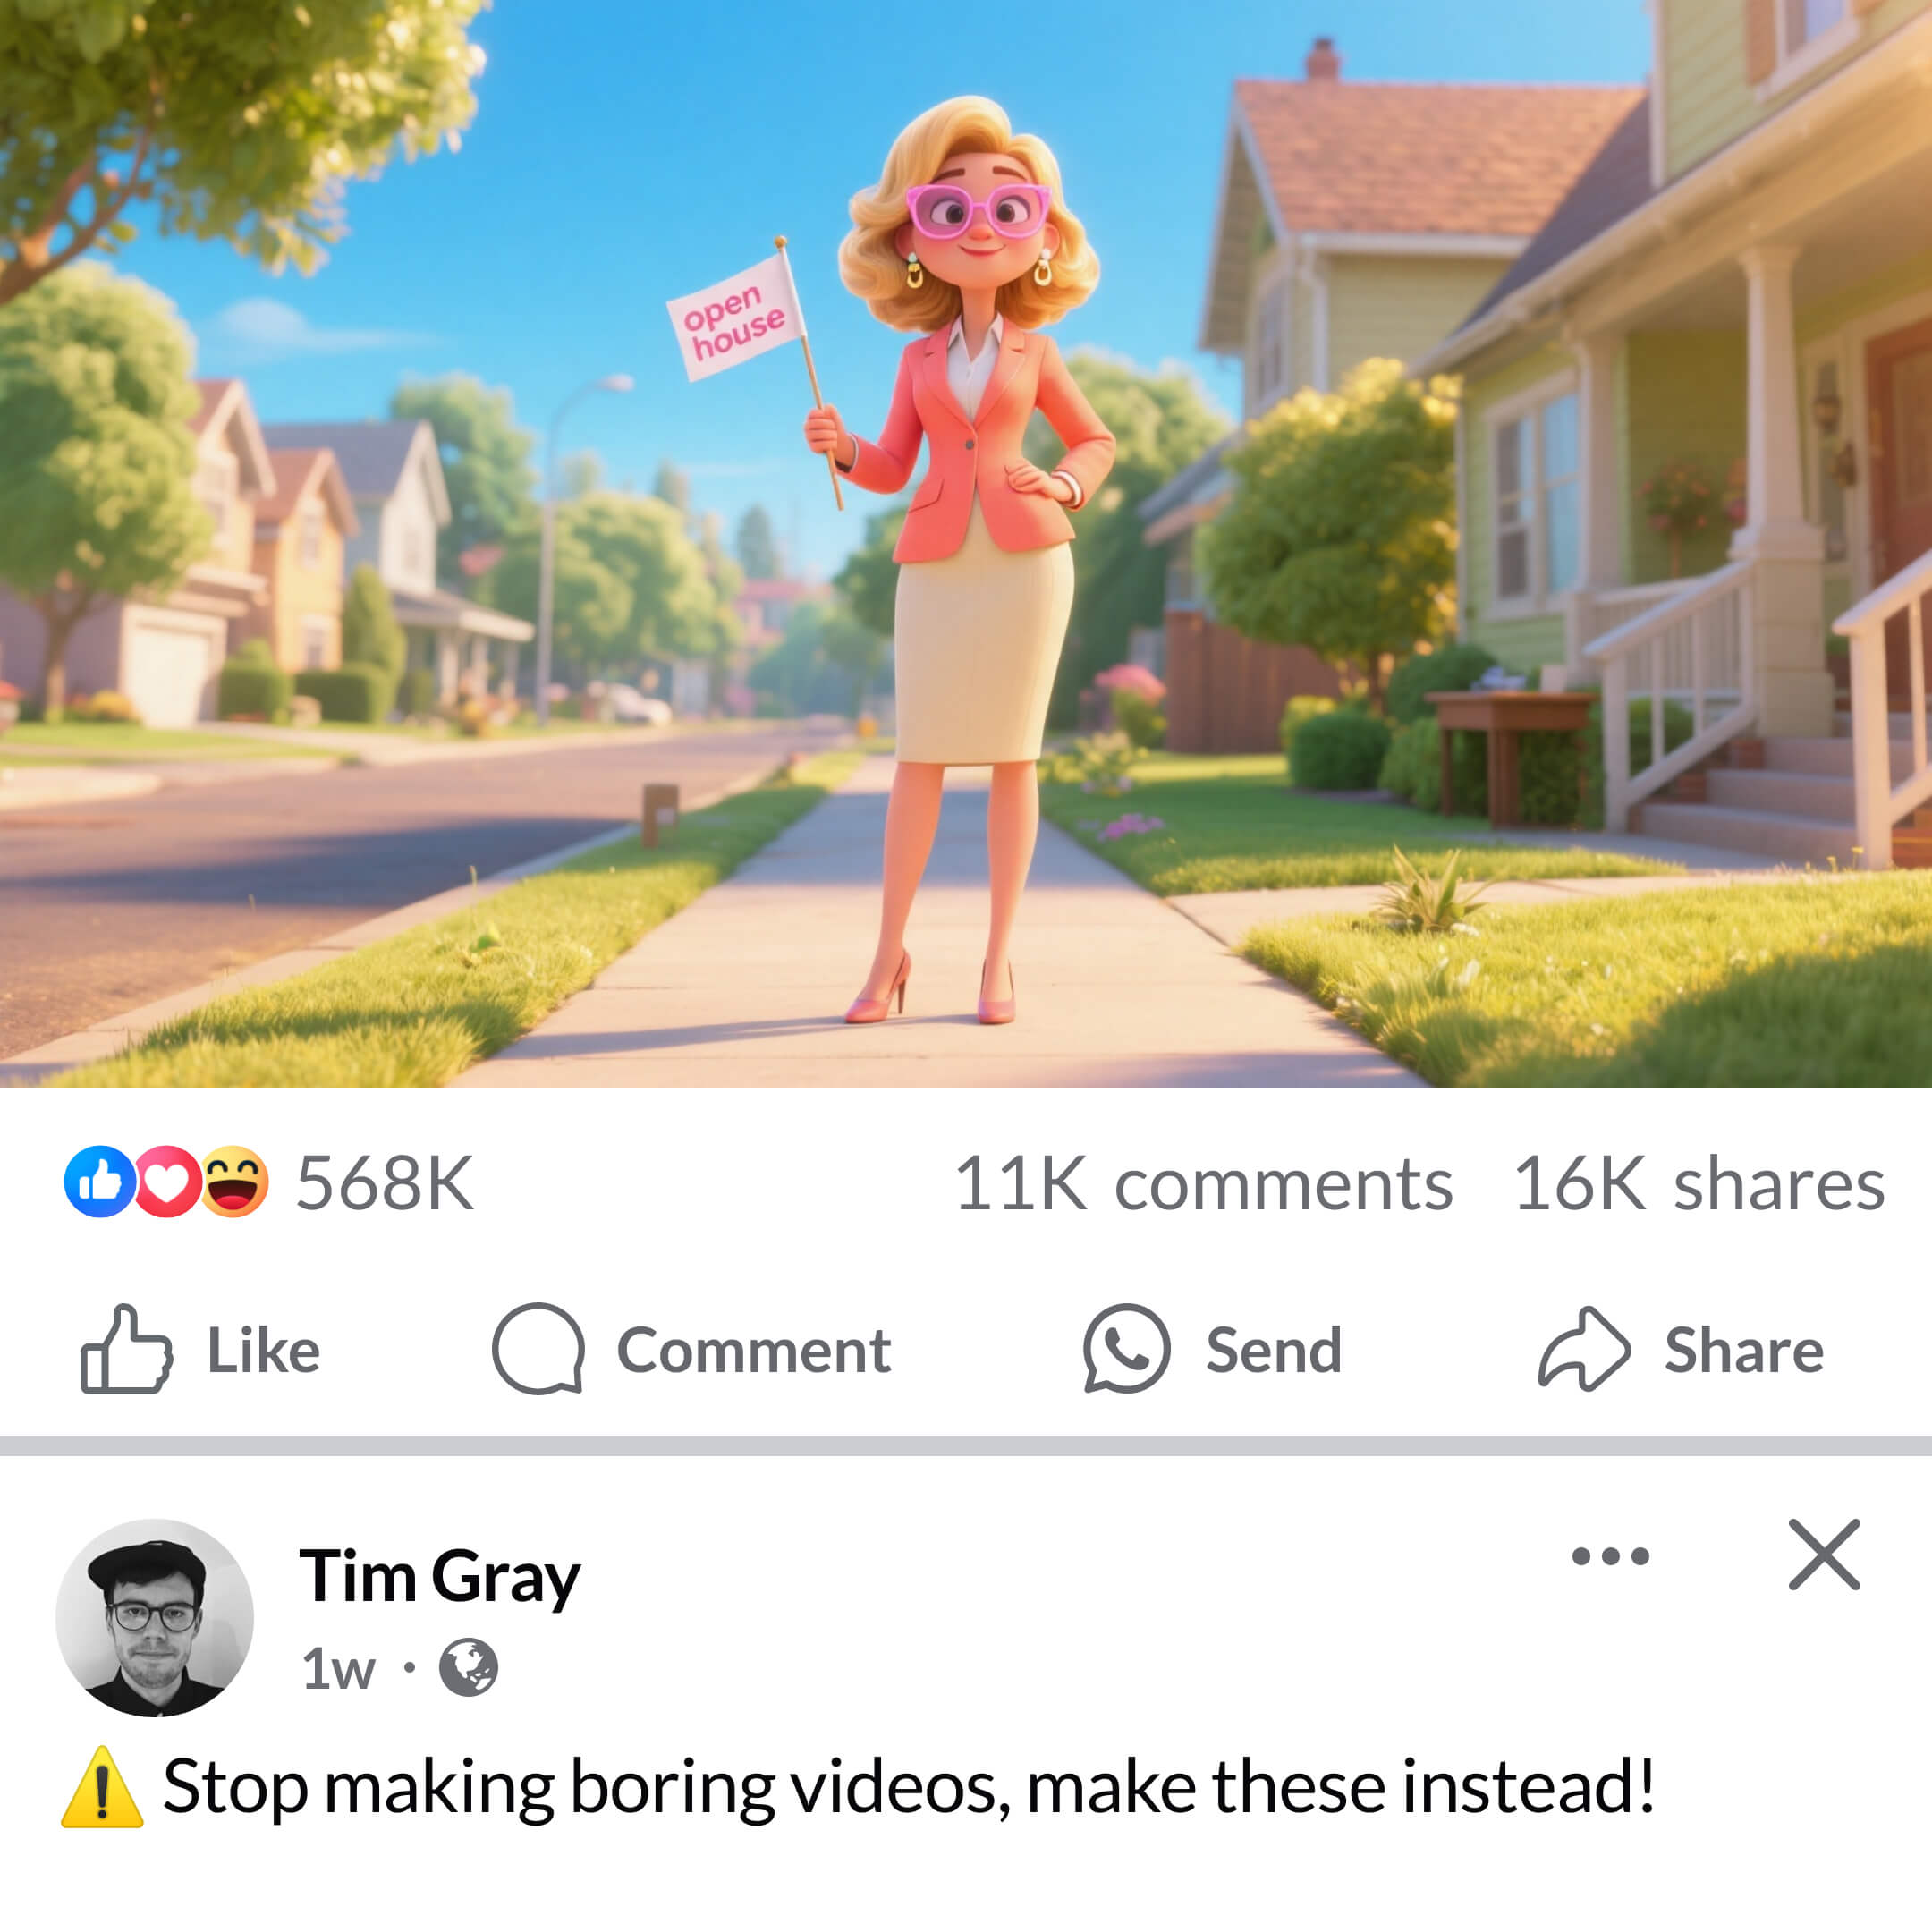
Text on flag is too small to read.
If you can't read it without squinting, the AI can't either - it'll guess, and the text may distort.
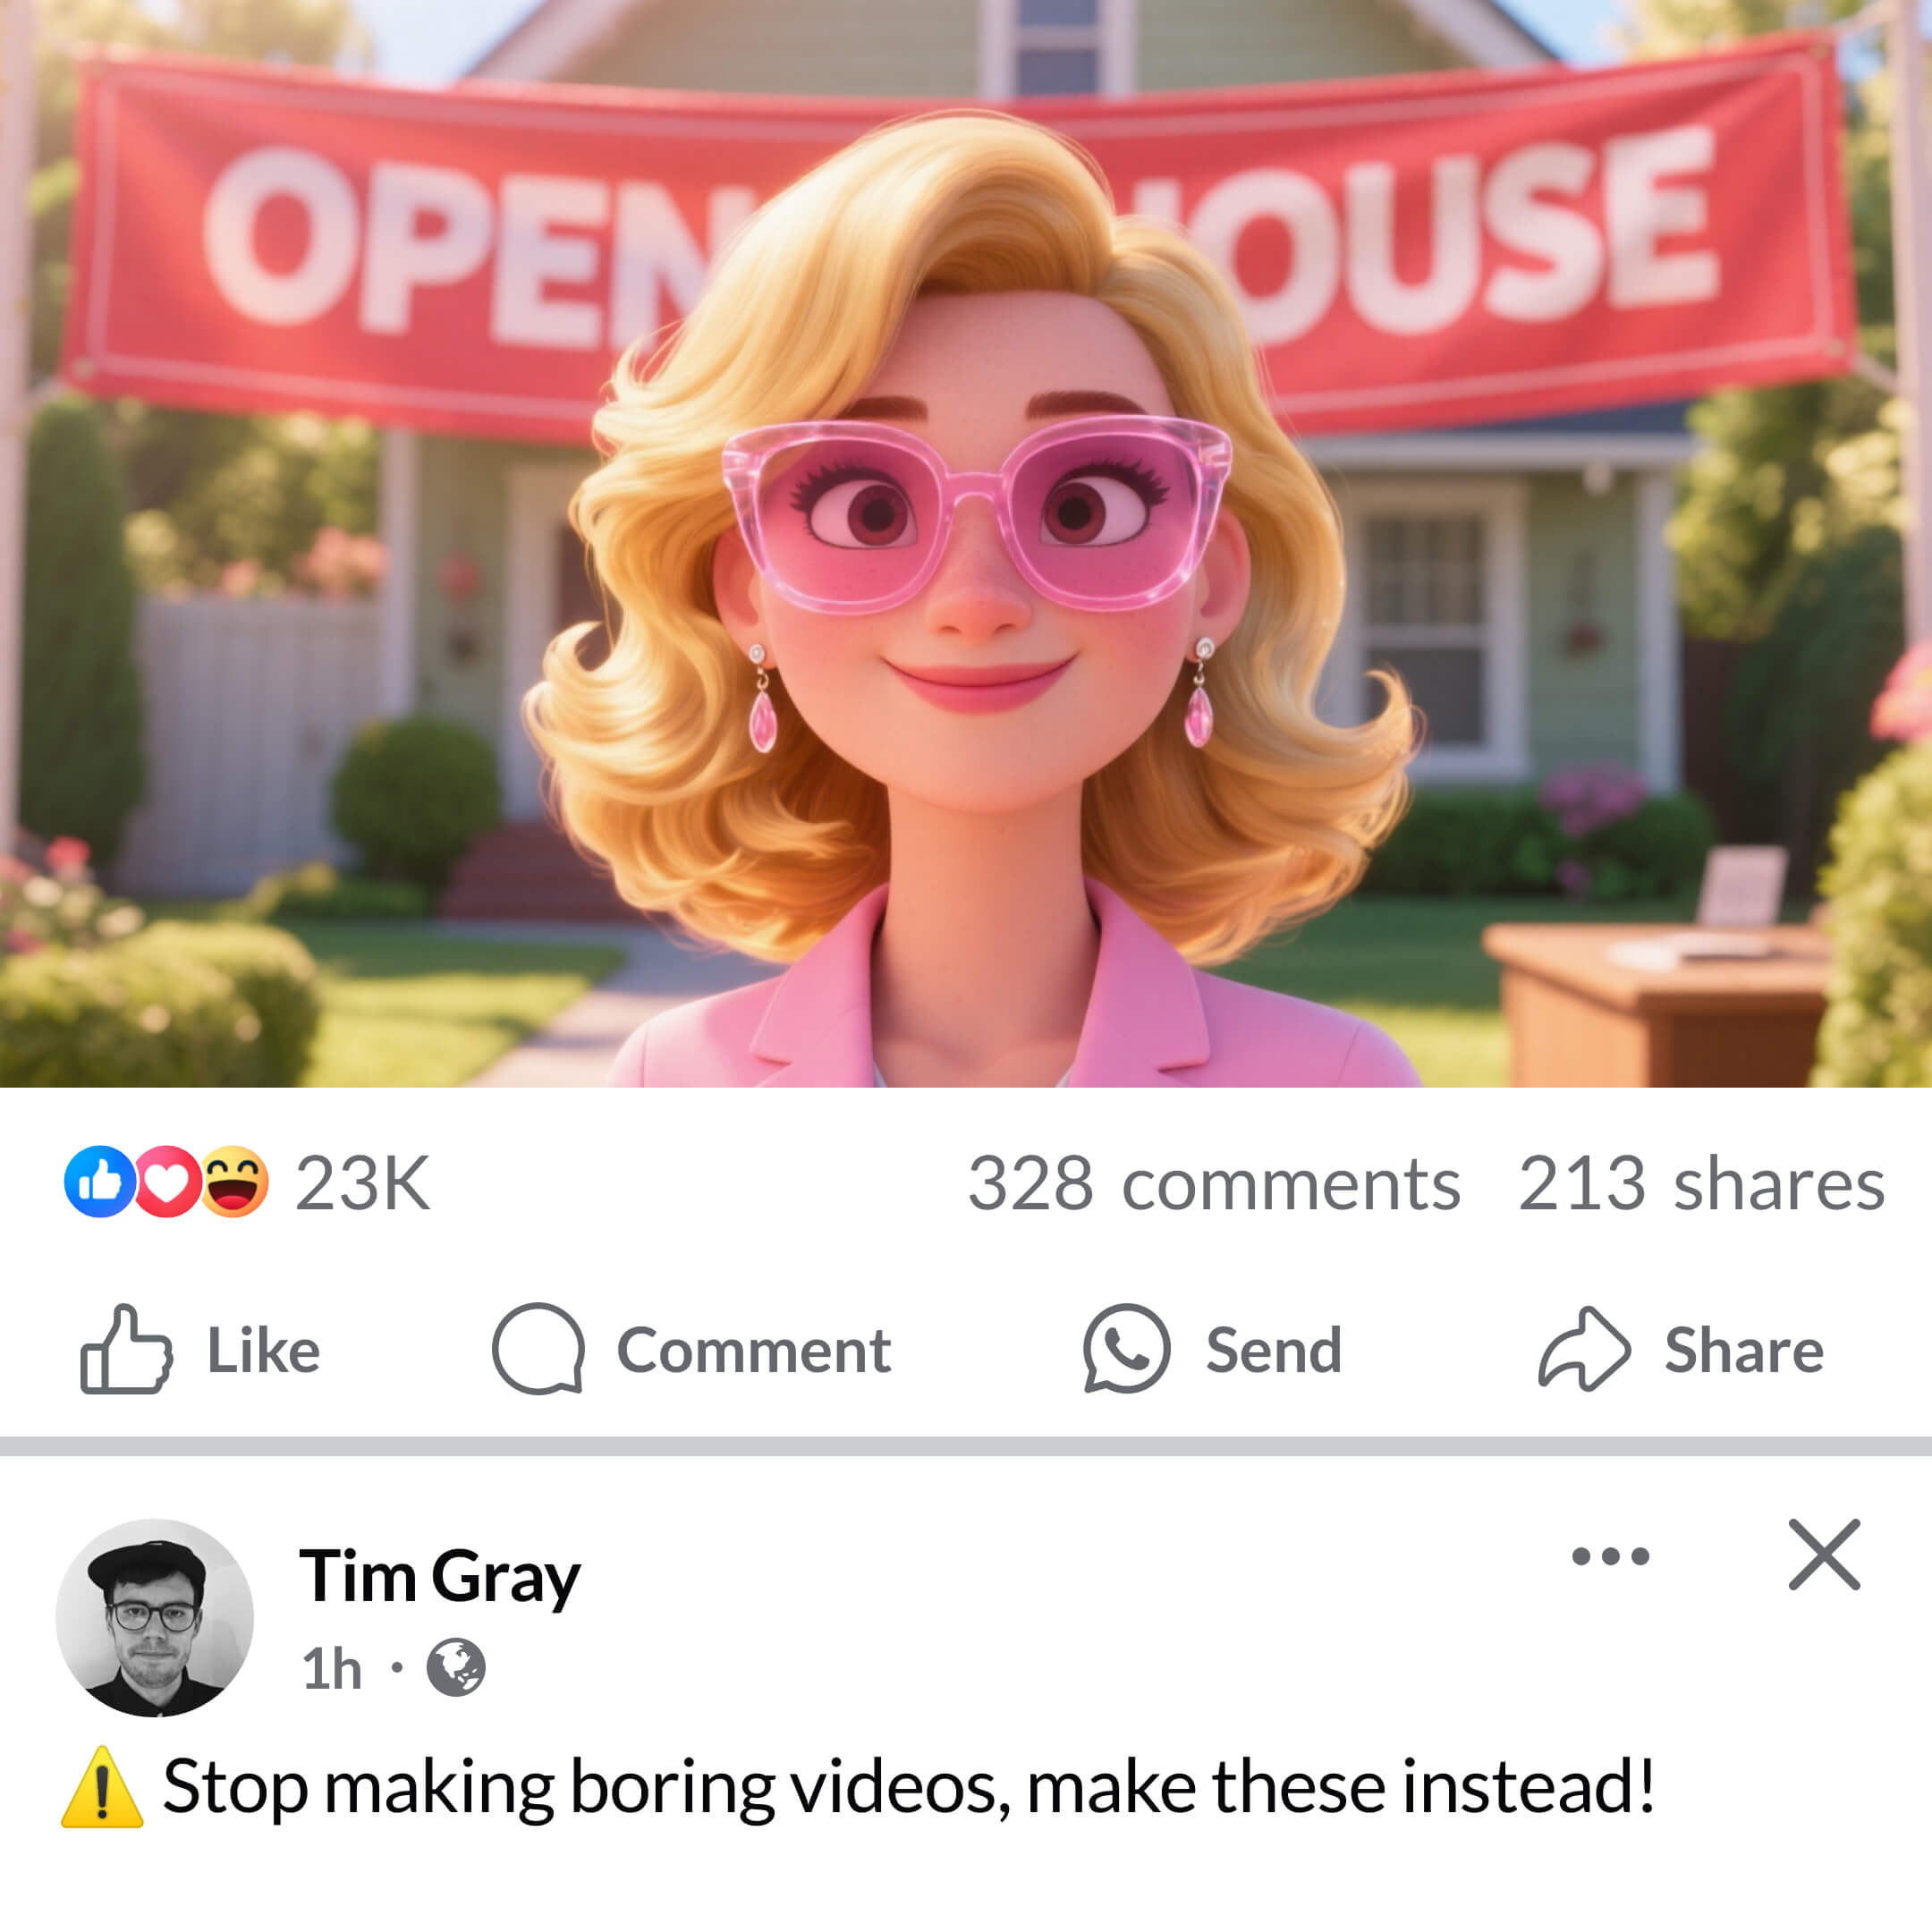
Half the word on flag is hidden.
The subject covers part of "HOUSE" - the AI has to invent what's behind her.
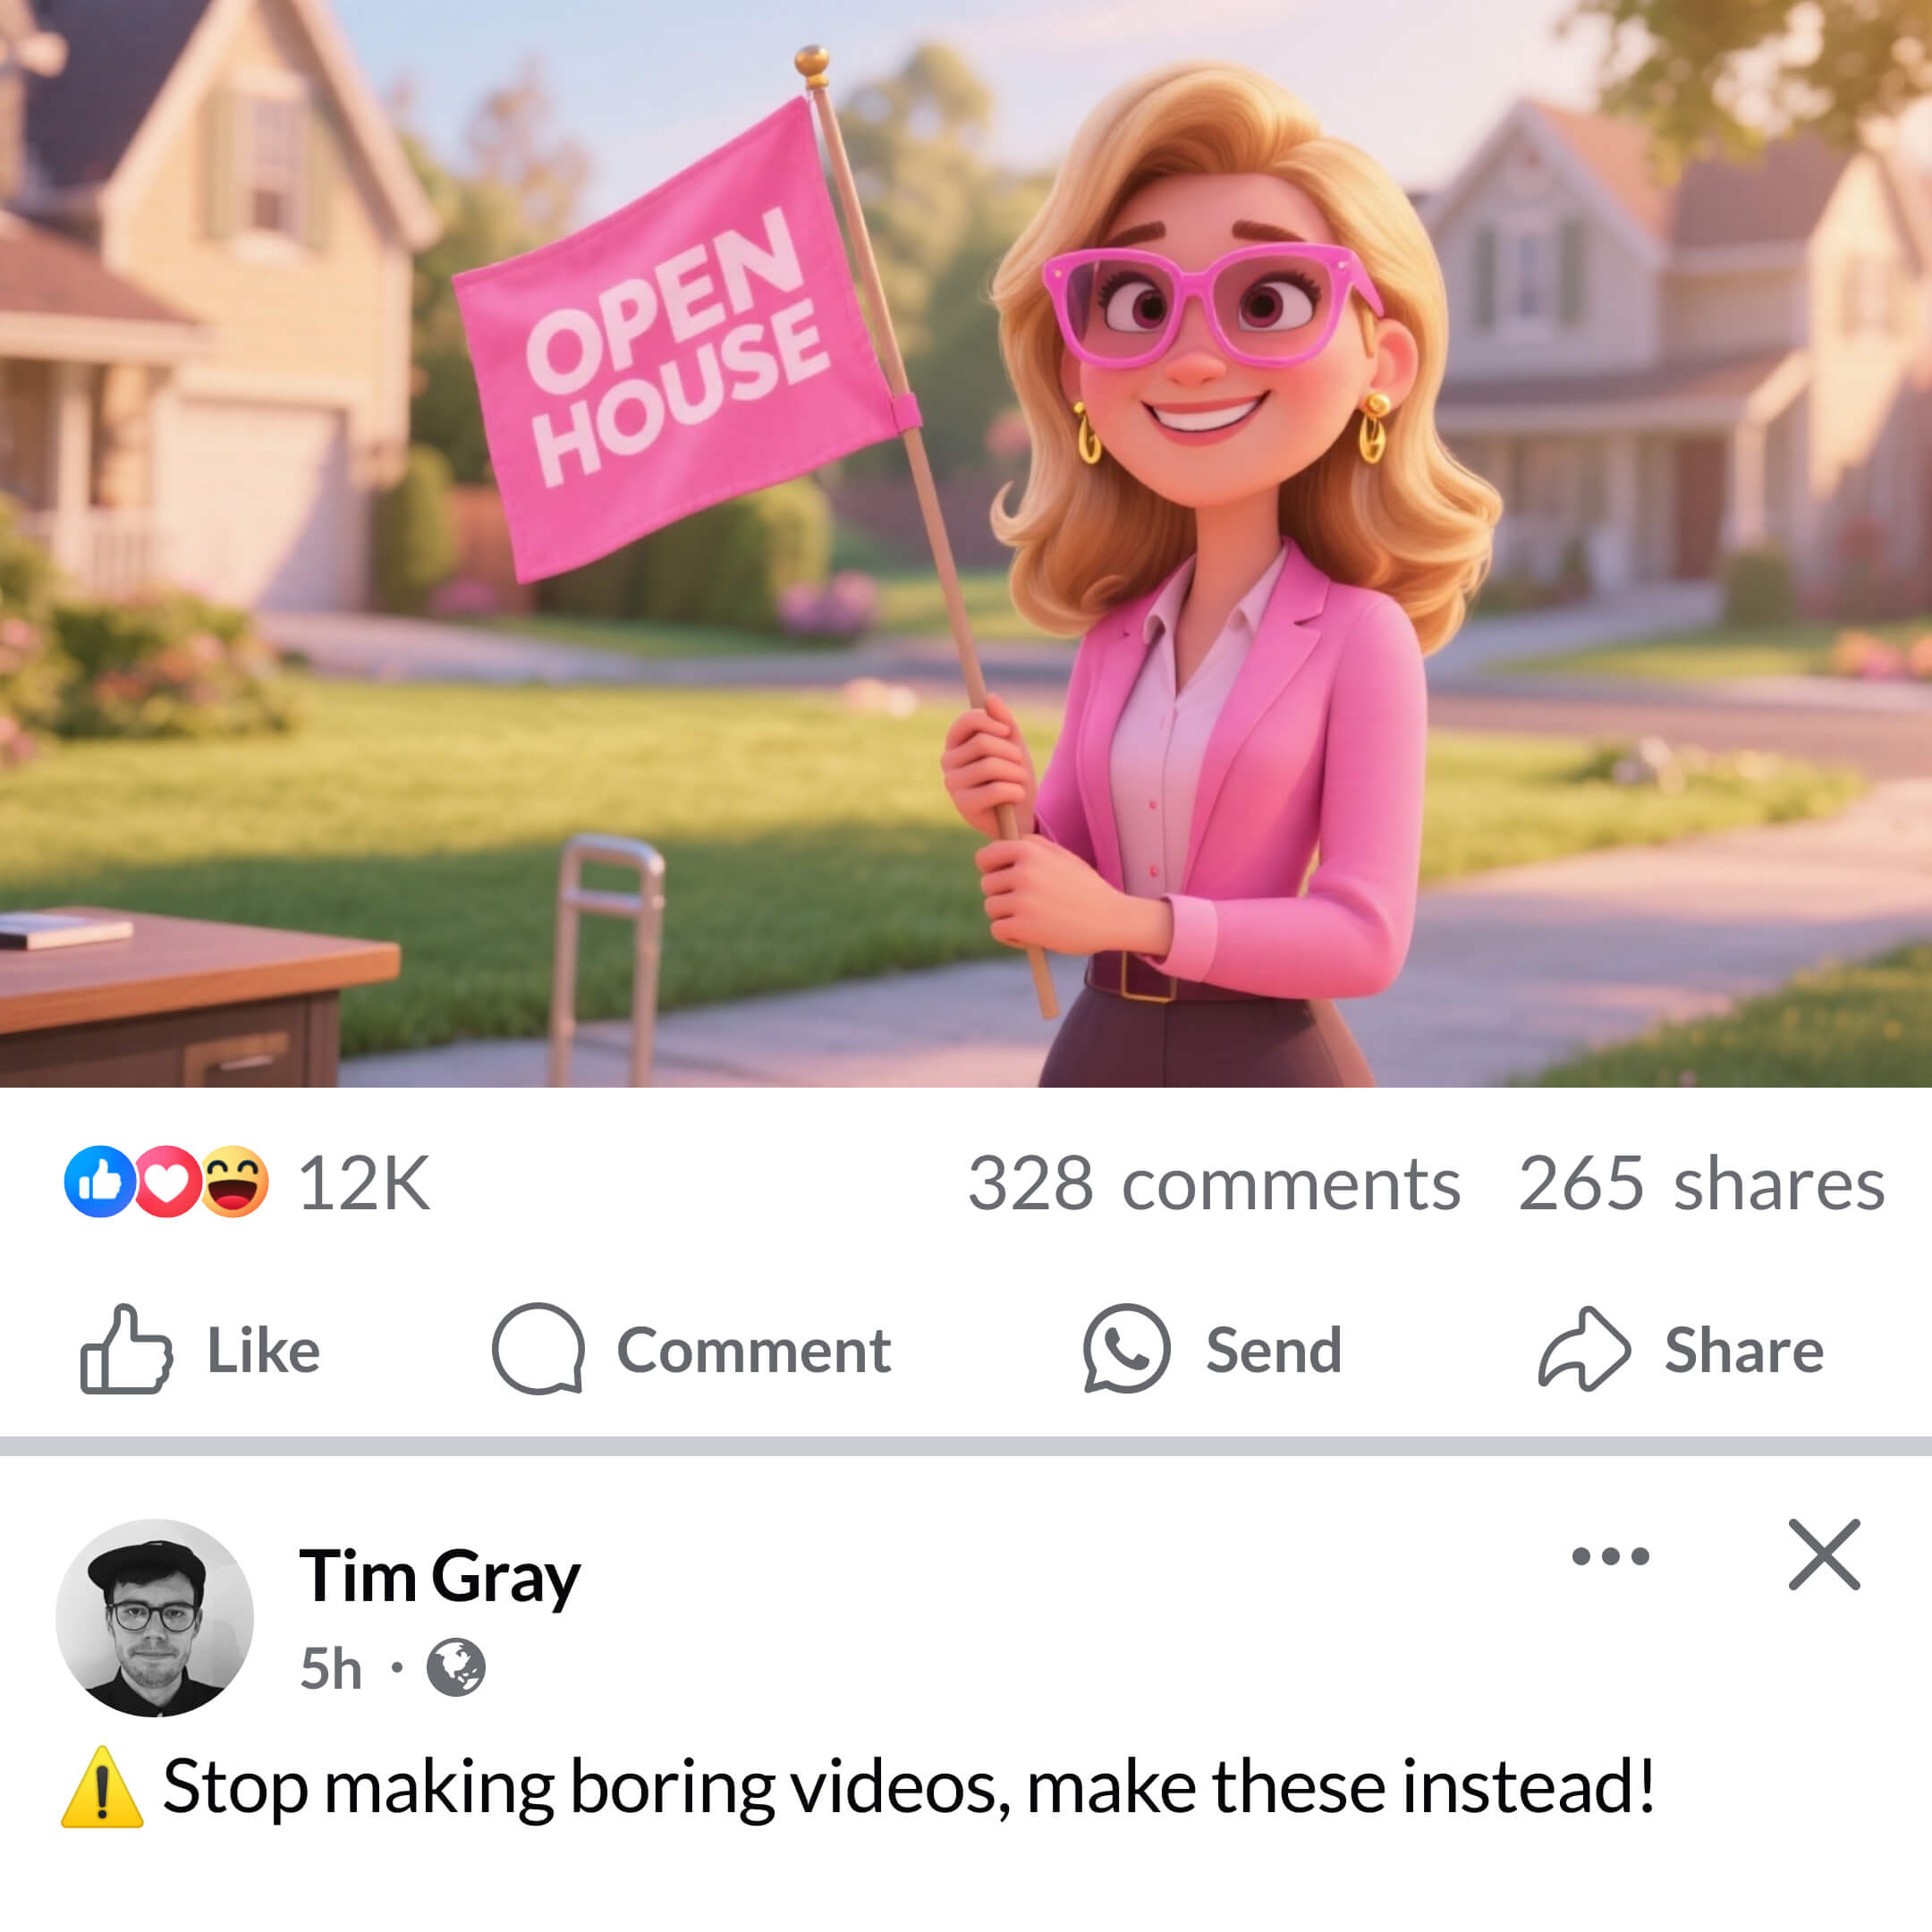
Text on flag is big, bold & fully visible.
What the AI needs to render it cleanly. Same applies to a logo.
Text rules
- Keep text short (2-4 words)
- Make it big ("text is big and bold")
- 100% clearly visible (no squinting to read)
How to fix at the Prompt step View ▾Hide ▴
Big bold text + close-up shot
Still not close enough? Focus directly on it - book cover example:
Logo rules
- Logo is big, bold and visible
- Logo is not obstructed
- Logo doesn't have a long slogan (why?)
How to fix at the Prompt step View ▾Close ▴
Placement + close-up shot
Still not close enough? Focus directly on it - logo on t-shirt example:
You can generate up to 4 variations of your scene preview from a single prompt. A variation is a different version of the same scene - same prompt, different result.
Instead of re-submitting your prompt over and over until you get a result you like, variations let you generate several options in one go and simply pick your favorite.
How it works:
- Enter your prompt into the prompt box in the sidebar.
- In the Variations dropdown, choose how many variations you'd like - anywhere from 1 to 4.
- Your variations will now generate as static scene previews.
- Once they're ready, cycle through them in the scene preview selector.
- Select the one you like best, preview it in the main editor, and click "Next" to proceed to the animation step.
Here's a quick video walkthrough of these steps:
Keep in mind, only the variation you select is sent to the animation engine and turned into your final video.
And if you're wondering why your variations aren't moving - that's normal. Variations are static image previews at this stage. Your chosen variation becomes a video at the next "Animate" step.
Try it on your next scene to save some time!
Before you animate, check your scene preview and ask yourself two questions:
- What is the obvious subject that will pop out? There should be one clear answer - not multiple competing subjects, not a fixed object that can't physically move, not an empty scene.
- Can it easily and naturally move toward camera? Nothing blocking its path, no awkward arm angles if holding something, and the subject isn't framed too close - for best results, they should be visible from hip to head, or full body.
If you can answer both questions confidently, you're good to animate. If either answer makes you hesitate, regenerate your scene preview - it's free, and it's easier to fix now than waste credits on a broken animation.
Scene to avoid · No clear subject
No subject that can pop out.
The pop-out effect needs something that can physically move toward the viewer. An empty room, a building exterior, or a fixed object like a sign bolted to a wall or a clamp locked to a wheel - these can't pop out in real life, so they can't pop out in your video either.
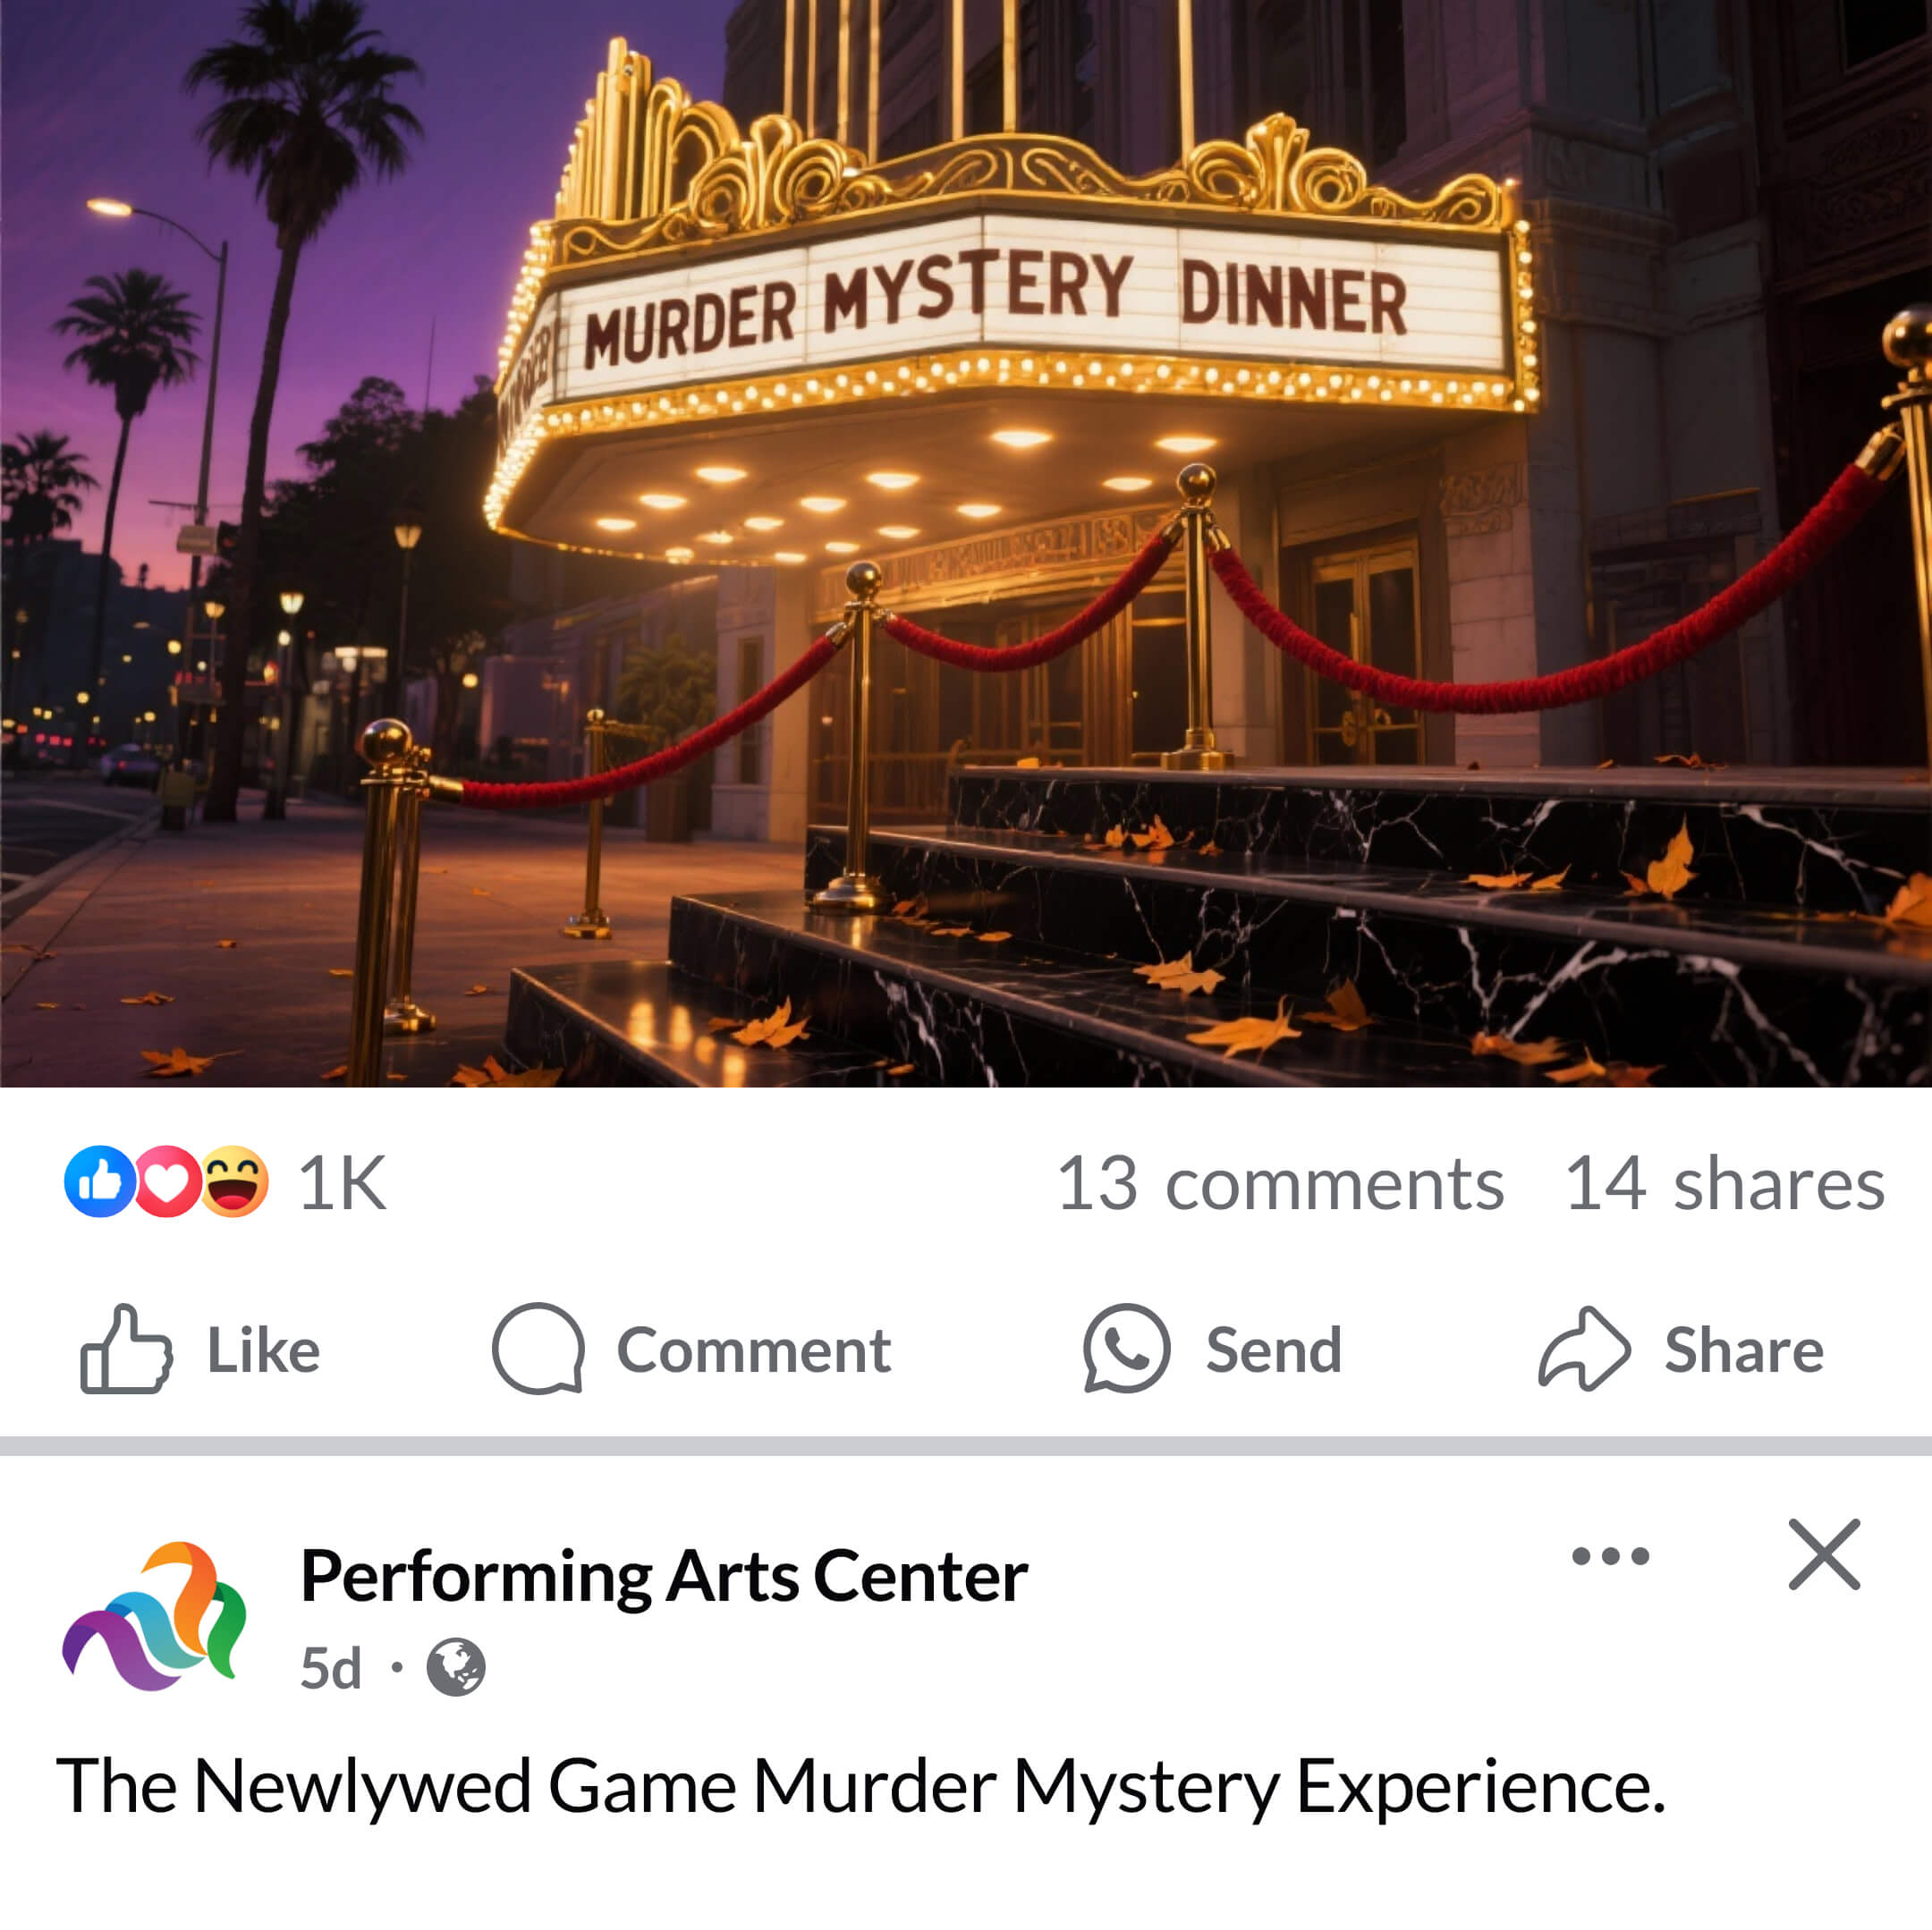
✕ Fixed sign - nothing can move
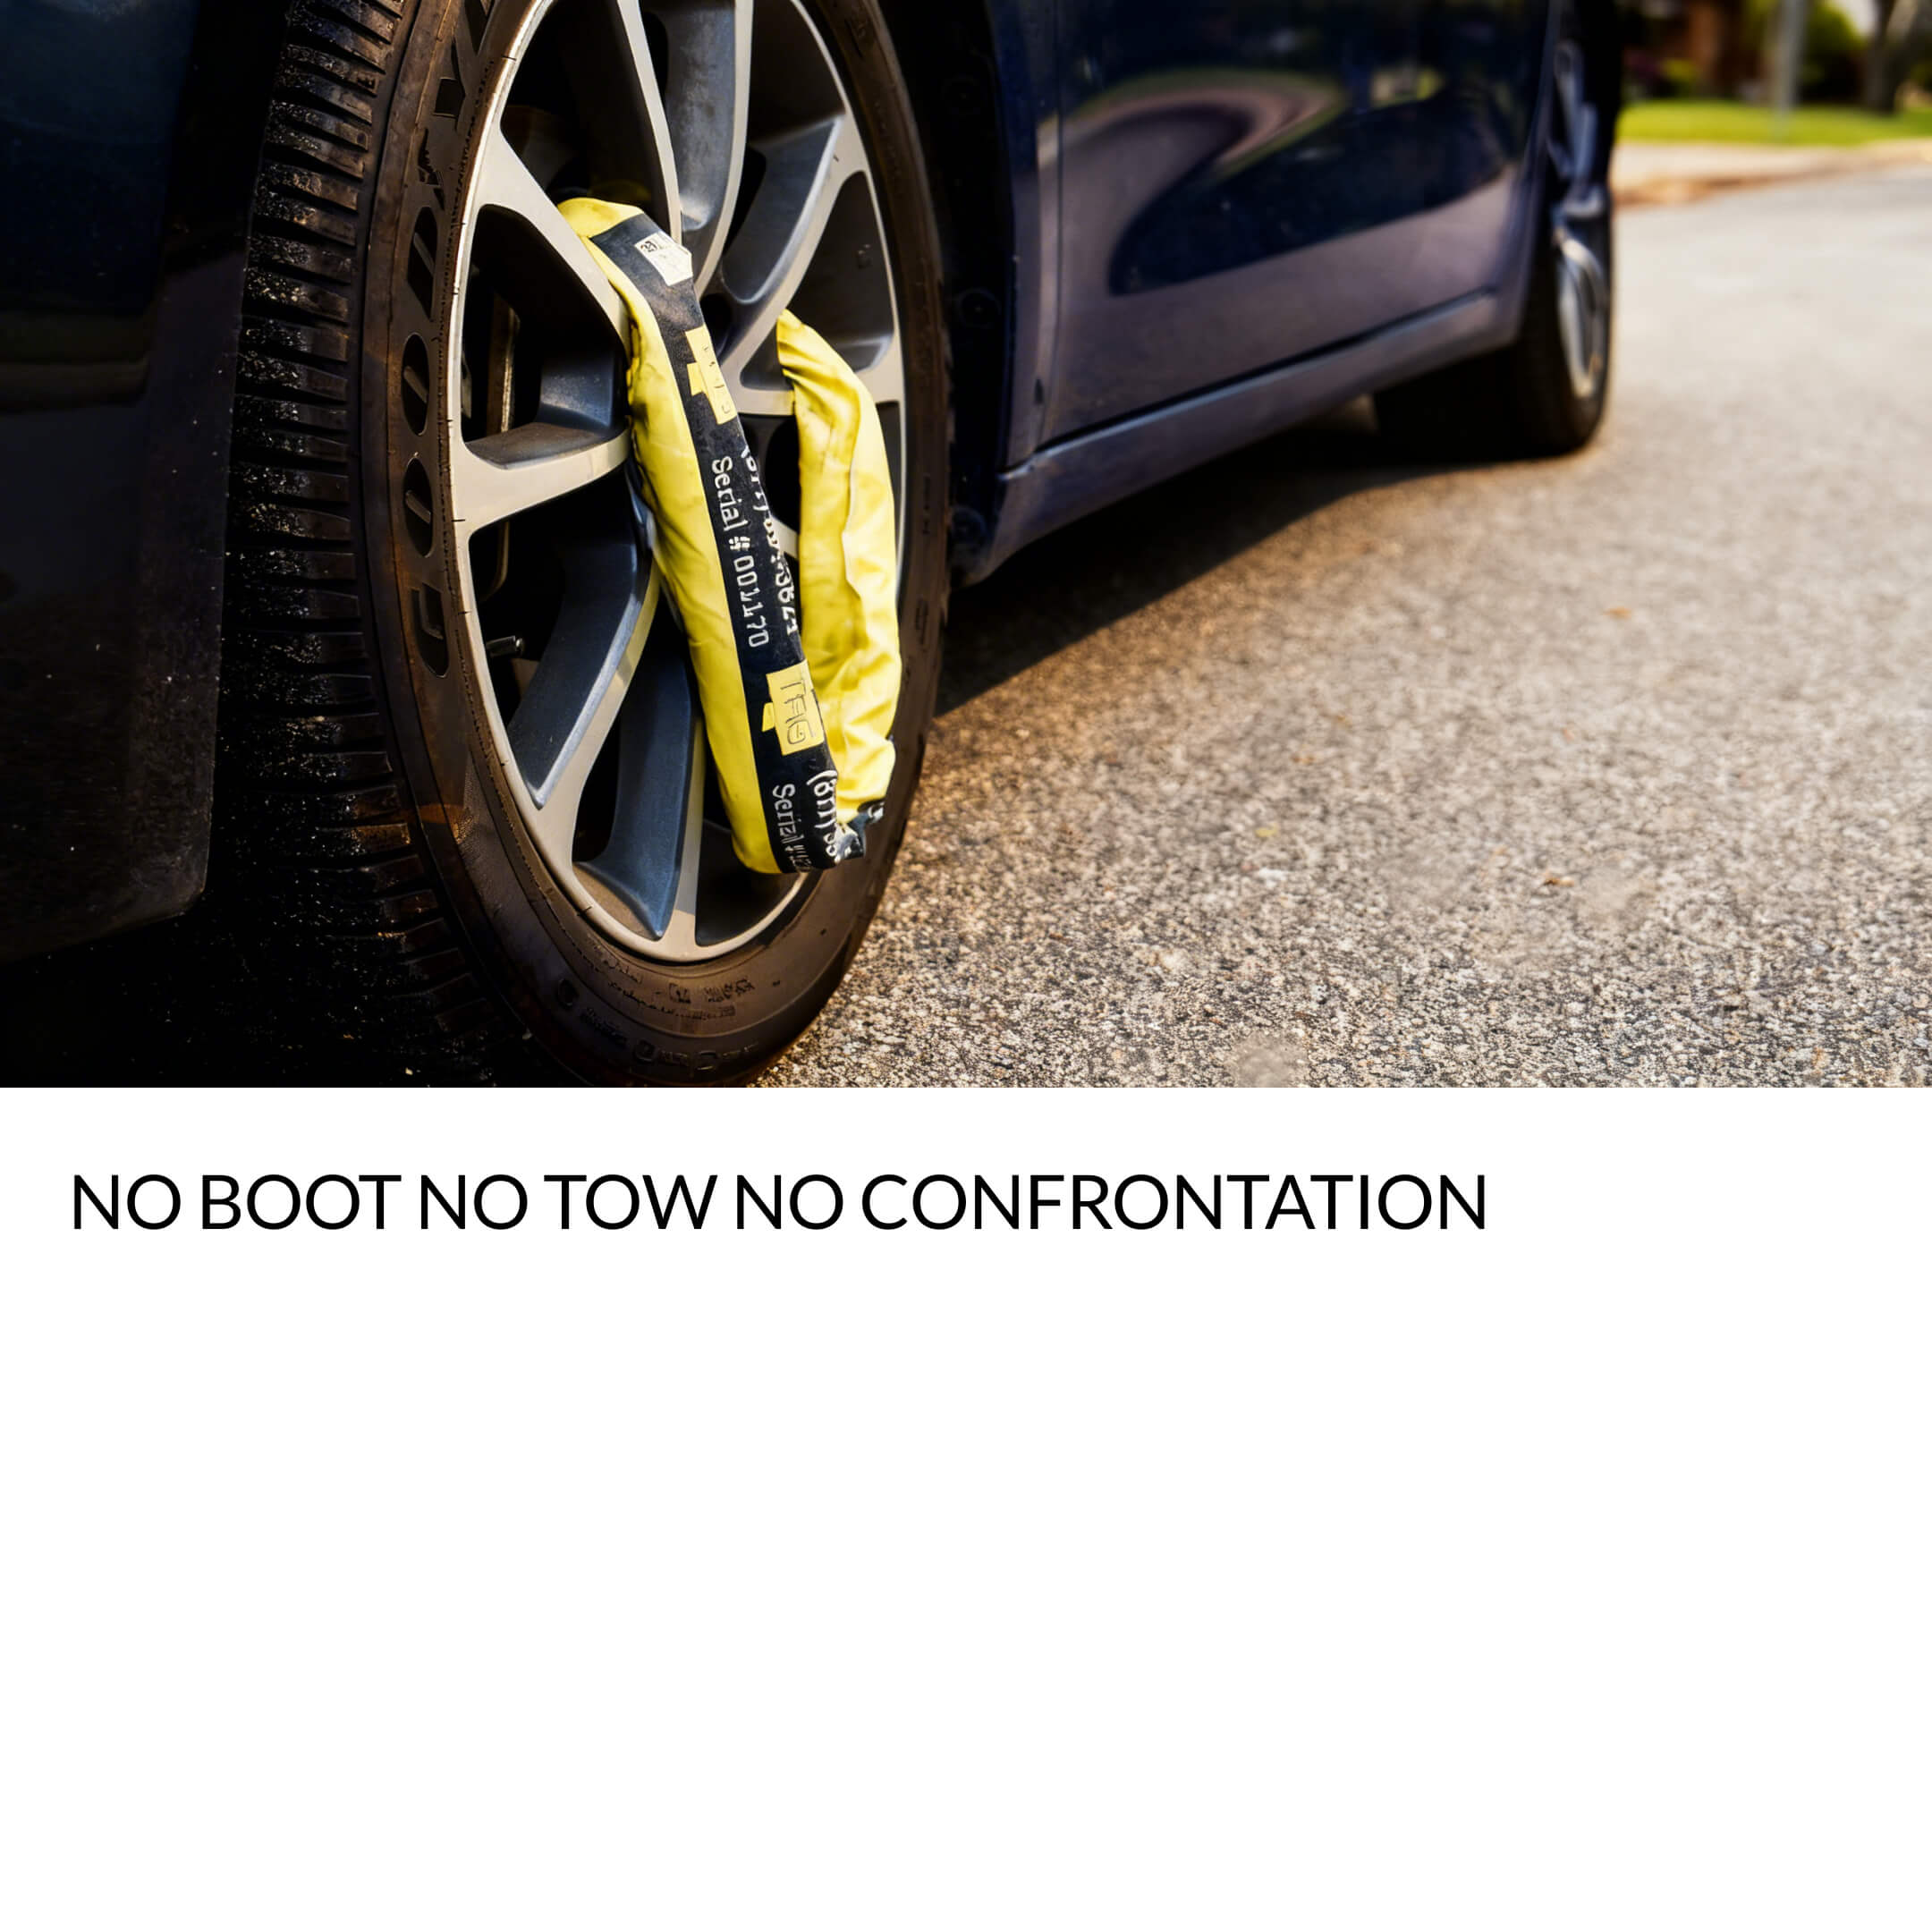
✕ Locked clamp - can't move
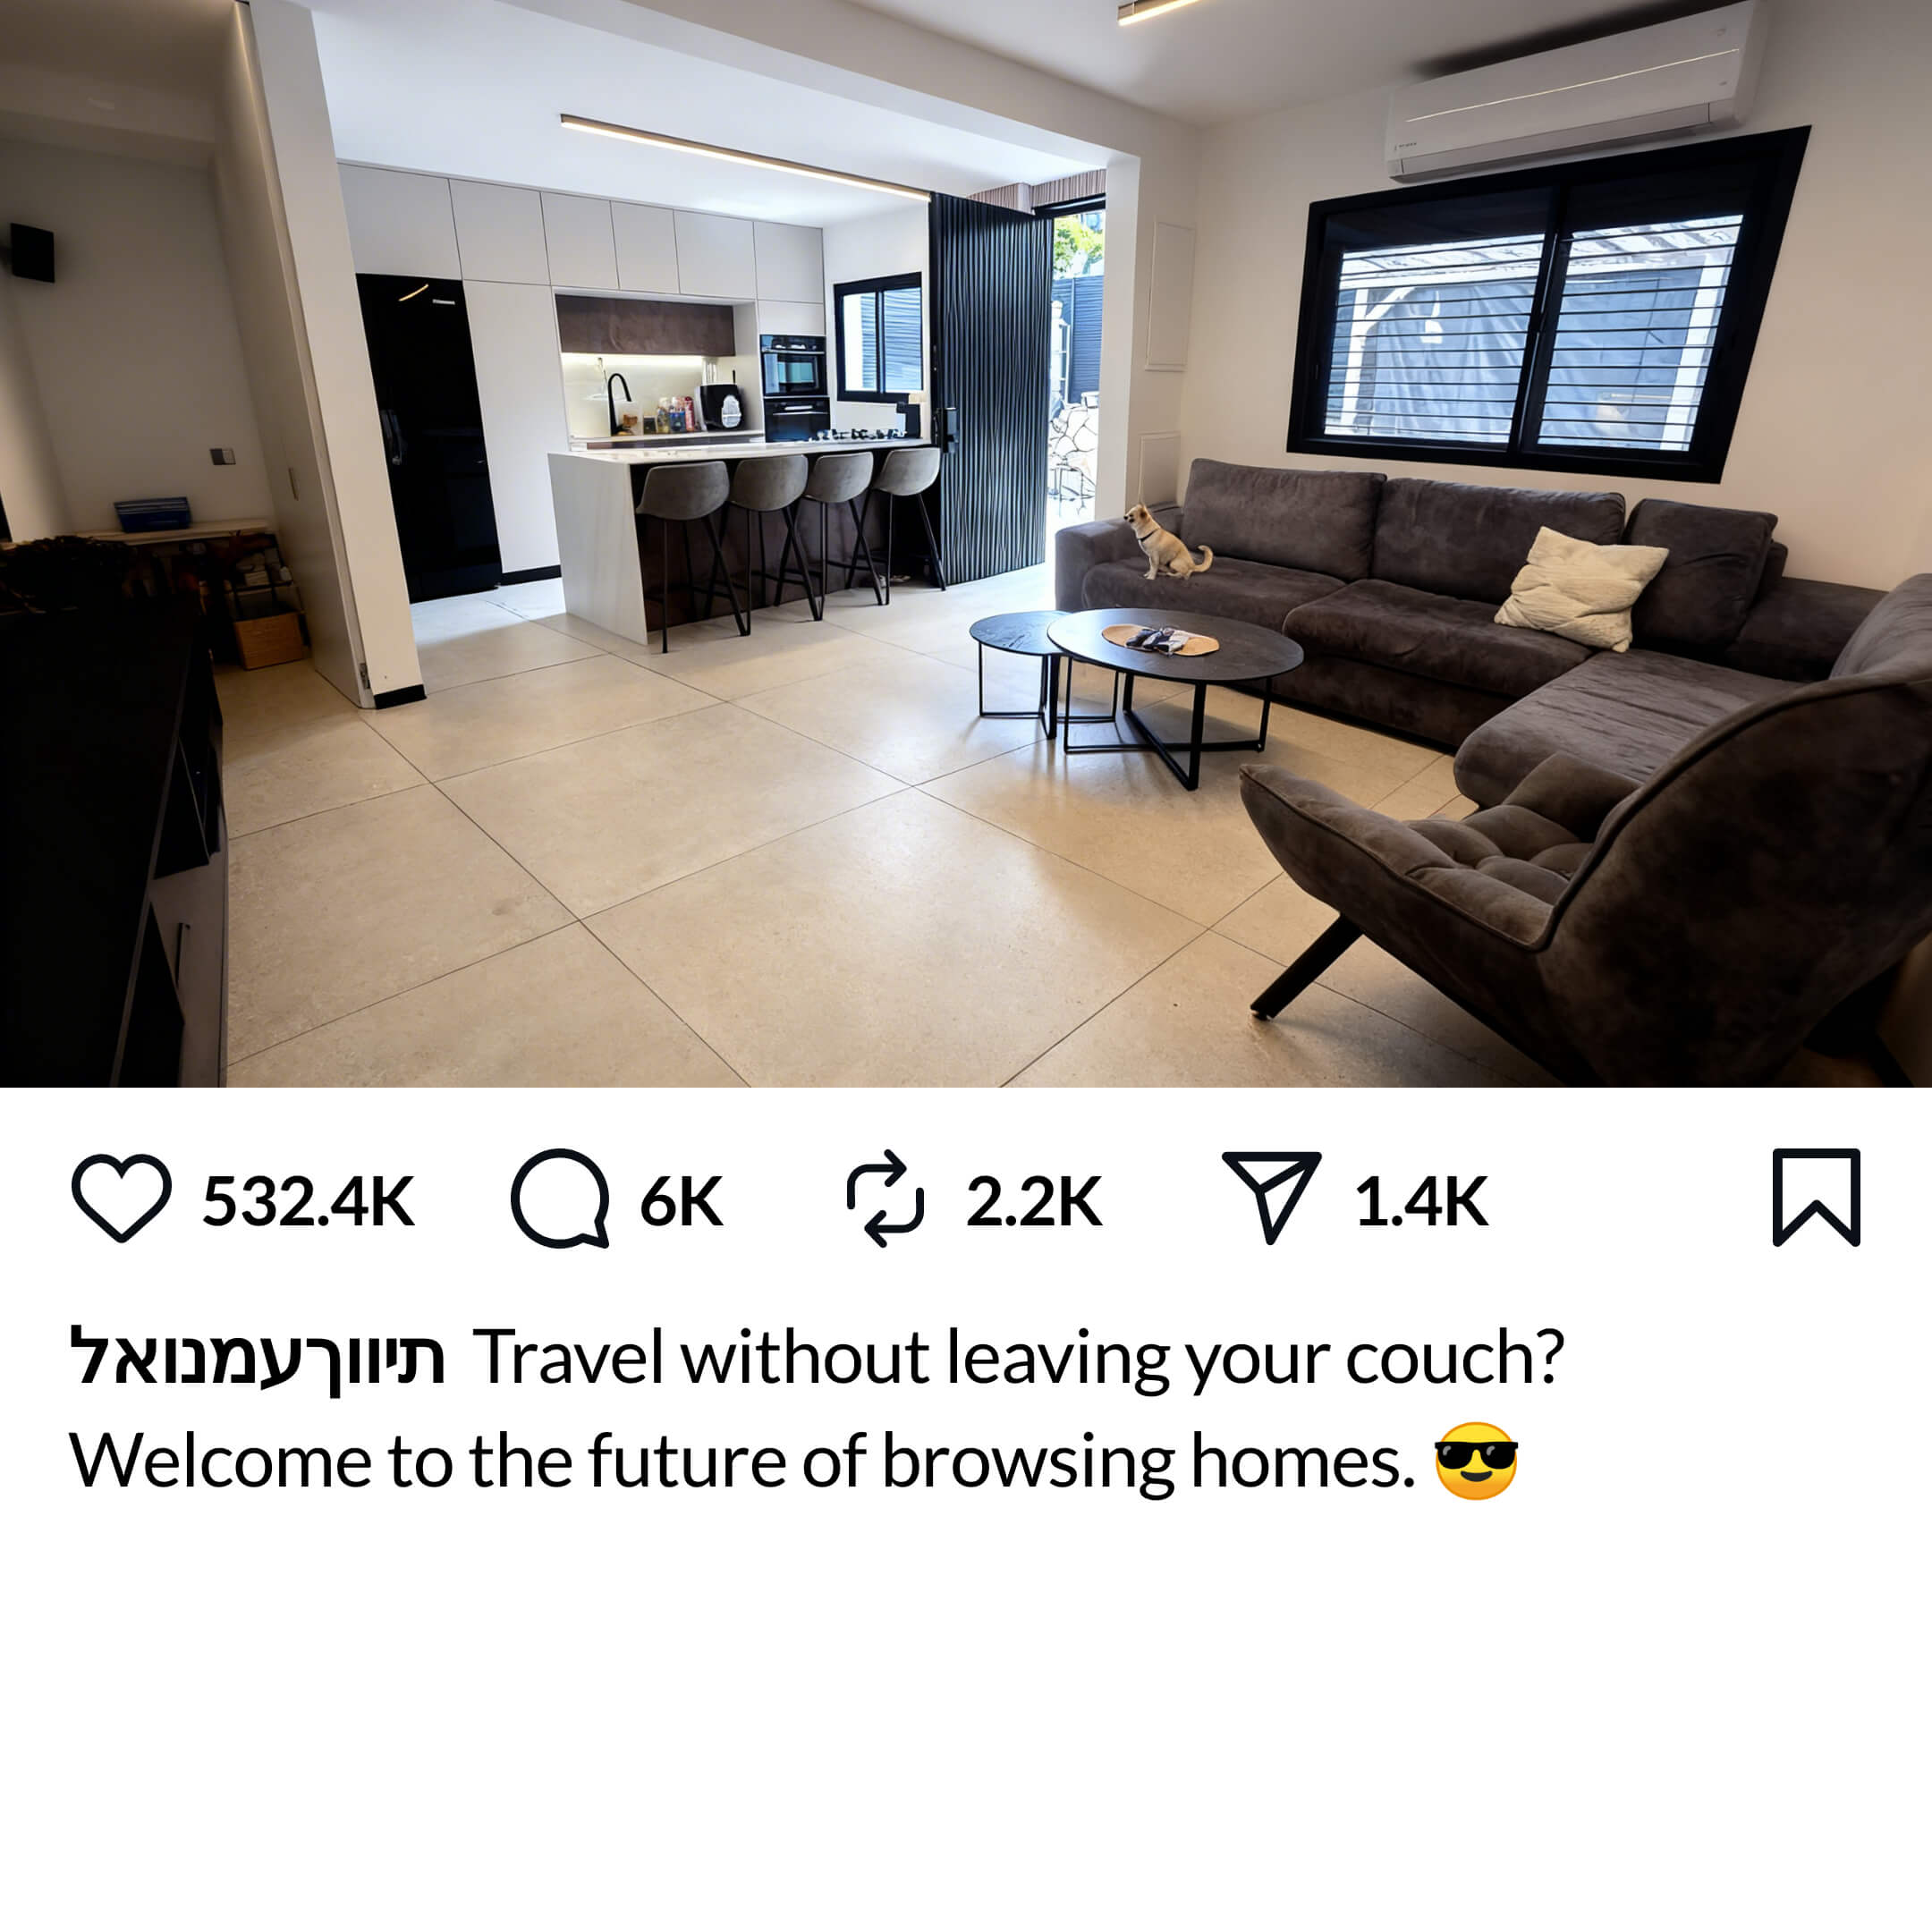
✕ Empty room - no subject
Scene to avoid · Barrier blocking the path
Something is between the subject and the camera.
If there's a desk, counter, table, or any object between your subject and the camera, they can't pop through it. The subject needs a clear path forward. Think of it this way: the AI follows real-world physics - if a barrier would stop someone walking toward you in real life, it will stop them in your video too.
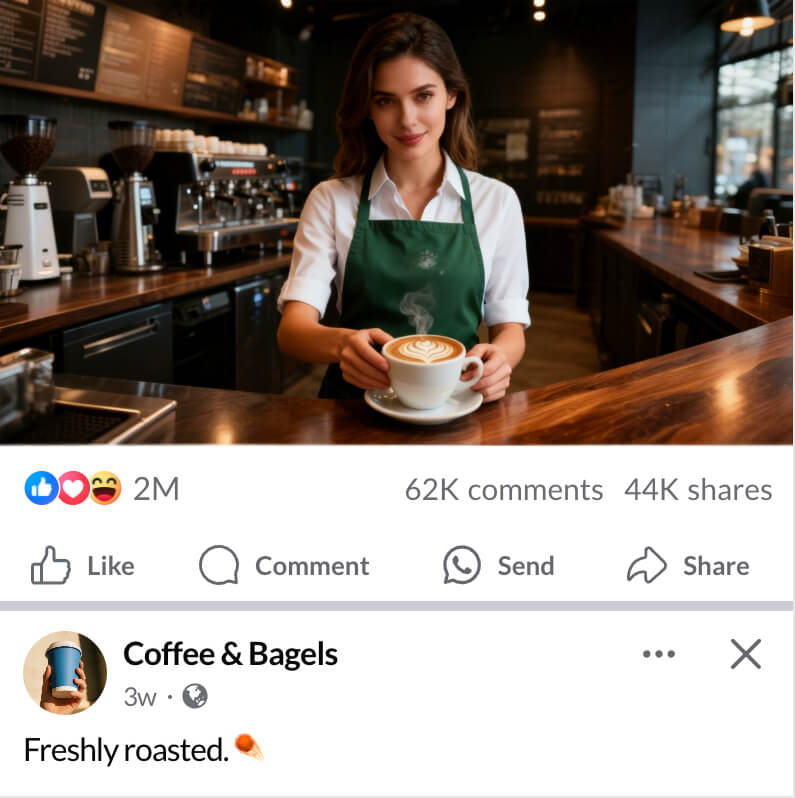
✕ Counter - blocks forward movement
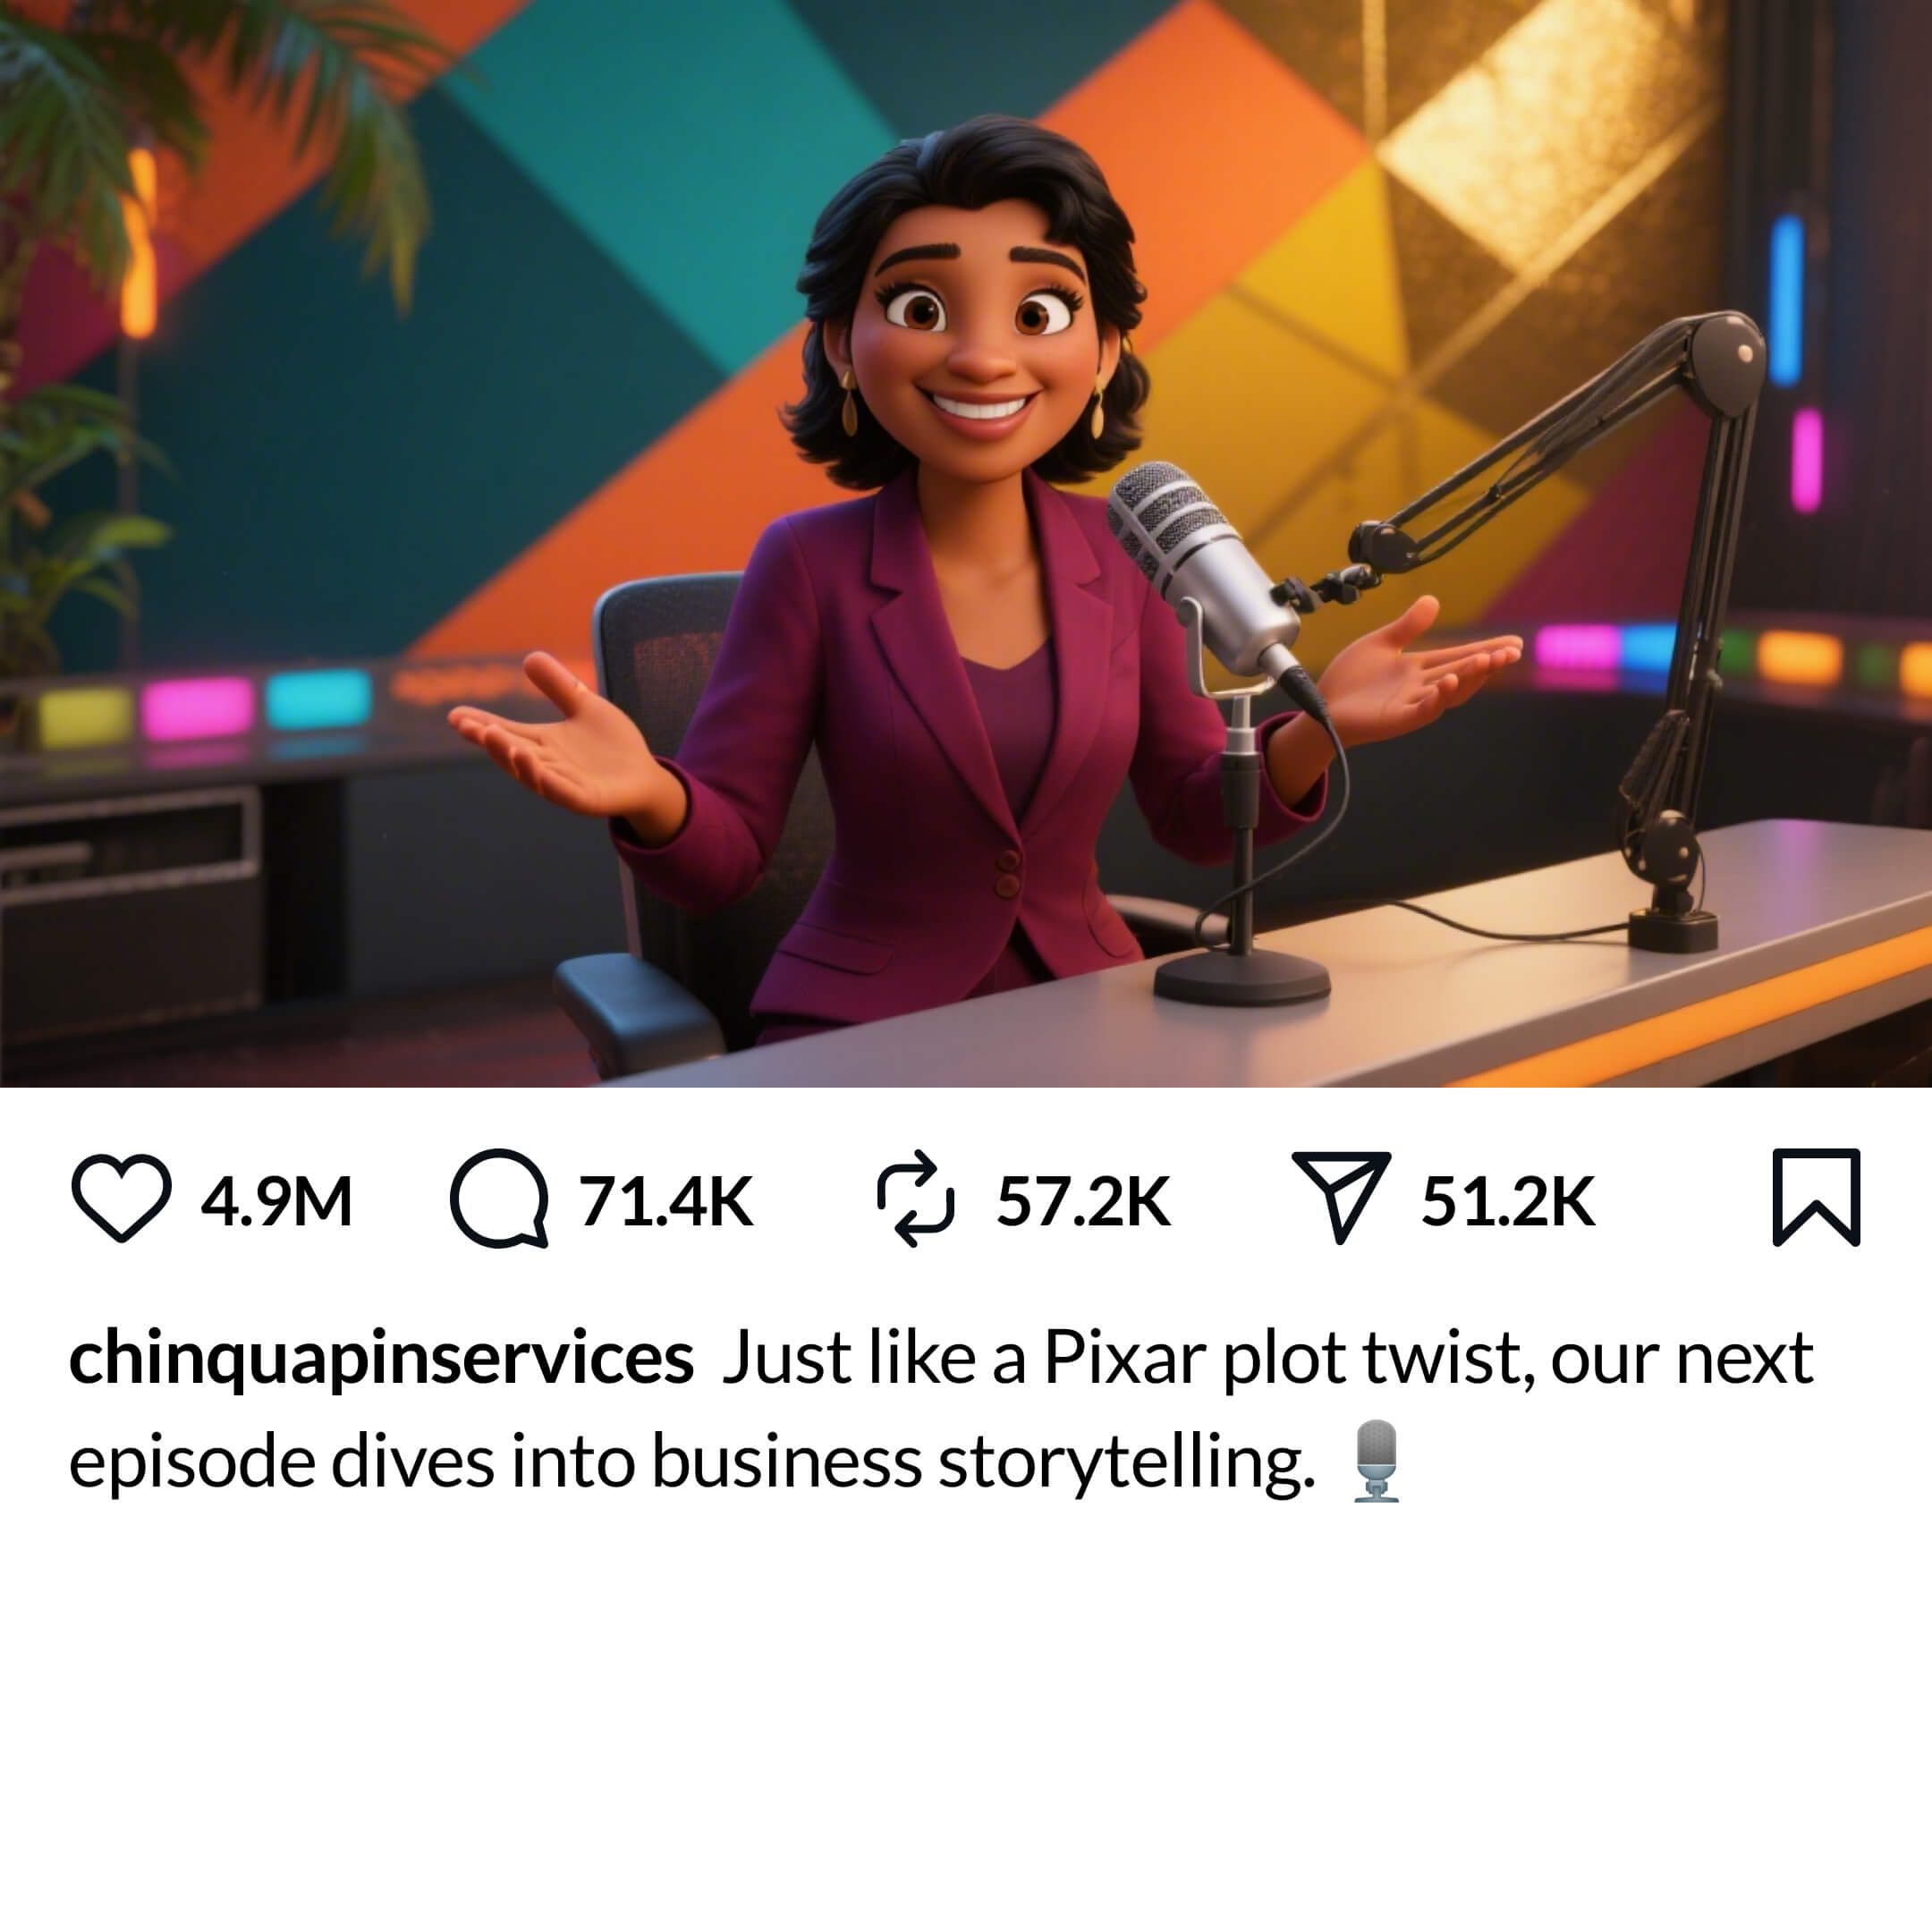
✕ Desk - blocks pop-out path
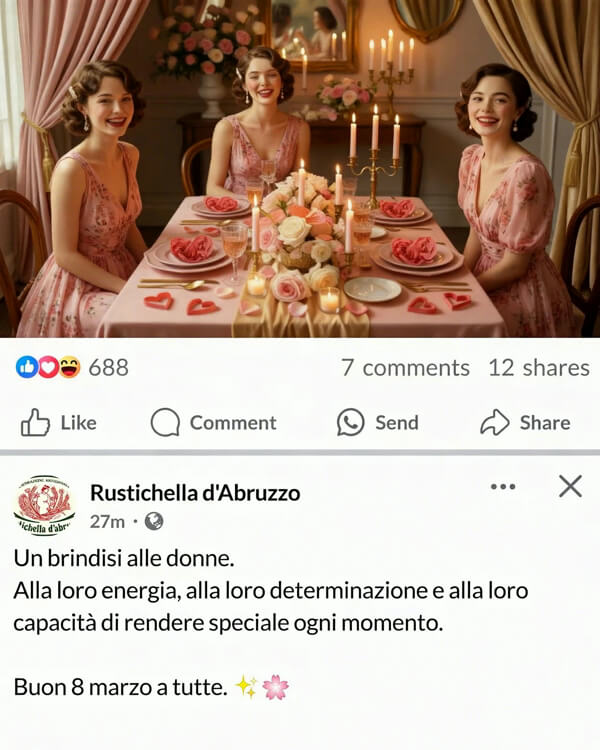
✕ Table - blocks all three subjects
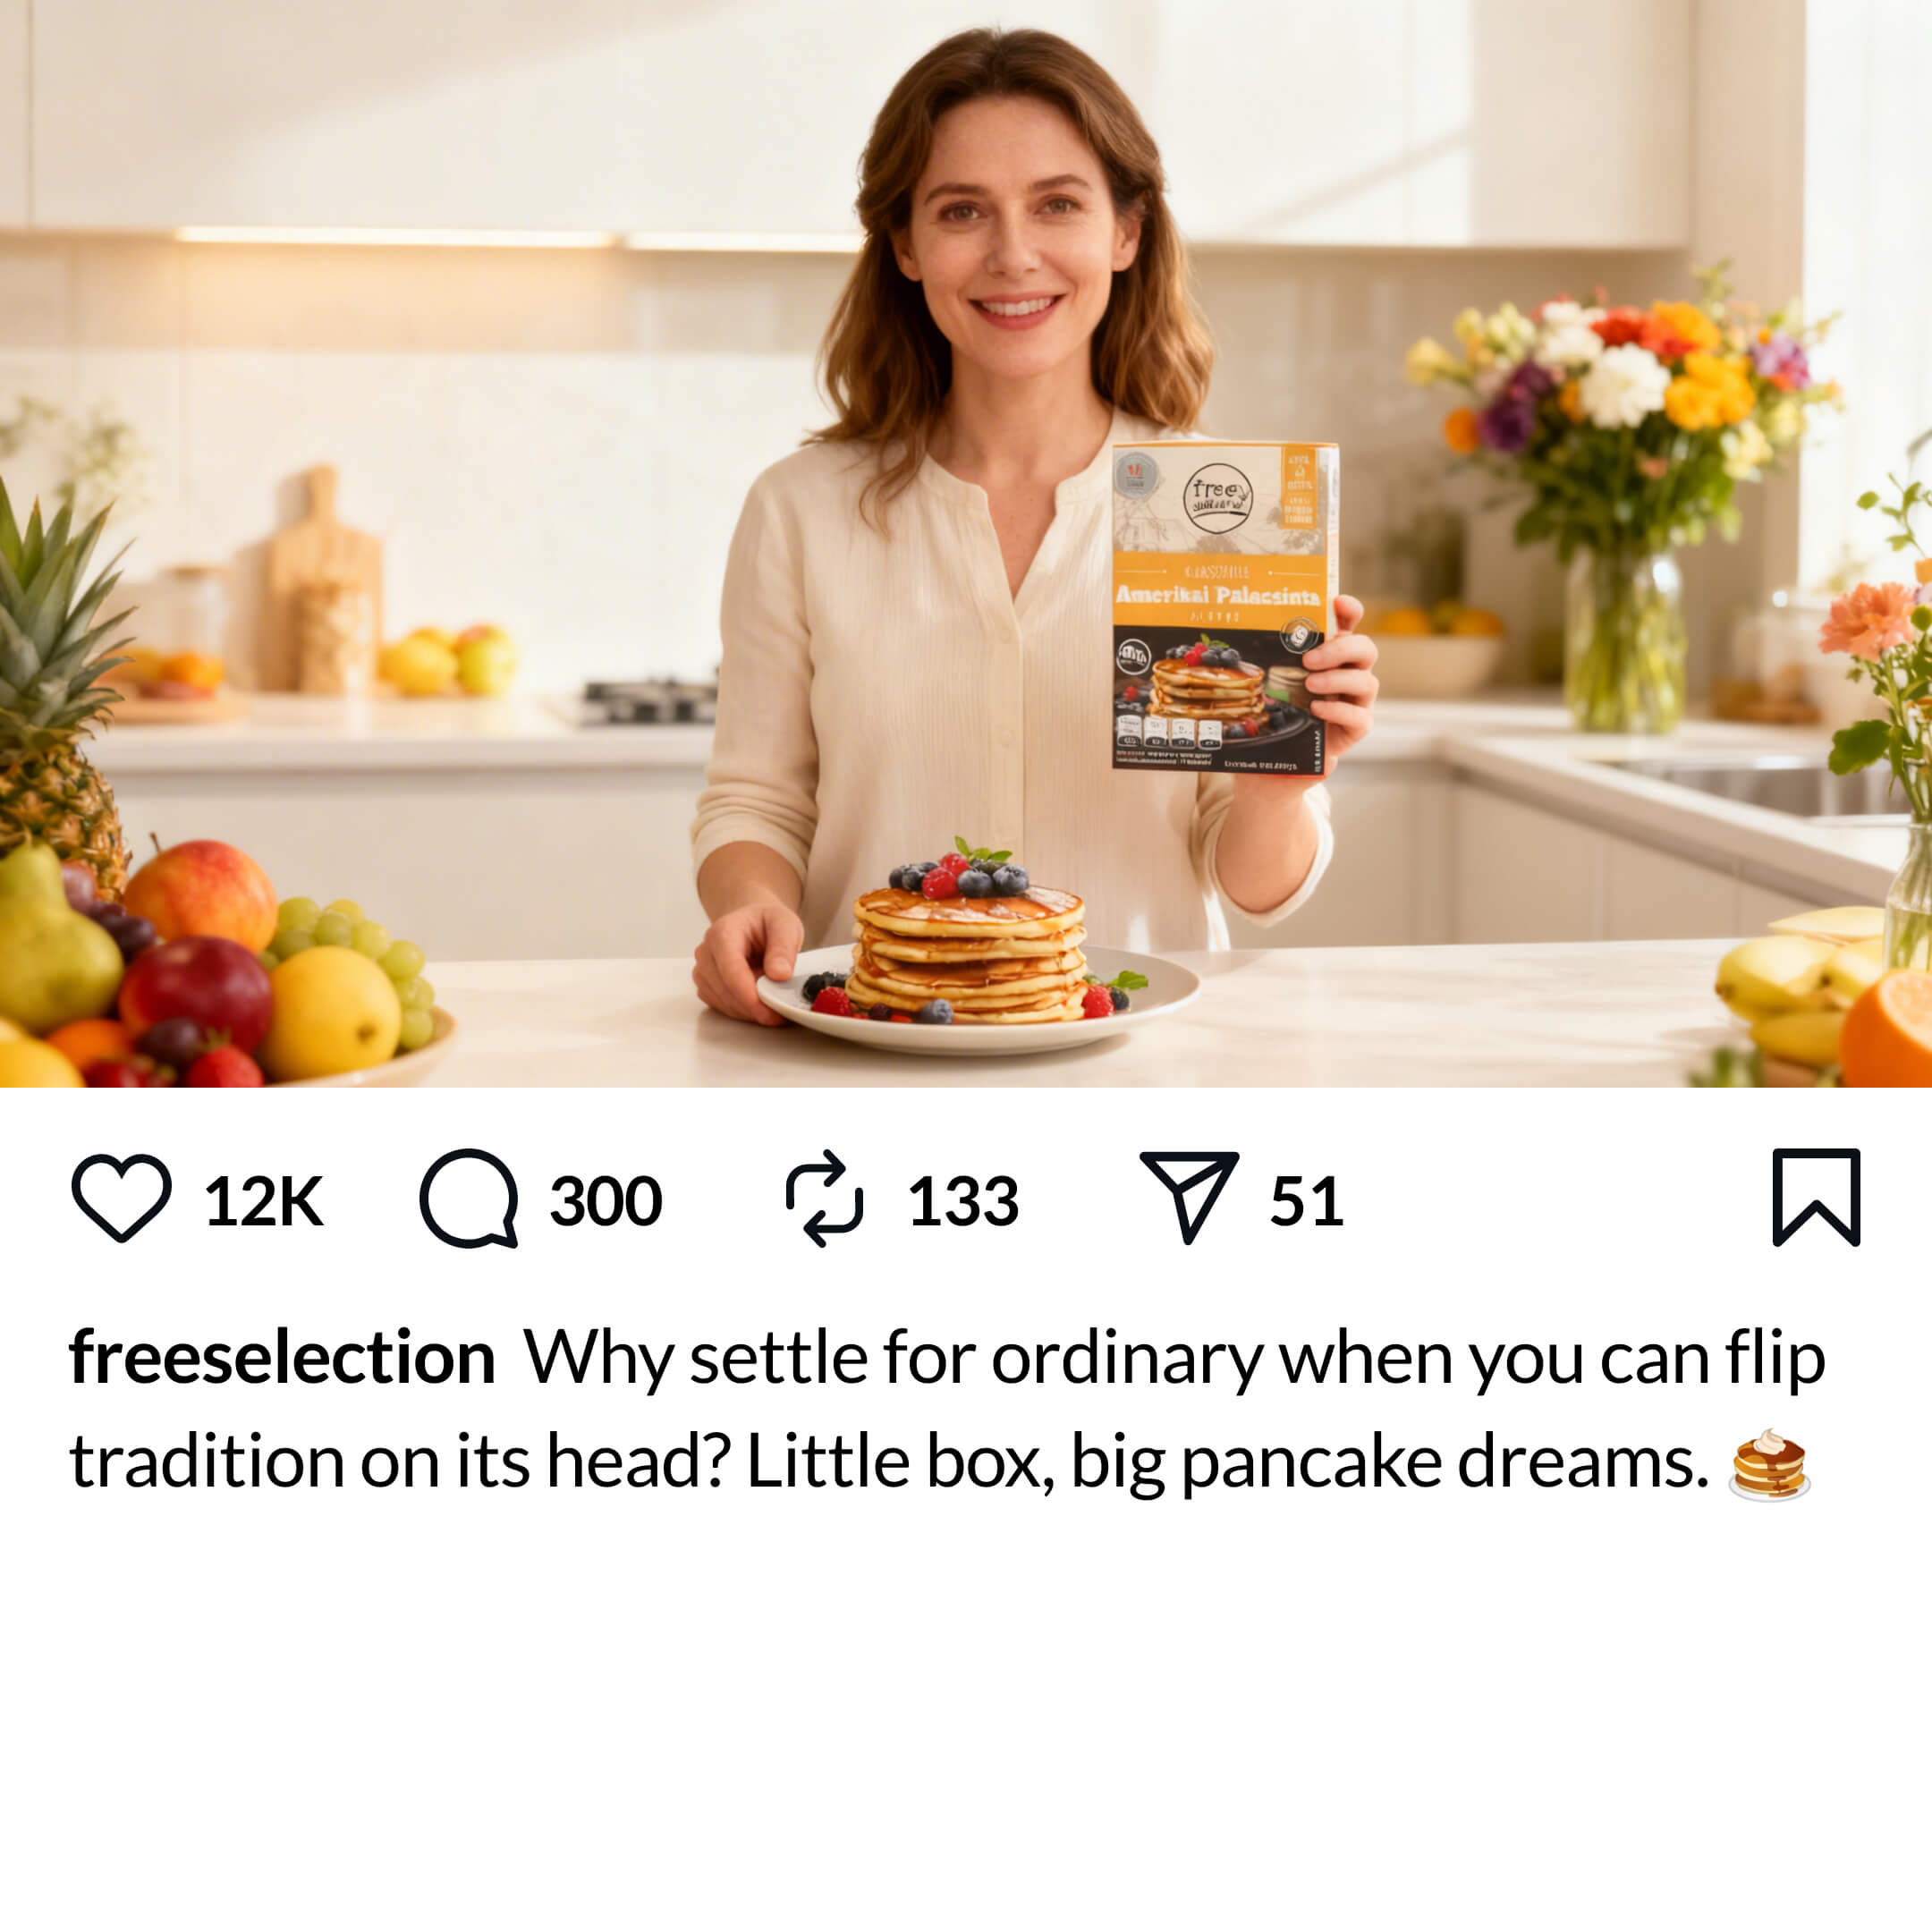
✕ Kitchen island - blocks path
Scene to avoid · Awkward product angle
Product held at an awkward angle.
Look at the woman holding the product below - how would that product naturally pop out? If she brought it forward, her arm would need to pass directly through the white social post area below instead of over it, which doesn't make for a good pop-out. The framing is too tight. You need to zoom out and allow more space, giving her arm the room it needs to extend naturally toward the camera. Check the fix below for the right framing terms to add to your prompt.
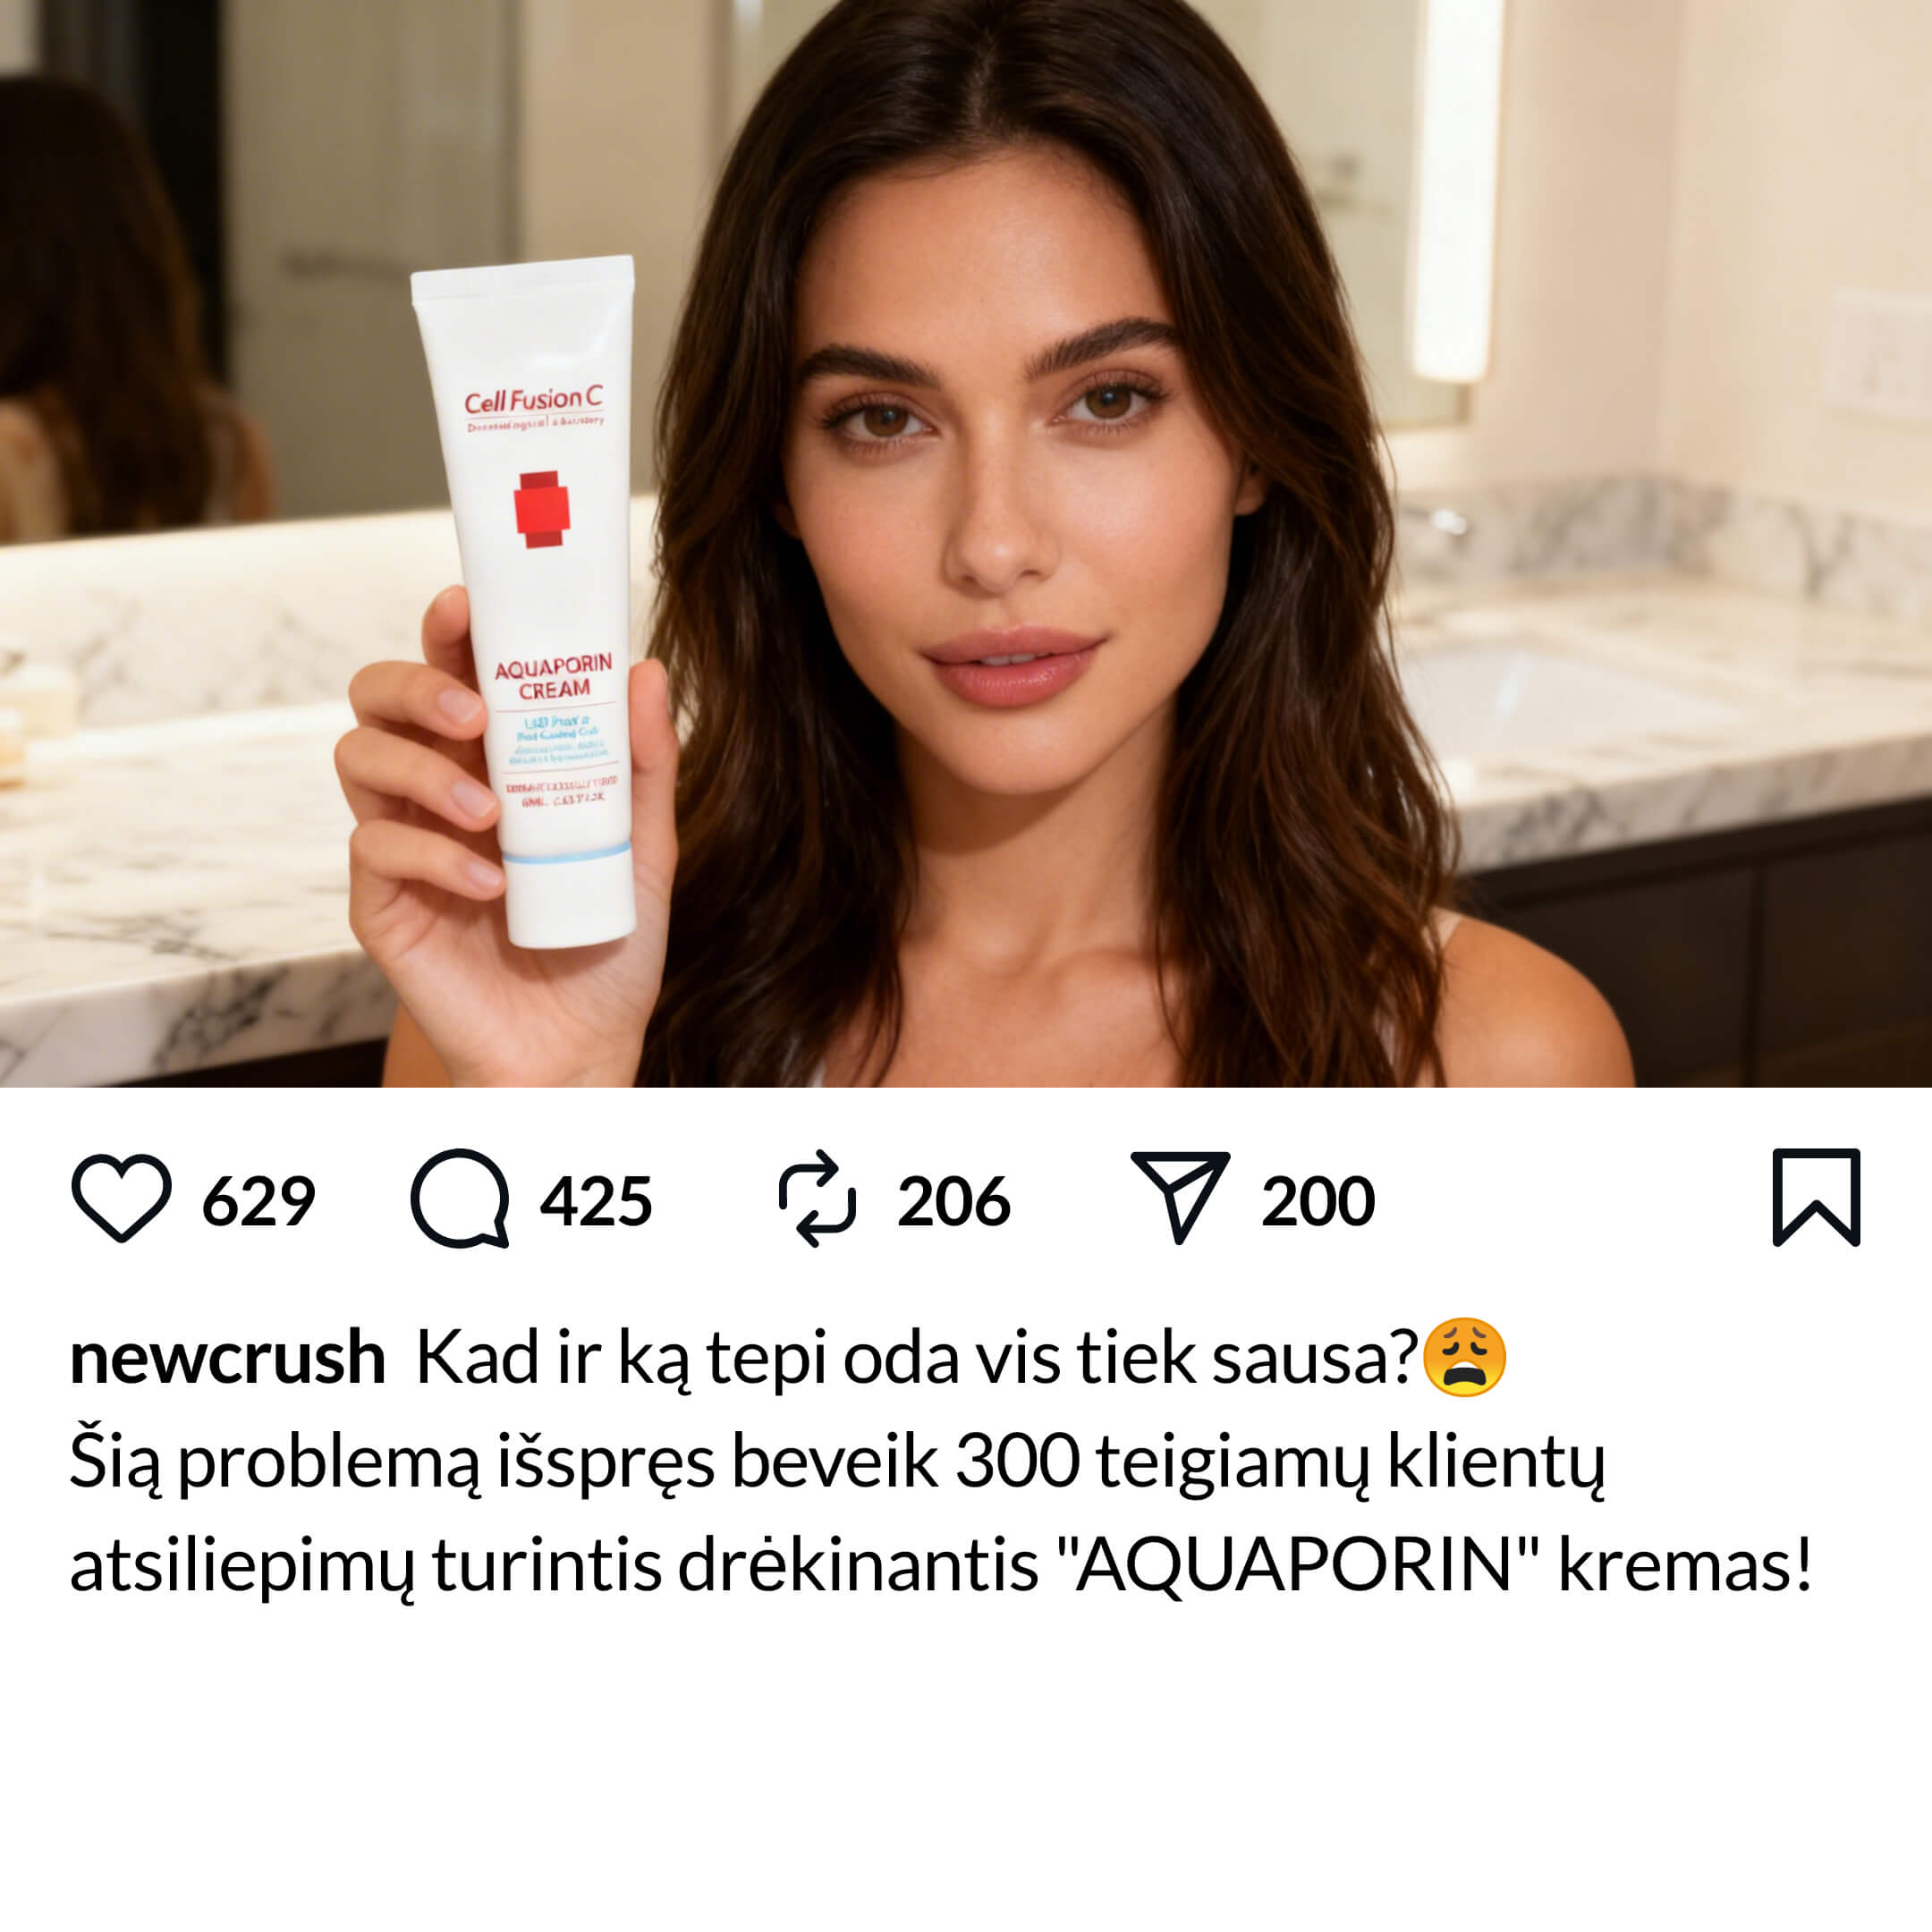
✕ Arm raised up - can't extend forward
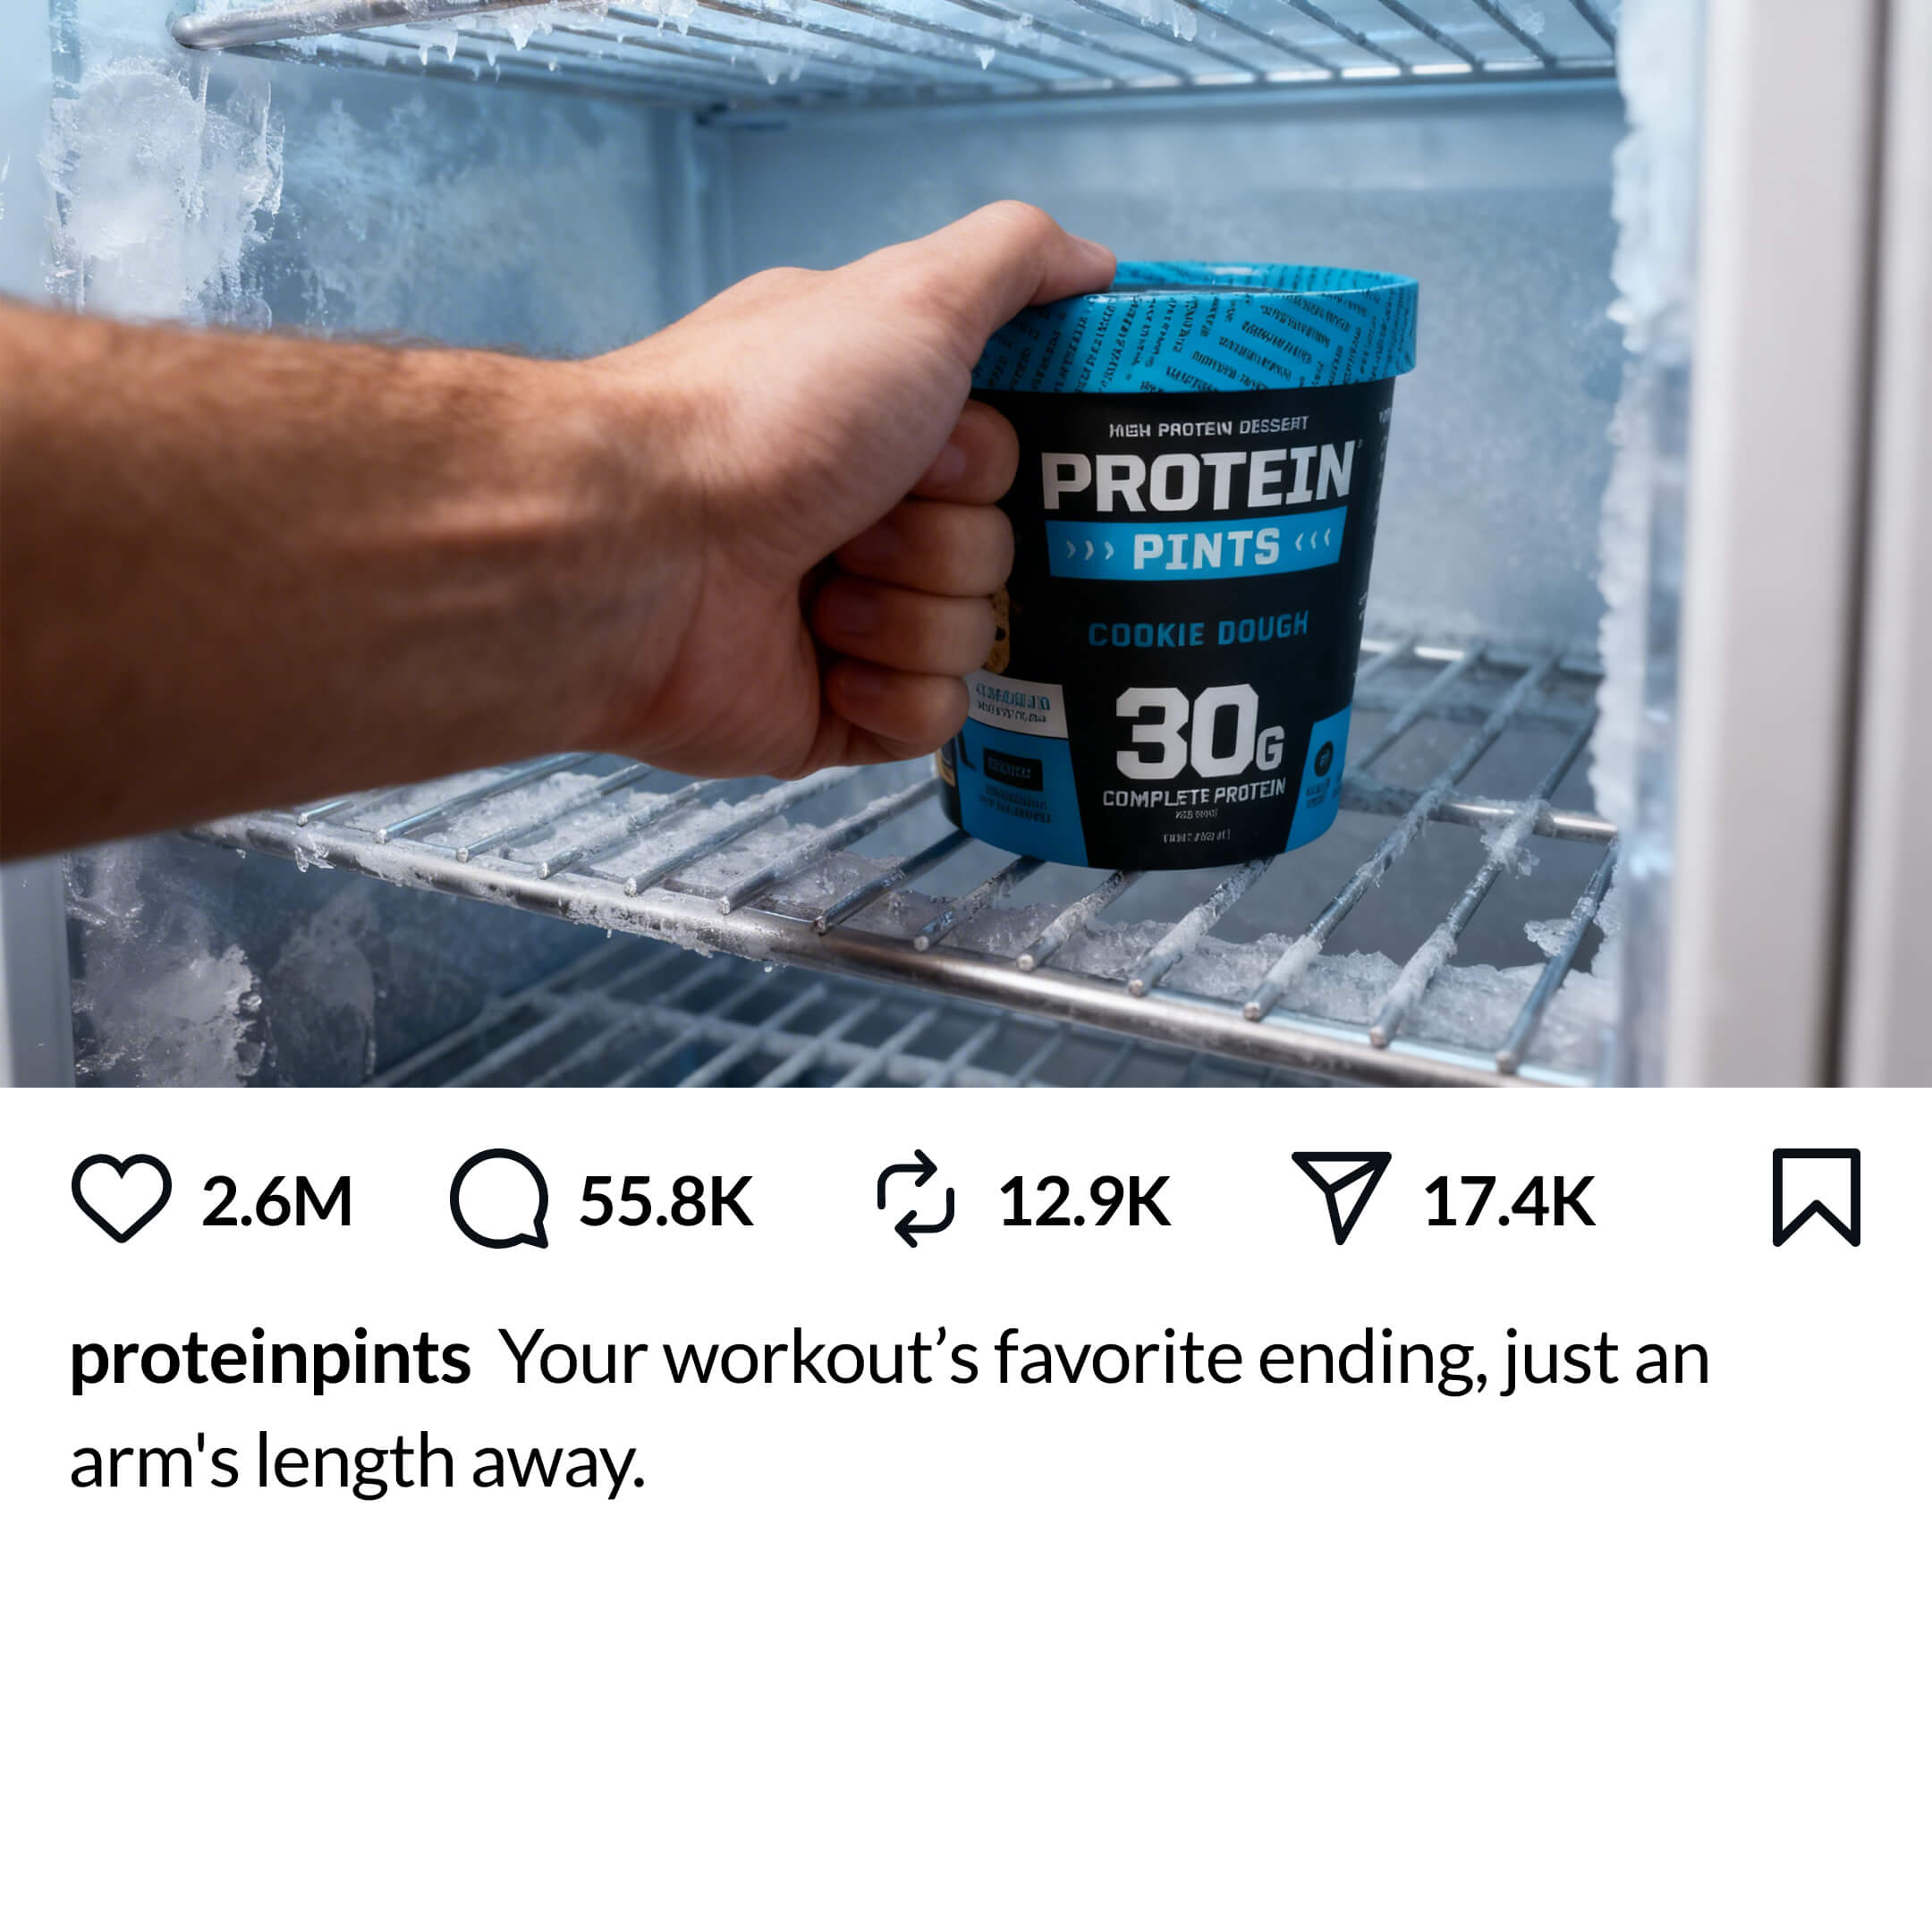
✕ Reaching away - arm would need to reverse
Add close up shot for hip-to-head framing (more space to allow a clean pop-out). Best for product shots.
Add full body shot. Best when holding a big enough product - small products held far back won't be clear when they pop out.
Scene to avoid · Framing too close
Only the face fills the frame.
If the camera is so close that only the face fills the frame, what exactly would pop out? A disembodied head flying toward the viewer isn't the effect you're after. The pop-out works best when there is adequate spacing (you can see the subject's upper body - at minimum their arms, torso and head - so there's something substantial to 'pop out').
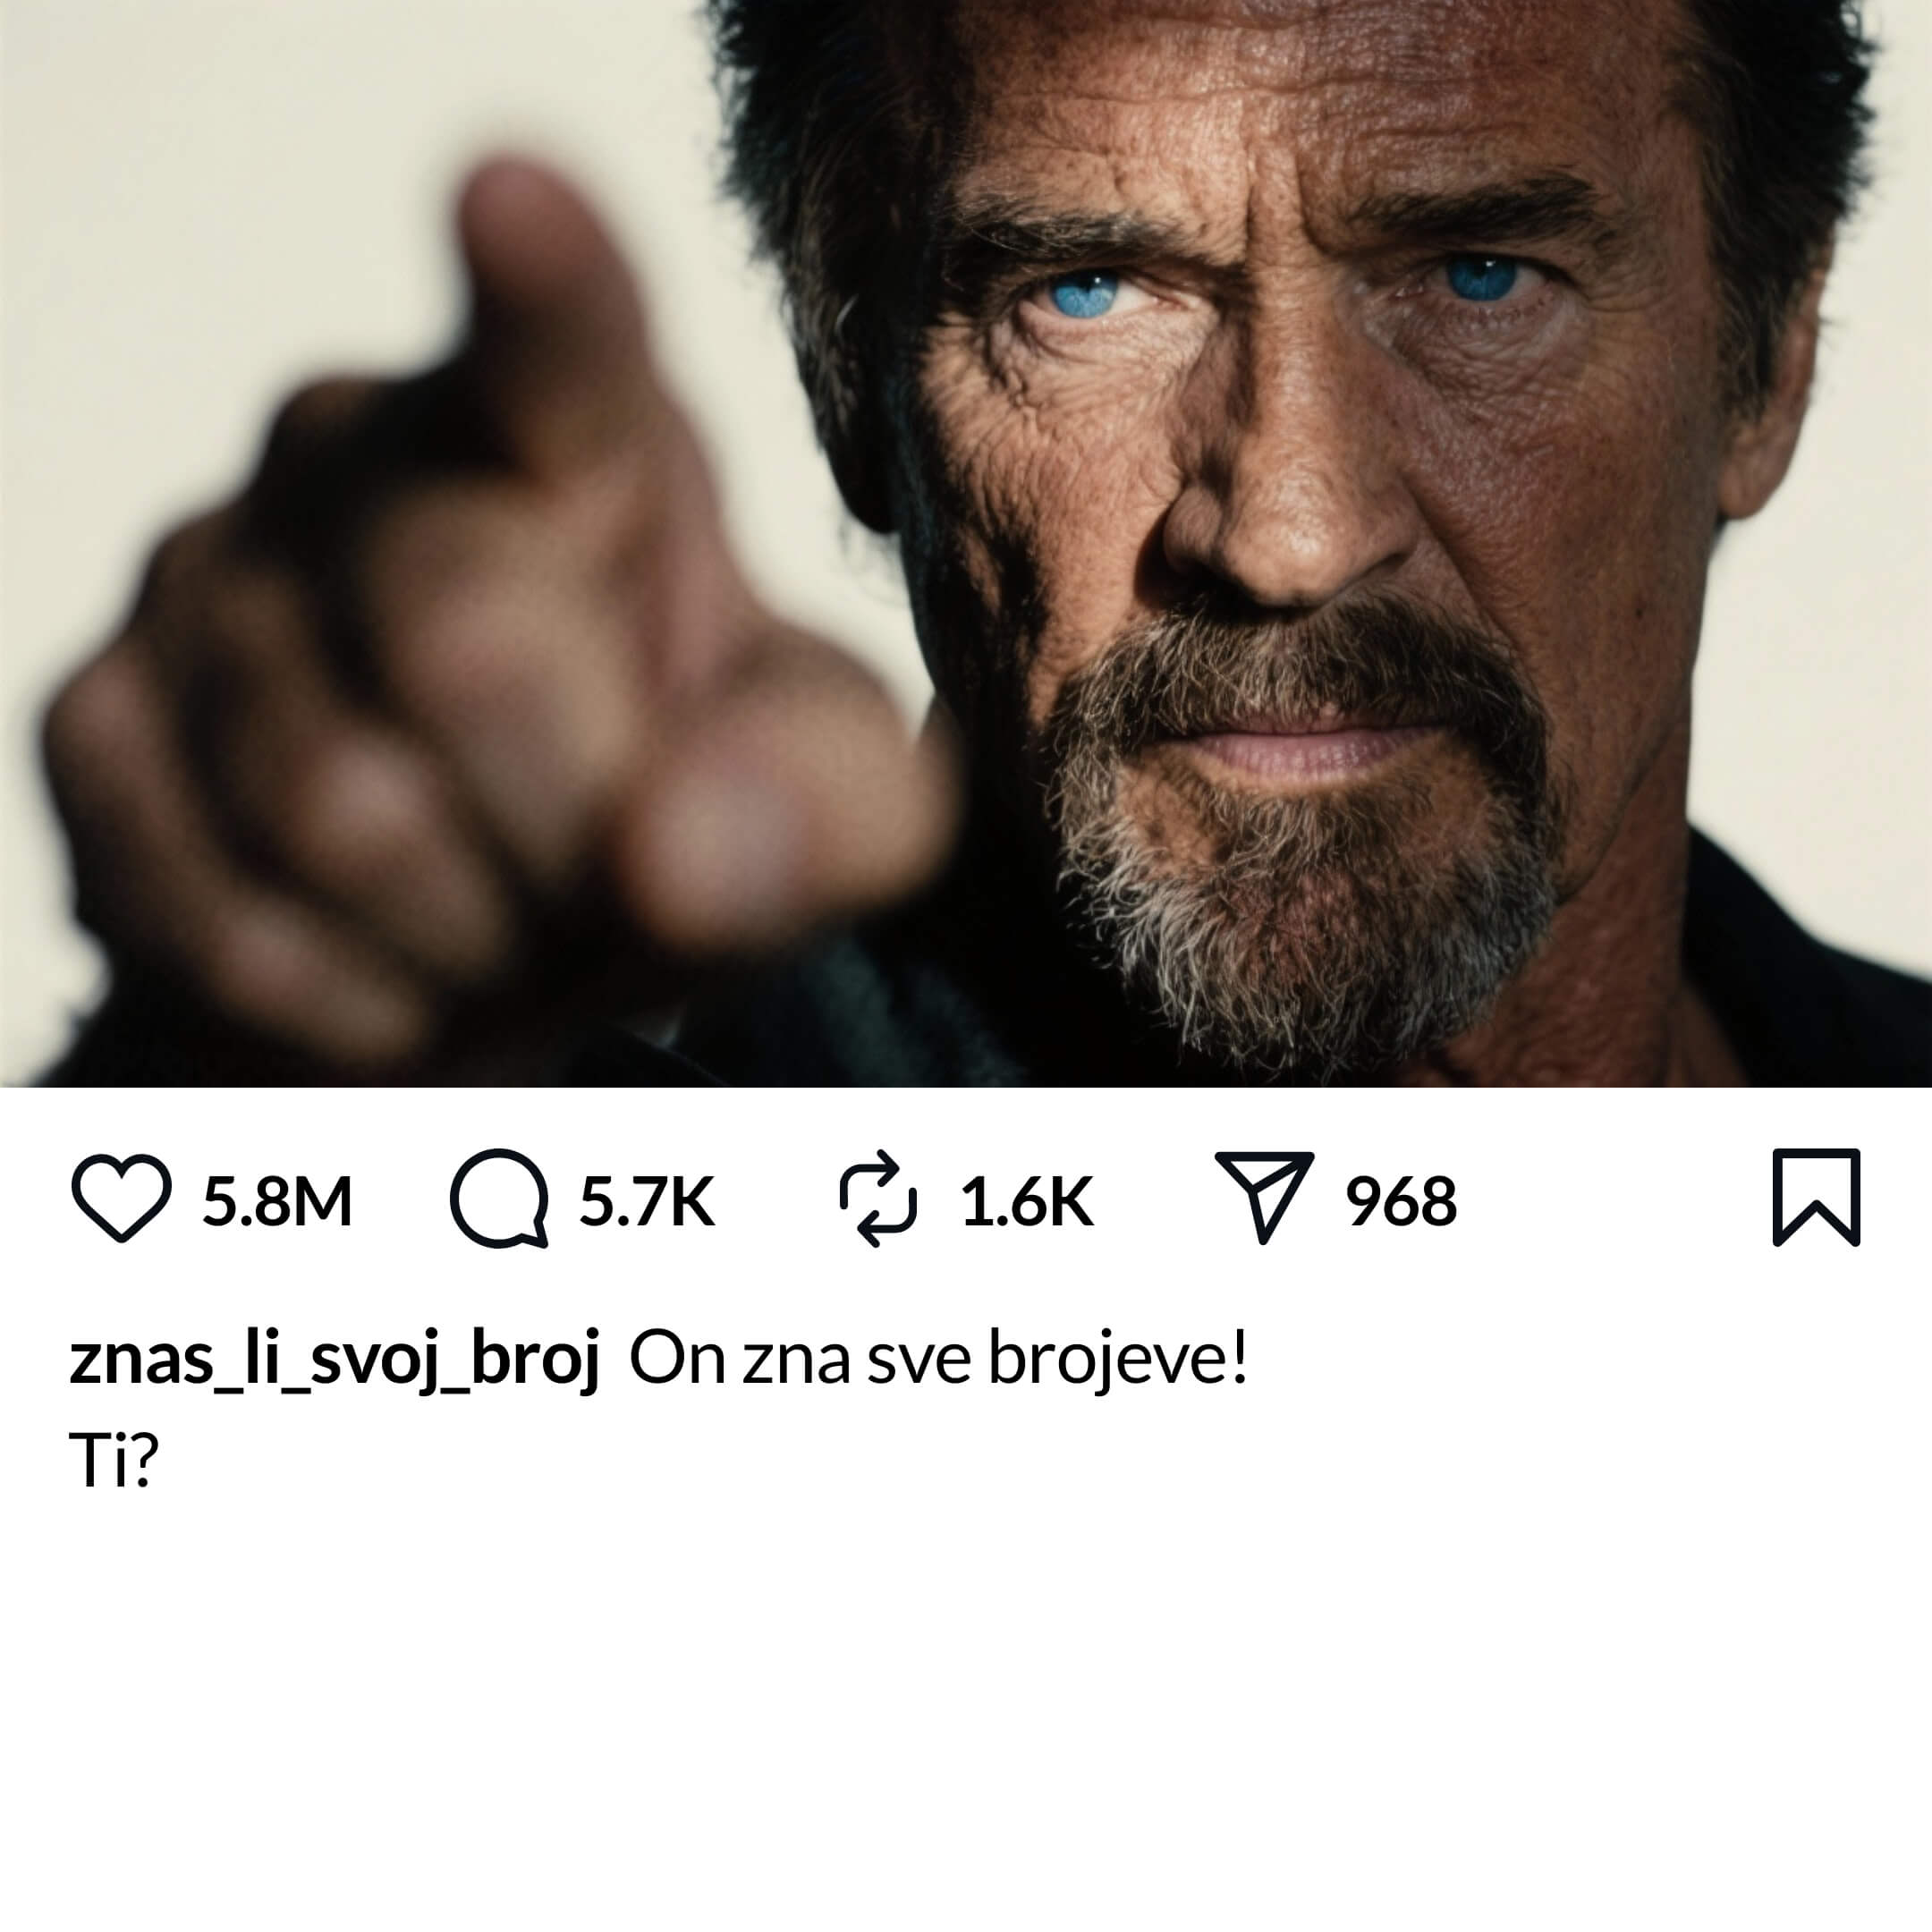
✕ Just a face - nothing to pop out
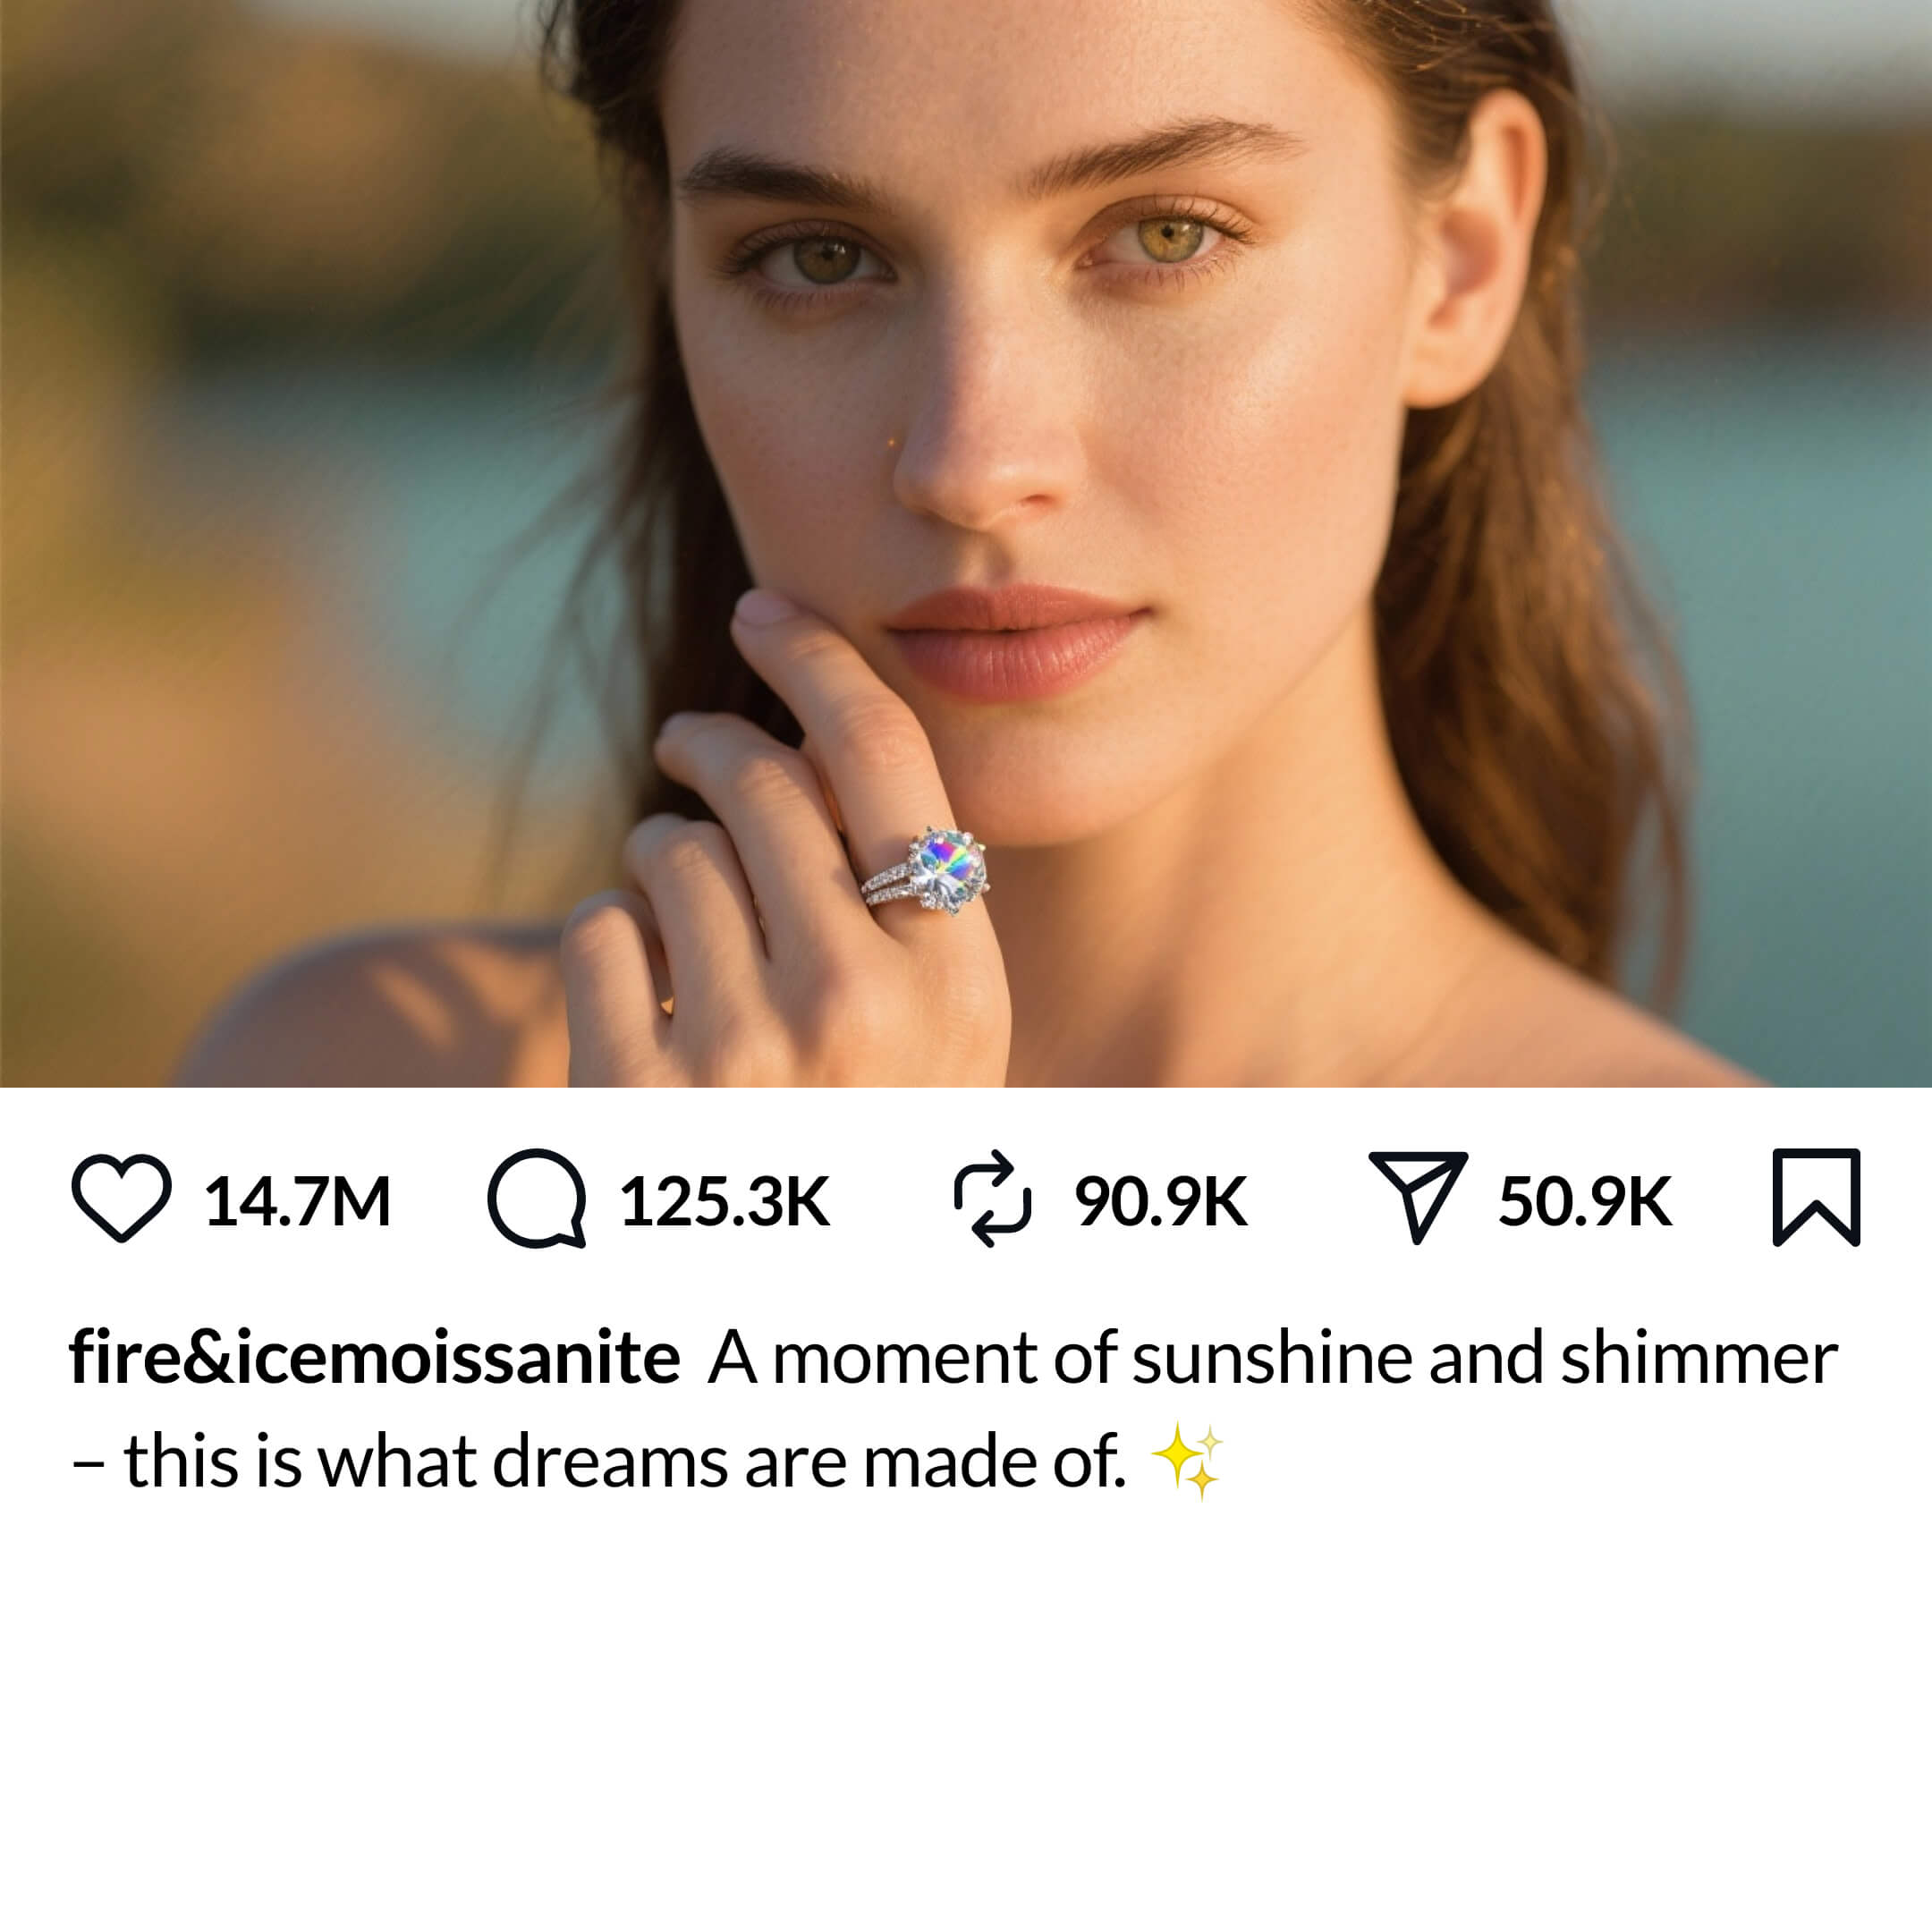
✕ Too tight - need to see body
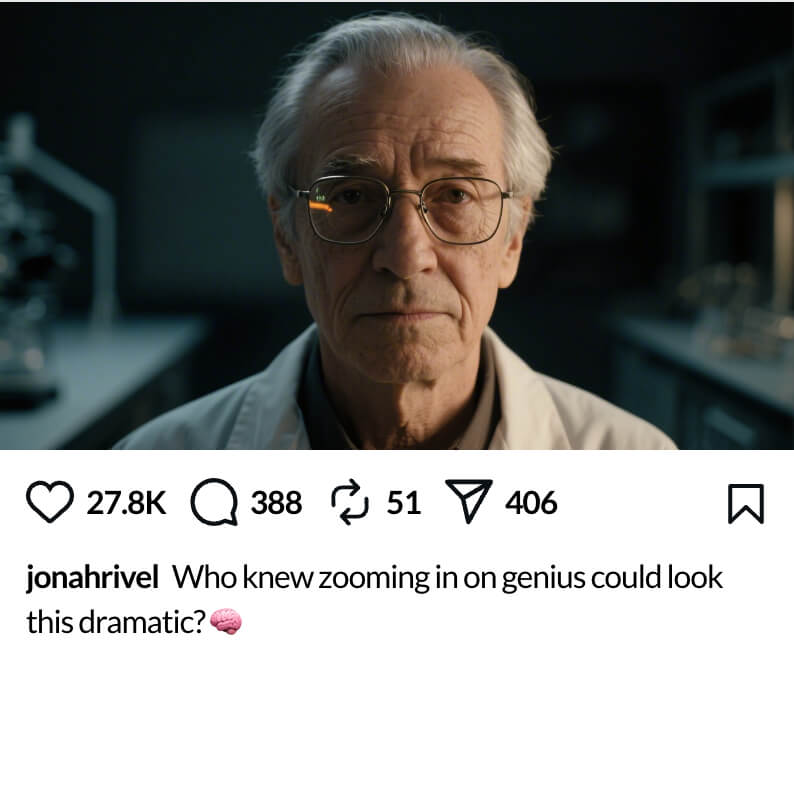
✕ Cropped - need more body visible
Add close up shot to your prompt to get hip-to-head framing.
Add full body shot to your prompt to get full body framing.
Still stuck? Contact [email protected] with your exact prompt and video name.
A few things to keep in mind:
- Your prompt defines the starting scene only - you can't control the animation or movement. The pop-out effect is applied automatically.
- AI video generation can be unpredictable with specific details like facial expressions. Simpler, focused prompts tend to give better results.
If every variation gives you the same unwanted result, that's usually a fundamental prompting issue - further regenerations are unlikely to fix it. You'll need to adjust your prompt or try a different type of video.
AI video generation is creative and unpredictable - sometimes it nails your vision, sometimes it interprets things differently. This is where multi-generation comes in. We give you multiple videos at no extra credits:
- Pick 2 videos - Get 2 videos, uses the same credits as 1 video
- Pick 4 videos - Get 4 videos, uses the same credits as 2 videos
Every video also includes 1 free regeneration. Review the variations and pick the one closest to what you're after, and disregard the ones which didn't work, as they don't cost any extra credits.
First - make sure you're using multi-generation. AI video generation is creative and unpredictable - sometimes it nails your vision, sometimes it interprets things differently. Between variations and free regenerations, most pop-out issues resolve themselves. We give you multiple videos at no extra credits:
- Pick 2 videos - Get 2 videos, uses the same credits as 1 video
- Pick 4 videos - Get 4 videos, uses the same credits as 2 videos
Every video also includes 1 free regeneration. Review the variations and pick the one closest to what you're after, and disregard the ones which didn't work, as they don't cost any extra credits.
If all of your videos fail to pop out, it's likely a prompting or framing issue. Check your scene preview for these common problems:
Good setup checklist:
- Subject is fully visible - not cut off or hidden
- Adequate framing - entire torso + head visible at minimum, or full body
- Props fully visible - if holding a sign, the entire object must be in frame
- Close enough to the frame edge to pop out within the 5-second video
- Nothing blocking the path forward (no desks, counters, steering wheels)
- Facing the camera - not sideways or facing away
Common failure points:
- Too many subjects / busy scene - keep it simple: one [subject] in [environment]
- White background - conflicts with the white social post area below. Use a contrasting background colour.
- Bad framing - too close (just a face) or too far back (subject is tiny)
Still stuck? Contact [email protected] with your exact prompt and video name.
Prompting guide: ai.breakoutclips.com
The prompt optimizer is a guideline - it flags common issues like missing subjects, action verbs, or obstructed positions, but it can't predict exactly how the AI will interpret and animate your scene.
AI video generation is creative and unpredictable - sometimes it nails your vision, sometimes it interprets things differently. This is where multi-generation comes in. We give you multiple videos at no extra credits:
- Pick 2 videos - Get 2 videos, uses the same credits as 1 video
- Pick 4 videos - Get 4 videos, uses the same credits as 2 videos
Every video also includes 1 free regeneration. Review the variations and pick the one closest to what you're after, and disregard the ones which didn't work, as they don't cost any extra credits.
If all variations have the same issue, it's usually a fundamental prompting issue - further regens are unlikely to fix it. You'll need to adjust your prompt.
Still stuck? Contact [email protected] with your exact prompt and video name.
AI video generation is creative and unpredictable - sometimes it nails your vision, sometimes it interprets things differently. This is where multi-generation comes in. We give you multiple videos at no extra credits:
- Pick 2 videos - Get 2 videos, uses the same credits as 1 video
- Pick 4 videos - Get 4 videos, uses the same credits as 2 videos
Every video also includes 1 free regeneration. Review the variations and pick the one closest to what you're after, and disregard the ones which didn't work, as they don't cost any extra credits.
If all your variations have the same unwanted element, that's usually a fundamental prompting issue - further regenerations are unlikely to fix it. Adjust your prompt or try a different approach.
Still stuck? Contact [email protected] with your exact prompt, video name, and what elements appeared that shouldn't have.
Yes. You can bring up to five of your own images into a single scene - photos, product shots, logos, anything you want the AI to work with.
Where to upload:
Start a new AI video, or remix one from the Community Showcase. At the Layout step, open the Edit Scene Preview sidebar on the left. At the top you'll see the prompt that made your current preview, with an Upload Image option below it - click the box and choose your photos, up to five.
Tag your images in the prompt:
As you upload, each image is tagged automatically - @img1, @img2, and so on - shown right on the image. Use these tags in your prompt to tell the AI exactly where each image belongs. Type @ and pick an image from the dropdown, or click an uploaded image to drop its tag straight into the prompt.
Examples:
- Logo on a product: "Pint of beer, with the logo in
@img1printed on the glass." - Two images at once -
@img1a house,@img2a person: "Use the house in@img1as the background, with the person in@img2holding a For Sale sign."
The more specific your prompt, the better the result. When you're ready, choose how many scene previews to generate - a few at once makes it easy to pick a favorite - then click Regenerate Scene. Once they're ready, click the one you like best, and your images are part of the scene.
Full feature guide: breakoutclips.com/ai-video-maker/guide
Your logo has been saved to your Brand Kit, which is used in your social post design layout. It doesn't get automatically added to your scene, because not everyone wants a logo in every scene they create - so you need to add it at the Prompt step.
Here's how the two systems work:
- Brand Kit (Automatic) - Your Brand Kit logo is automatically applied to all social post layouts (Facebook, LinkedIn, Instagram layouts). You upload once, it's used for all future videos.
- Animation Scene (Manual) - Adding your logo inside the actual animation scene is handled separately. We don't automatically inject your logo into the scene, because not everyone wants their logo baked into every animation.
Why two different systems? Flexibility. Your Brand Kit handles the social post layouts automatically (Facebook, LinkedIn, Instagram layouts), while scene logos give you control over whether your logo appears in the actual animation. Some videos look great with a logo, others look better without one.
To add your logo inside the scene:
- Click the "Prompt" breadcrumb
- Upload your logo in the prompt box
- Resubmit your prompt
- Check the scene preview - your logo should now appear
Video walkthrough:
That logo is part of the original prompt, not from your Brand Kit. When you remix, the original creator's branding (logos, sign text, anything in quotation marks) stays in the prompt until you manually replace it.
How to fix it:
- Click the "Prompt" breadcrumb to go back
- Find the uploaded logo image or text inside quotation marks (e.g. "FOR SALE")
- Delete it
- Upload your own logo or replace the text with yours
- Resubmit the prompt
Video walkthrough:
Logos follow the same rules as text - anything you want rendered with 100% clarity needs to be big, bold, and clearly visible in the scene preview before you animate. If you're squinting to see it or it looks small in the preview, the AI will struggle too.
For logos specifically:
- Upload your logo at the Prompt step and reference its tag (e.g.
@img1) in your prompt - Specify placement in your prompt (e.g. "holding a sign with the logo in
@img1") - Make sure the logo area is large enough in the frame to be legible
- Check your scene preview before animating
Common logo mistakes:
- Logo on a business card - the card itself is too small
- Logo in the distant background - too far from camera
- Logo as a small element among many - gets lost in the scene
- Logo partially hidden behind the subject - the AI will try to reconstruct it and the result will look wrong
The edge case: logos with a high text density. If your logo has small text - a tagline beneath the brand name, a slogan, or just a long brand name that has to shrink to fit - it often becomes too tiny to render clearly once placed in a scene. The AI is then forced to guess at that text, and as a result it may look distorted.

Text-heavy logo.
Brand name is fine because it's big, bold and visible. The tagline below it isn't - too small to render cleanly once placed in a scene.

Tagline is too small.
Once placed in the scene, the tagline is too small to be readable. When the character comes forward, the AI can't bring the small text with it - the brand name survives, but the tagline garbles.

Big bold text, no slogan.
Drop the tagline. Either upload a slogan-free version of your logo, or skip uploading and just put the brand name in quotes in your prompt.
Example prompt using the brand name in quotes instead of uploading the full logo:
Still stuck? Contact [email protected] from the email associated with your Breakout Clips account, and include the following:
- Your video ID
- The exact prompt you used
- A screenshot of the issue
- An explanation of what went wrong
- Whether you used multi-generation, and if so, how many variations had the issue
This information upfront gets you a quicker resolution.
Your scene is defined at the Prompt step - so if you want to change anything in the scene, that's where you go.
- Click the "Prompt" breadcrumb to go back
- Find the text in the original prompt (it should be inside quotation marks)
- Replace it with the text you want
- Resubmit the prompt
Tips for getting text right:
- Always wrap text in
"quotation marks"so the AI knows exactly what to display - Keep it short - 2 to 4 words max. More words = harder to render clearly
- Use "big" before the object and "big bold" before the text (e.g. a big sign with big bold text
"SOLD")
There are two primary reasons text can change during animation:
1. Text is too small, unclear, or not fully visible in the scene preview
As the AI animates and scales up, it has to reconstruct what it sees, and unclear text often becomes distorted. Common examples where this goes wrong:
- Business cards - the card itself is so small that any text on it is tiny
- Book covers - subtitles and author names are too small to read
- Flyers and brochures - packed with multiple text elements at small sizes
- Distant signs or billboards - text is too far from camera to be legible
- Product labels - text on bottles, jars, or packaging is often too small to render clearly
To avoid this:
- Keep text short - 2 to 4 words max
- Make the text big, bold and visible
- Always wrap text in
"quotation marks"so the AI knows exactly what to display - Use "big" before the object (e.g. "a big sign") and "big bold" before the text (e.g. big bold text
"SOLD")
2. Text is positioned behind the subject and gets obstructed
When text is a background element (e.g. on a wall, billboard, or banner behind the subject), the subject may partially cover it. When the subject pops out, the AI tries to fill in what was hidden behind them - which makes the text look distorted or completely different. Add "Make sure the text is not obstructed by the primary subject, and is fully visible, in big bold letters" to your prompt.
Rule of thumb: If you're squinting to read it in the scene preview, edit your prompt or regenerate your scene until it's big, bold and visible. Scene previews do not use any credits - edit your prompt or regenerate until everything is clearly visible.
Still stuck? Contact [email protected] from the email associated with your Breakout Clips account, and include the following:
- Your video ID
- The exact prompt you used
- A screenshot of the issue
- An explanation of what went wrong
This information upfront gets you a quicker resolution.
Unfortunately not - with AI video generation, the text, images, and motion are all generated together in a single pass rather than as separate layers. There's no way to freeze the animation and just swap one element - any edit means a fresh render with a new, unique animation. This is how all AI video platforms work (HeyGen, Google Veo, and others all work the same way).
To change text, it depends on where the text is:
- Text inside the scene (signs, billboards, t-shirts) - Go back to the Prompt step, find the text, replace it, and resubmit
- Text in the social post caption (username, caption, reactions) - Edit at the Layout step
Every change requires a re-render. This is why you get a scene preview first - so you can double-check everything before using credits.
Director Mode lets you direct how your scene plays out and ends. Instead of leaving the animation to chance, you describe the ending yourself - "it meows and waves at the camera", "he spray paints the wall", "she hands the viewer the toothbrush" - anything you can put into words.
Where to find it
It lives at the Animate step:
- Select it from the "Select mode" drop-down.
- Type your custom ending inside the "How would you like this scene to end?" box, or tap a smart suggestion - they're auto-tailored to your scene. (Remixing a video? This field may be pre-filled with the original creator's ending - edit or amend as needed.)
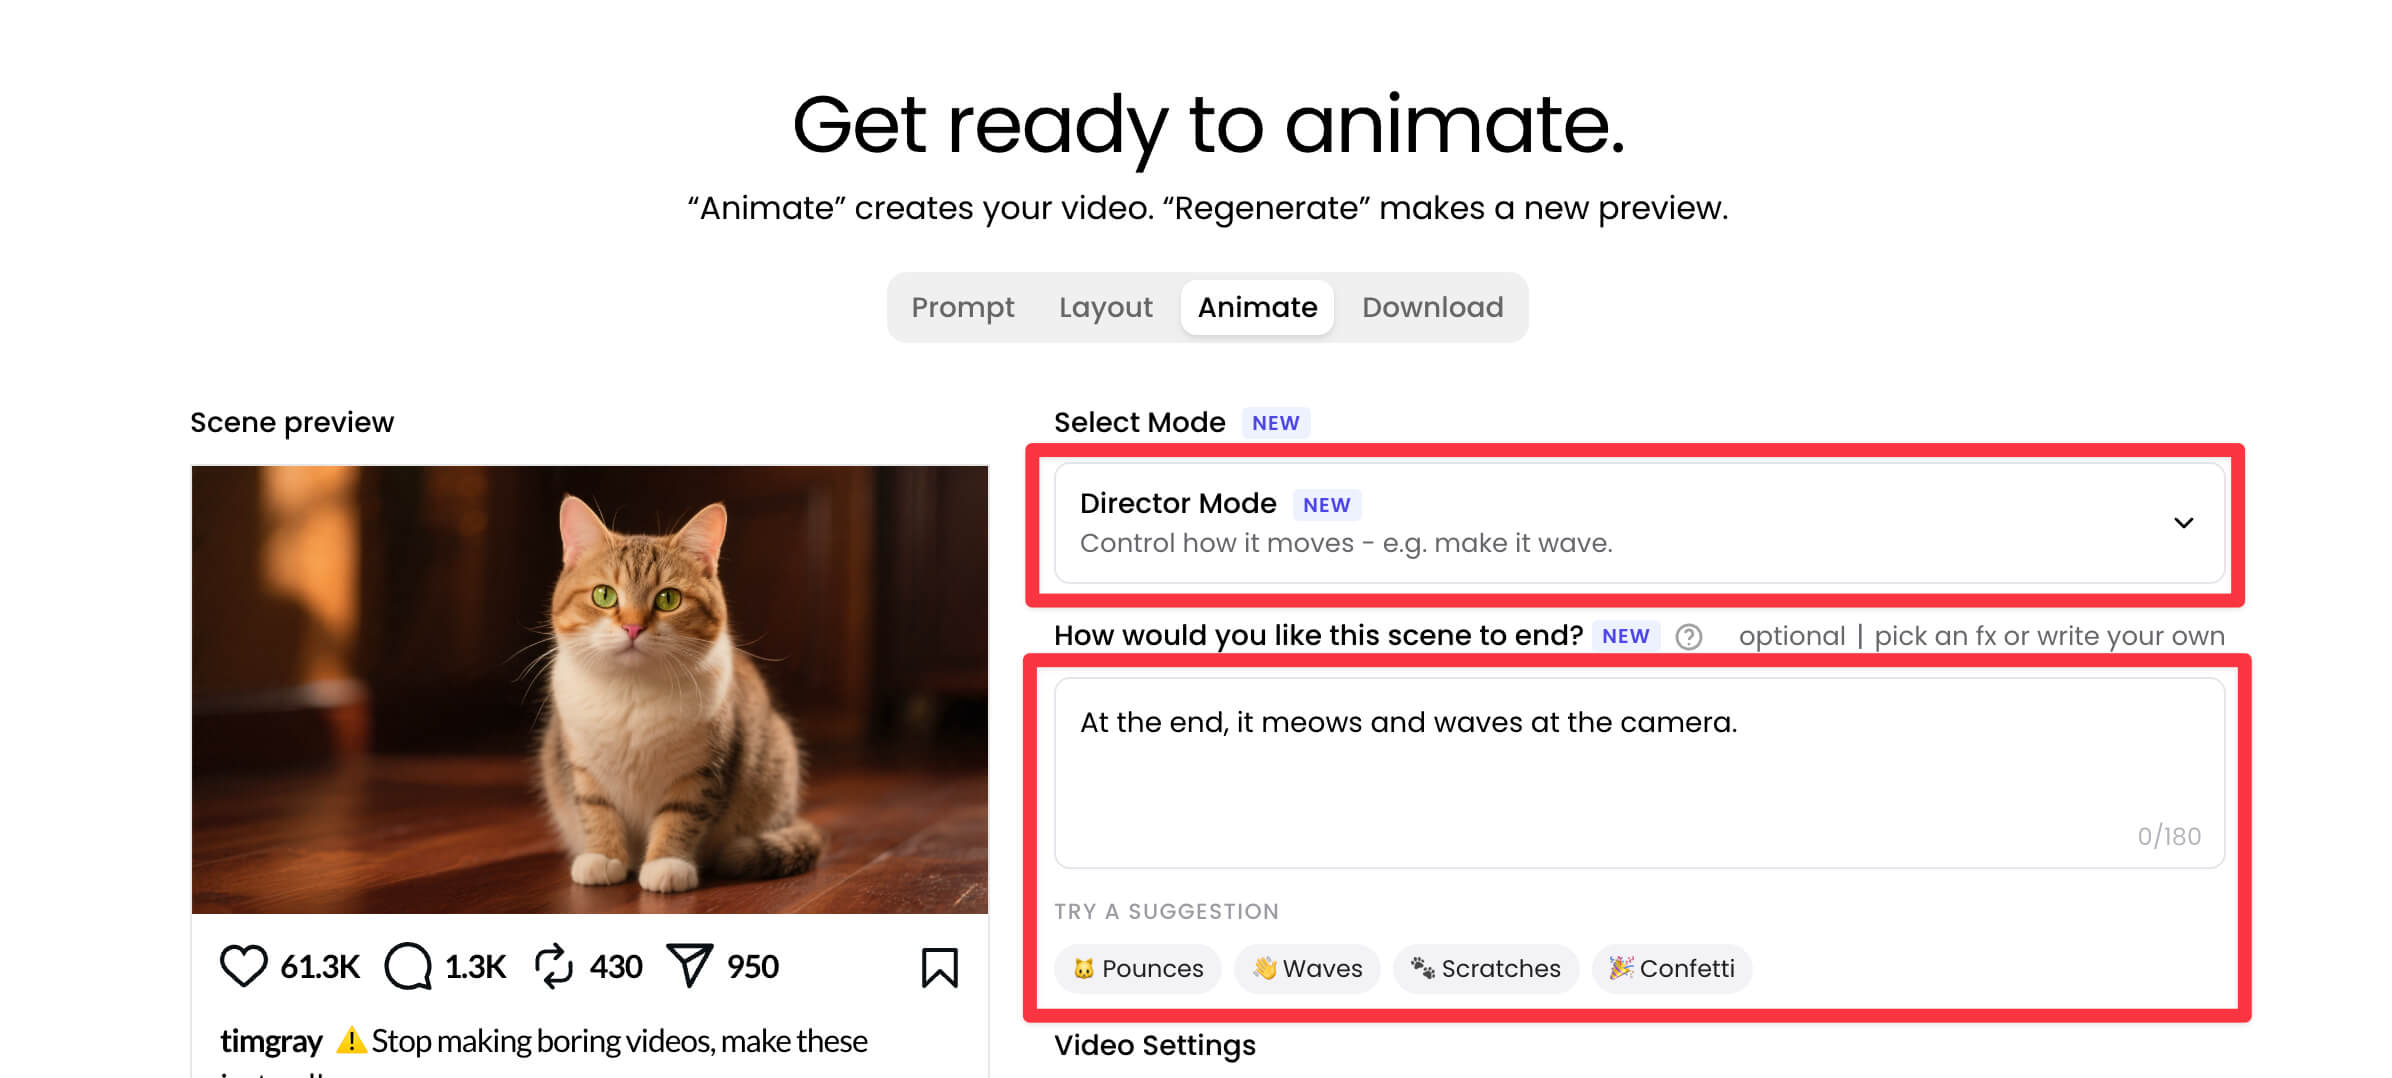
What you get with it:
- Audio baked in - every scene comes with sound; choose SFX or Music to match the mood.
- Faster renders - iterate without losing your train of thought.
- No extra credits - Director Mode adds on top of everything you already have. Benefit from multi-generation, 1 free regeneration per video, etc.
They do two different jobs:
- Scene preview prompt (the first Prompt step) - builds your static scene: your subject, the background, and any text or logos. The AI animates from this scene - so make sure it has everything you want in your final video. Don't describe action here - action belongs in the custom ending prompt.
- Custom ending prompt (the "How would you like this scene to end?" box - at the Animate step) - directs the motion: what your subject does in the scene.
How to use the custom-ending prompt: look at your scene preview, then describe what the things in it do. "The cat waves a paw at the camera" is plenty. That's why the ending box is only 180 characters - your scene is already set. All it needs is the action. You never need to repeat your scene prompt here.
Write your ending like you're explaining it to a five-year-old - step by step, in order, with details about what each thing does.
- Vague: "He pulls out a gem."
- Better: "At the end, he draws a circle on the bottom area, and it turns into a wormhole. He pulls out a gem with green smoke coming out of it."
The more sequence you give it, the more it can choreograph. Specify where things happen, what they do, and in what order. See 26 real prompts and their endings ↗
Ideas to get your creative juices flowing
- Your subject - "At the end, the cat meows and waves at the camera."
- Environment effects (FX) - "Snow scatters as Santa lands."
- Screen FX - "He knocks on the camera lens and it cracks."
- Reveals - "He takes off his hat, reaches in, and pulls out a white rabbit."
- Handovers - "She brushes her teeth, then hands the viewer the toothbrush."
At the Animate step (with Director Mode selected), you'll see a Sound button.
By default, sound effects are added to your video automatically - so every video comes with sound out of the box.
To choose music instead:
- Click the Sound button.
- Select the Music option.
- A new field appears - type the kind of music or sound you want.
Describe a genre or a sound, not a specific song:
- "Add ambient music to my video."
- "Add EDM dance music to my video."
- "Seagull noises as the waves crash over the bottom area."
A couple of things to know:
- Voice-overs aren't supported in the music field - it's for music and sound effects only.
- Want a specific track, or a voice-over? Keep the default Sound option - your video is created with sound effects only, no music. Then download the video file from Breakout Clips and import it into an editor like Canva or Veed.io to layer in your own music or voice-over.
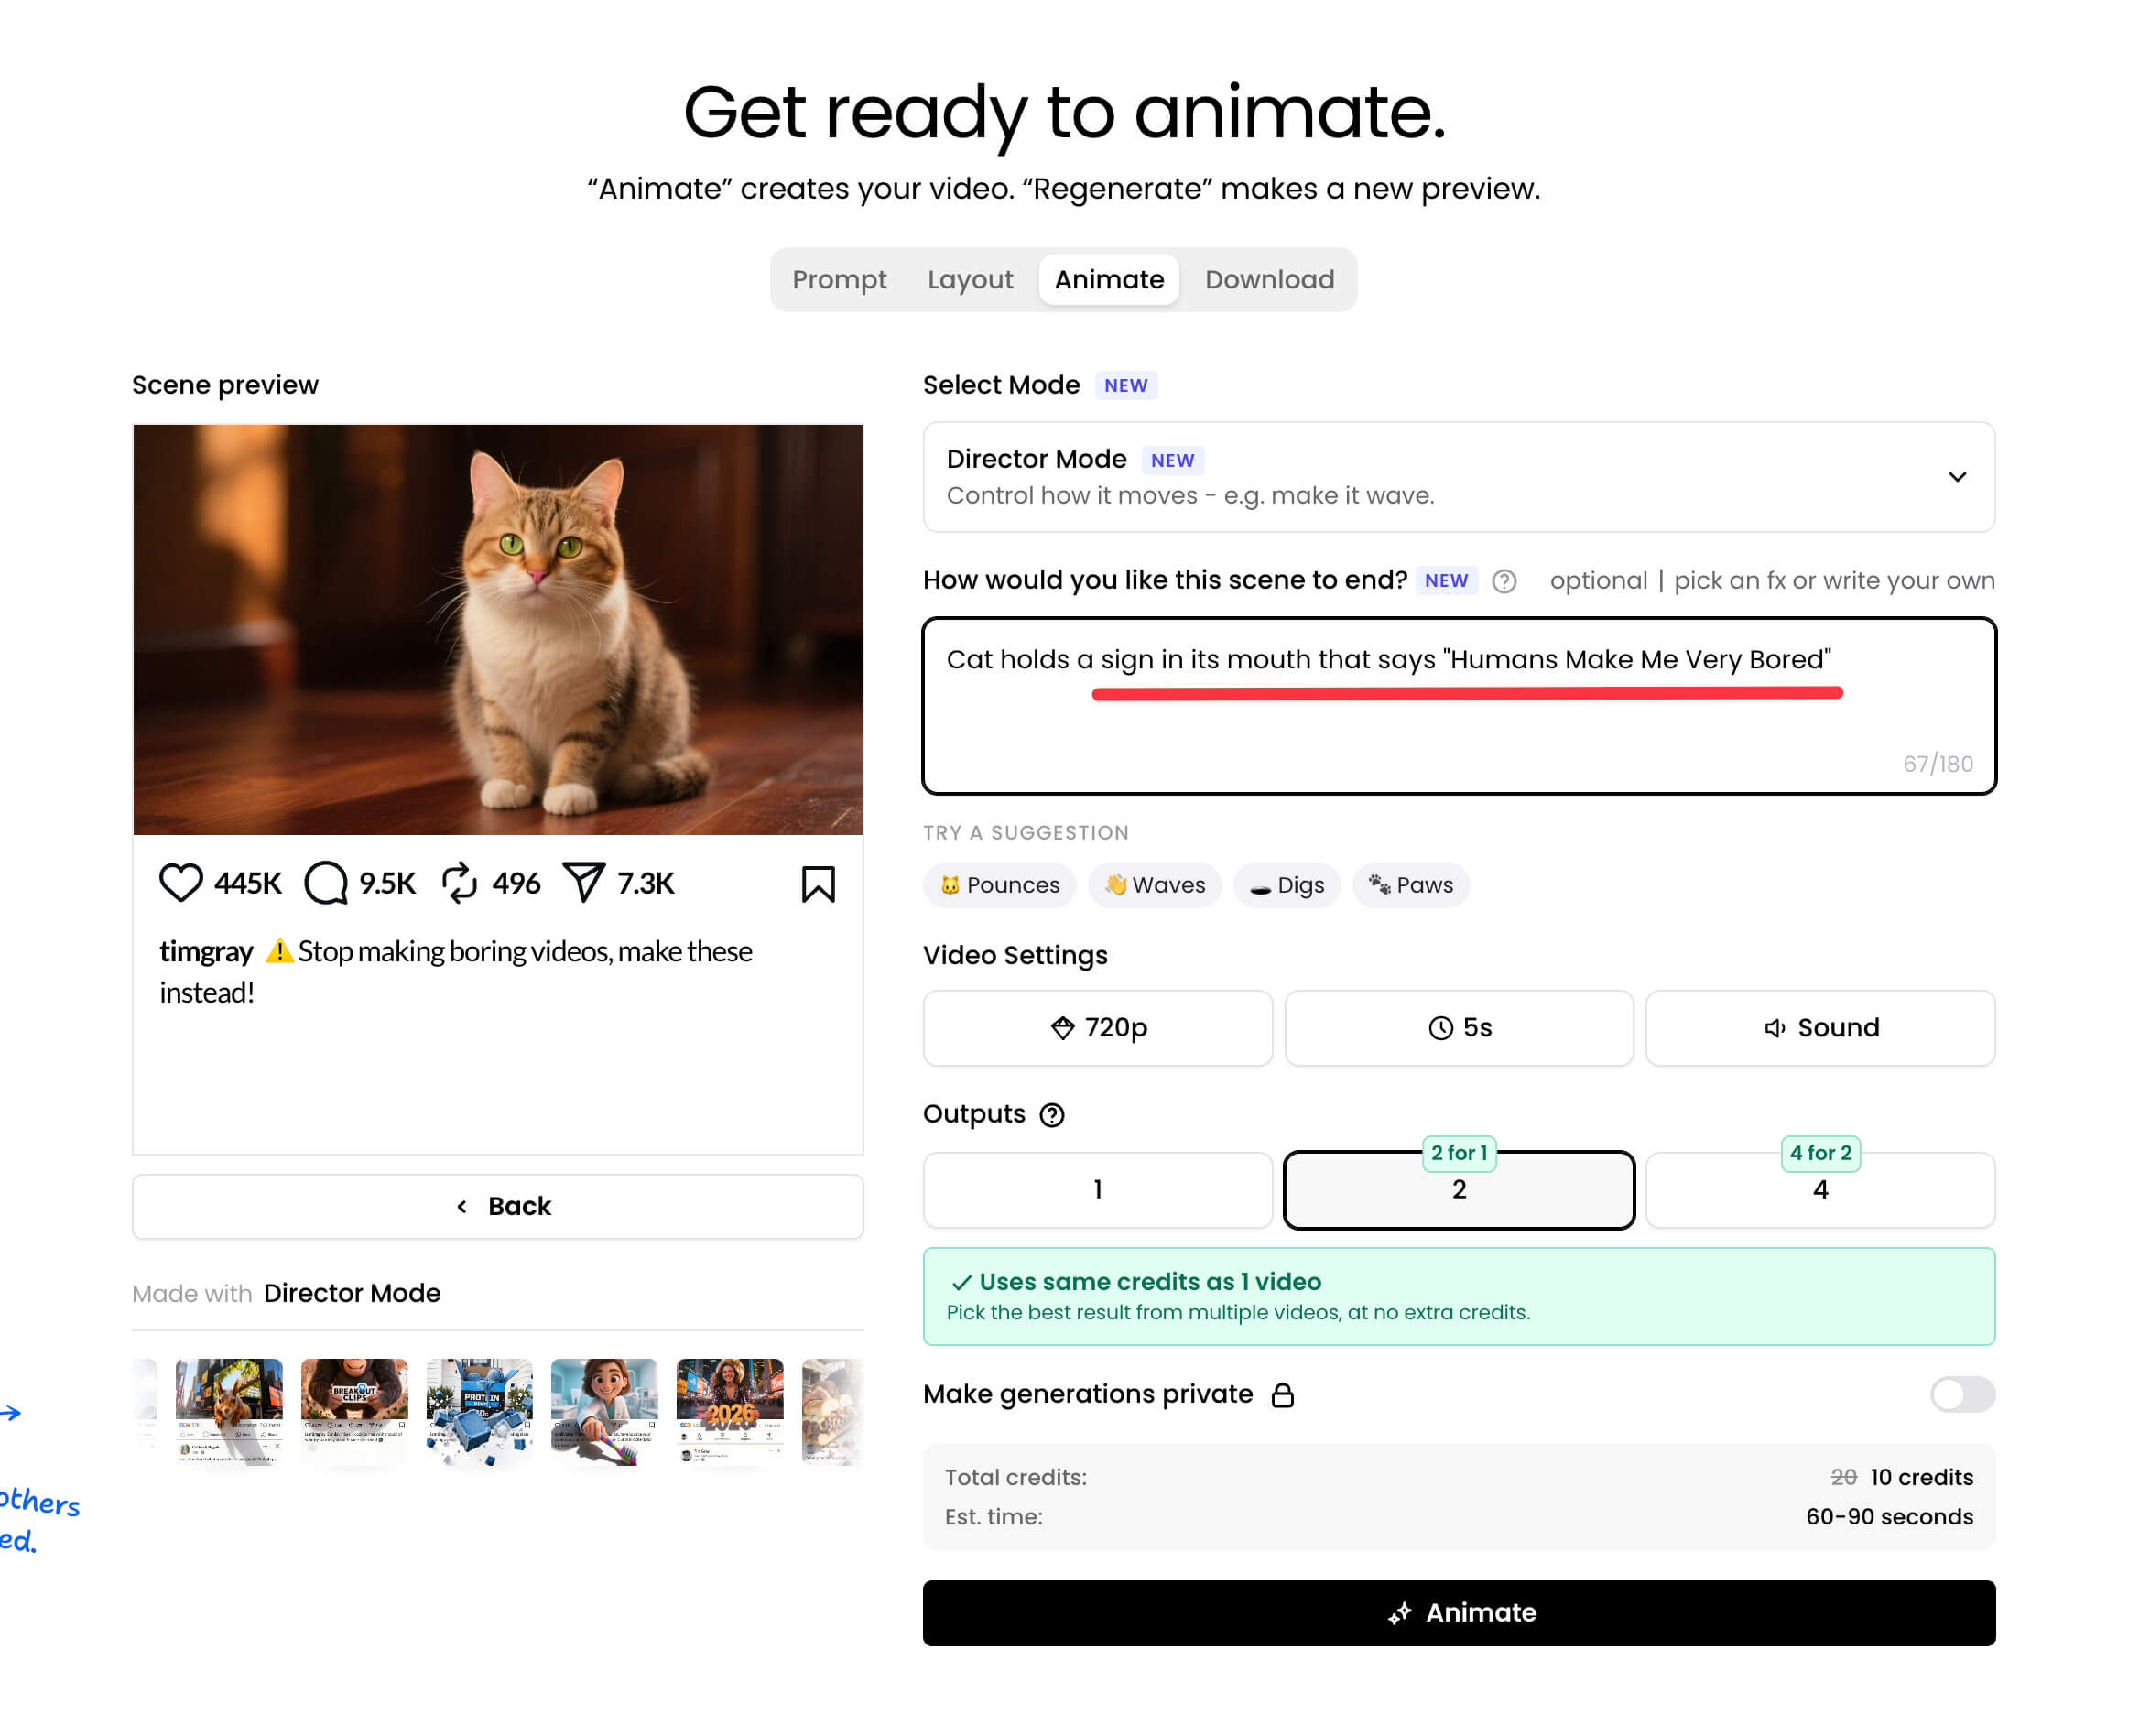
Your custom ending is asking the AI to invent text that doesn't exist anywhere in your video yet. When text isn't in your scene preview presented to you prior to animating, the AI has nothing to copy from - it has to make it up, letter by letter. This can lead to wrong words, incorrect spelling, mangled letters, or spacing that drifts from what you typed.
If you have a healthy credit balance, and don't mind burning some credits, go for it - between multi-generation and free regenerations, you'll usually land a clean take. If you're on limited credits (say, trying things out on the Starter Plan), there's a more consistent way:
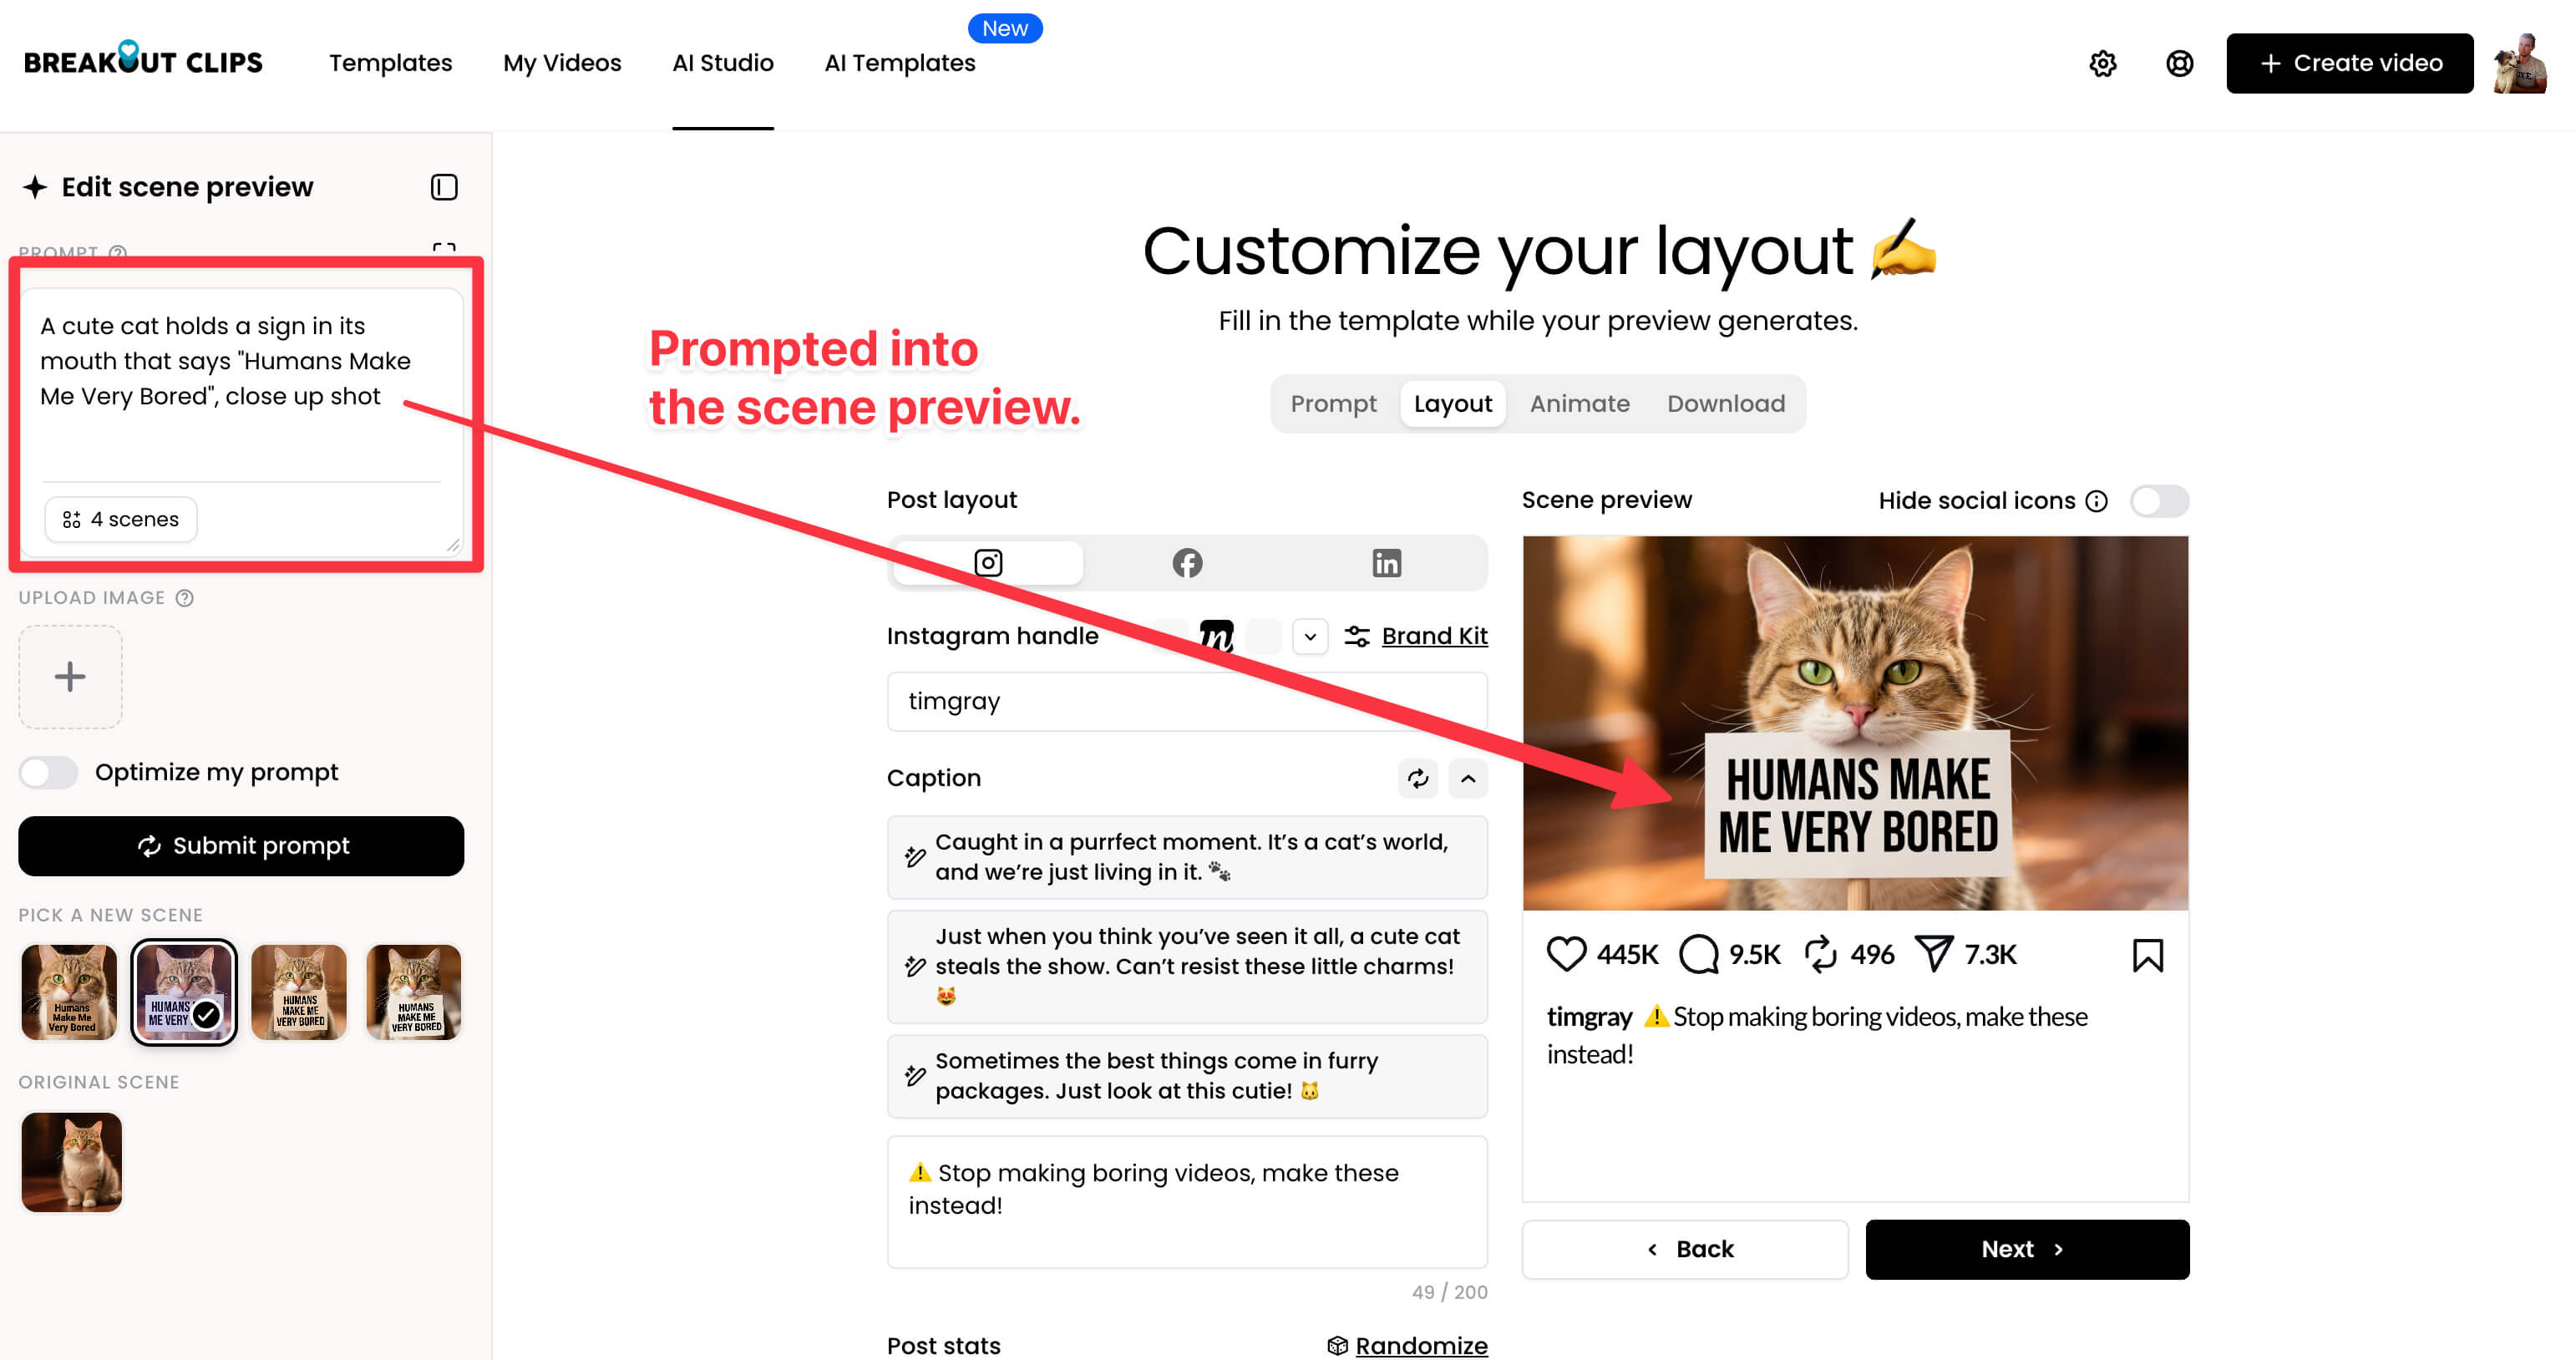
1. Put your text in the scene itself
The scene preview is what the AI animates from. If your text is already there - on a sign, a banner, or in the caption area - the AI simply carries it through. Nothing to invent, nothing to distort (just ensure the text you want brought forward is big, bold and visible so it comes through clearly).
See what not to do (text invented at the end) View ▾Hide ▴
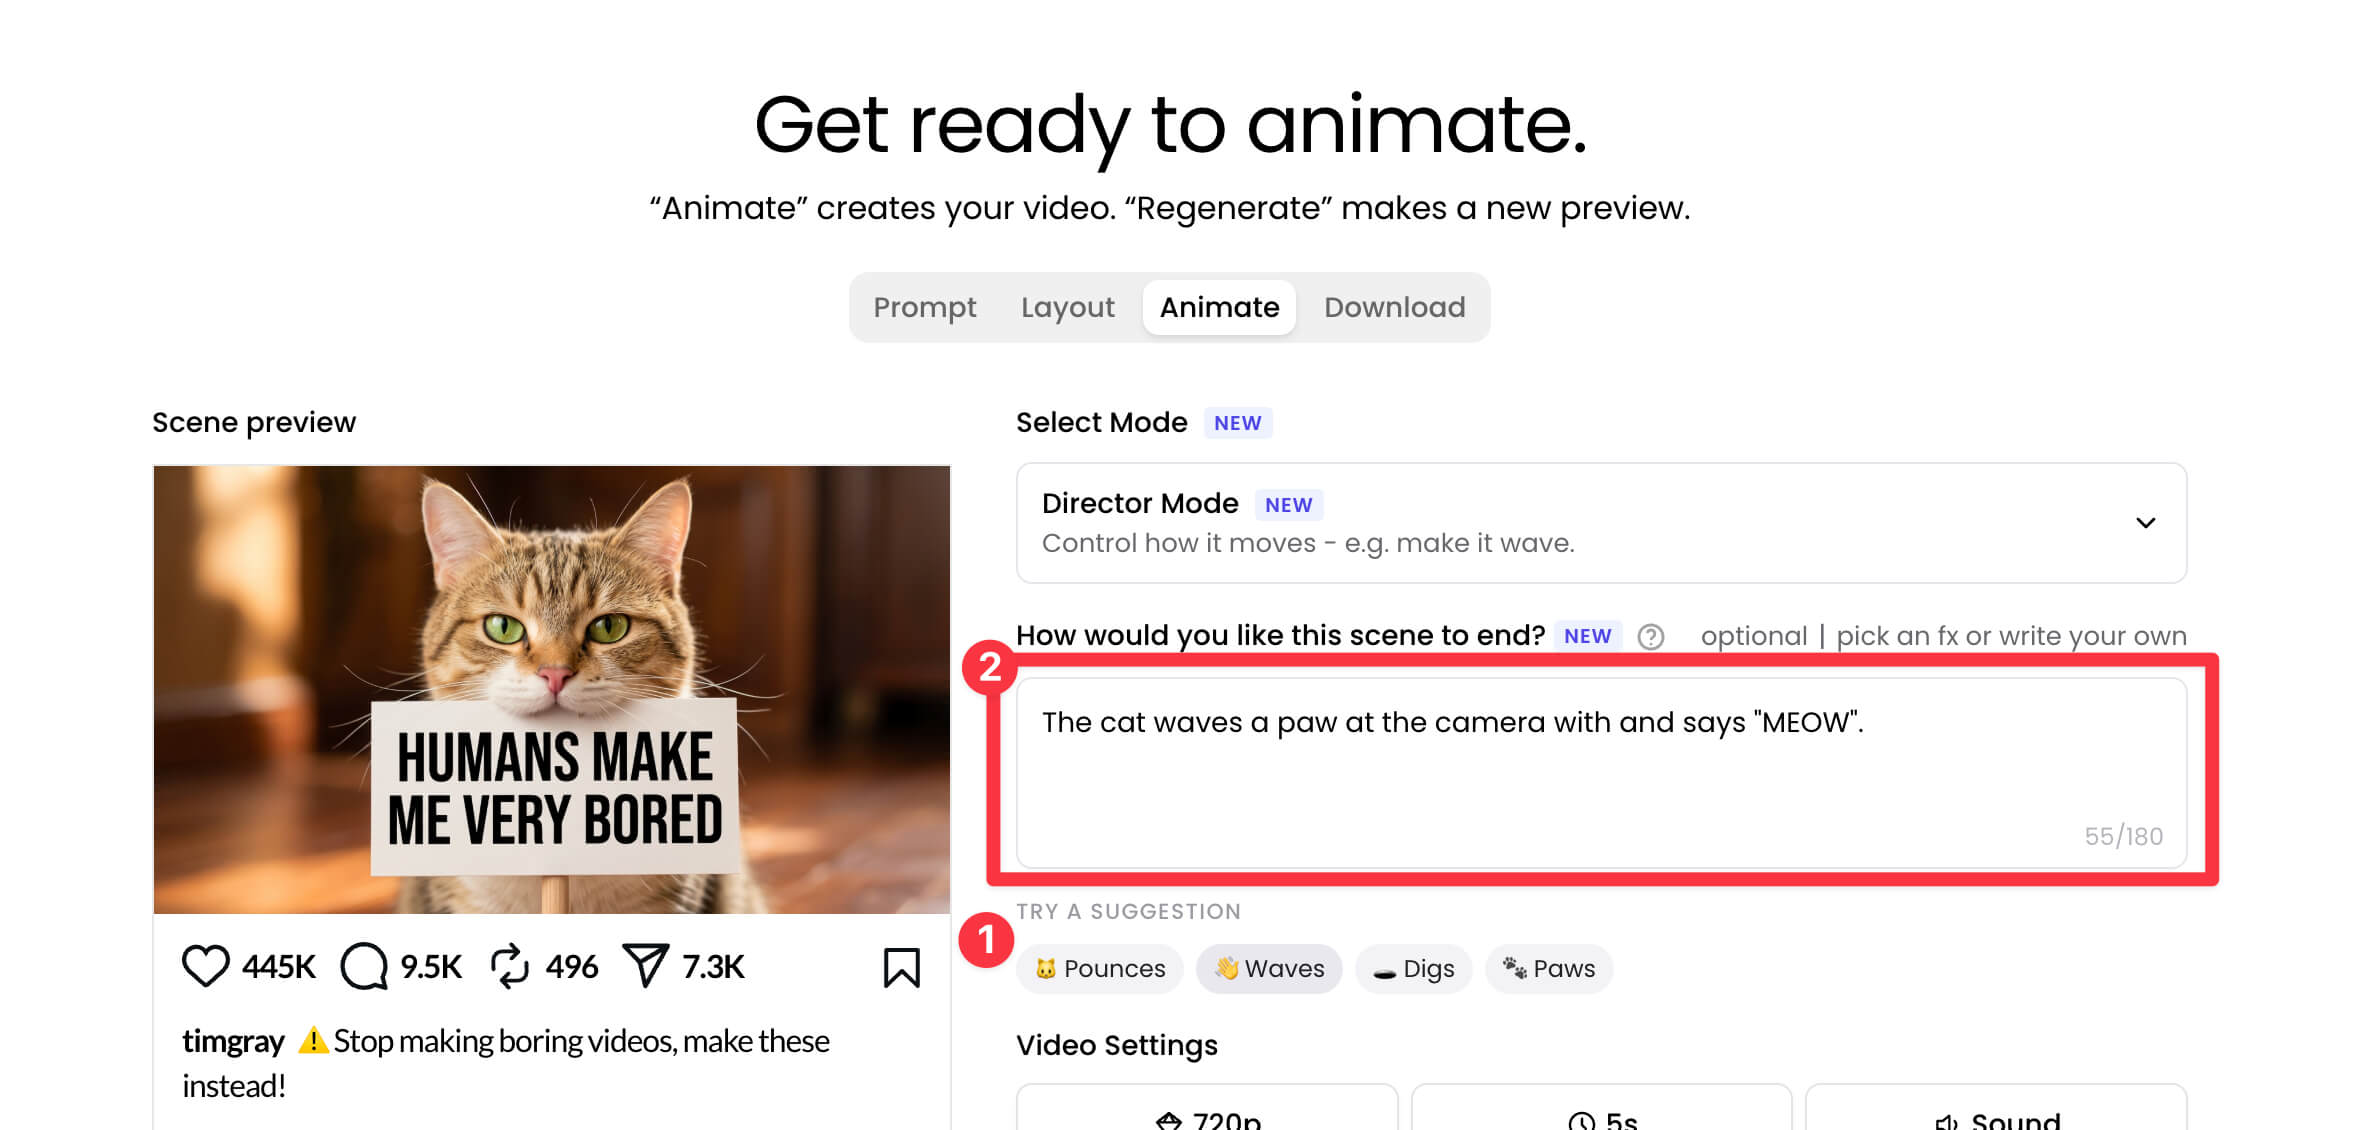
2. Keep your custom ending action-led
With the text handled in the scene, remove it from your Director Mode prompt and describe an action instead - e.g. The cat waves a paw at the camera and says "MEOW". These custom ending examples show the pattern.
Still want the AI to invent it?
Go for it - just budget for imperfect takes, since you'll burn more credits than if the text lived in the scene. The riskiest asks:
- Websites - "www", ".com" and no-space formatting give the AI more ways to slip.
- Anything past 2-3 words - every extra word multiplies the odds of an error.
- Phone numbers - long digit strings are the hardest to keep exact.
- Uncommon words - a property name like "23 Heoge Drive" gives the AI little to draw from; "Heoge" barely exists in everyday language, so it's more likely to drift.
Remix lets you take any video from the Community Showcase and use it as a starting point for your own video. The original prompt, settings, and scene are pre-filled - you edit whatever you want and make it yours.
- Find a video you like in the Community Showcase
- Click "Remix"
- The original prompt and settings are pre-filled - edit whatever you want
- Submit and animate
What you can change: the prompt, your branding, aspect ratio - everything.
Common remix questions:
- I remixed but still see someone else's branding - how to replace logos and sign text
- Why doesn't my remix match the original? - every AI video is unique
- Can I control the animation? - what you can and can't change
Every AI-generated video is unique - even with the exact same prompt, you'll never get a 100% identical result twice. This is how all AI video platforms work (Runway, Pika, Sora, Luma included) - submit the same prompt twice on any platform and you'll get two different videos. Want proof you can run yourself? Ask ChatGPT the exact same question twice - you'll get two answers that say the same thing in different words. Same principle, but in video.
When you remix, you're reusing the same prompt and scene setup as your starting point. You're not copying the finished animation itself - just the instructions that made it. Here's the mental model that makes it click: an AI video has no layers. It's not like a Canva template, where the design stays fixed and you swap one element while everything else stays put. The text, images, and motion are all baked together in one pass, so there's no way to freeze the animation and just swap one element. Every render is generated fresh, so every render is unique. See Can I change the text but keep the same animation? for more detail.
Here's the part that makes it click: that randomness isn't a flaw - it's the engine. It's the exact thing that created the original video you liked in the first place. Take it away, and the AI couldn't create anything at all.
So instead of chasing an identical copy: use multi-generation to render several takes in one go and pick the closest (learn more) to what you're after.
On a computer:
Click Download and your video saves to your browser's default downloads folder. Full steps: How do I download my video?
Not sure where that folder is? Search your browser name plus "default downloads folder" for a guide - for example, "Google Chrome: how to find the default downloads folder."
On a phone:
Follow our mobile walkthrough: How to download your video on an iPhone
Once it's saved, here's how to post it to each platform:
First, download your video - there's a Download button the moment it finishes rendering, or grab it anytime from My Videos in the top menu. Once it's on your device, upload it to Facebook like any other video: click the Photo/Video button on your page or profile, choose the file, and post.
Two things worth knowing:
- Black bars on desktop? That's the 4:5 size showing on a wide screen. Switch to Square to fill it, or pick the aspect ratio that fits where you're posting.
- Video looks soft right after posting? That's normal. Facebook takes a few minutes to finish processing HD, then it sharpens up on its own.
Full walkthrough with screenshots: How to post to Facebook
First, download your video after creating it, then post it like any other clip.
- On desktop: click + Create, choose Post, and select your video. To keep your framing, click the Crop icon and pick Original so Instagram doesn't crop it for you.
- On your phone: download the video, then post it straight from the Instagram app.
Your videos come pre-sized for Instagram. The default 4:5 fits the feed and tends to get the most engagement, so you rarely need to change a thing.
Full walkthrough with screenshots: How to post to Instagram
Every prompt generates a brand new scene from scratch. Even small changes (tweaking wording, adding a reference image, or adjusting style) cause the AI to reinterpret the entire description and build a fresh composition to match your idea.
This is different from traditional image editors where you modify an existing file. Here, your prompt is the full blueprint - the AI doesn't "edit" the previous scene like a template. It reads your updated instructions and creates something new that better matches them.
Want proof you can run yourself? Ask ChatGPT a question. Then change one word and ask again. You won't get the old answer with one word swapped - you'll get a whole new answer. Your scene works the same way.
Good news for you:
- Scene previews are completely free.
- You can edit and regenerate as many times as you want.
- Credits are only used when you decide to animate the final version.
Don't worry - you don't lose any credits for videos that don't successfully render. Only successfully rendered videos deduct credits.
Video generation usually takes about 60 seconds. If it's taking longer, our servers may be under high demand - the platform will let you know if that's the case.
If the video is stuck for an extended period of time, or there's an error, contact [email protected] from the email associated with your Breakout Clips account and we'll investigate promptly.
Most video issues fall into one of these categories:
- Unwanted elements - the AI added something you didn't ask for (random objects, extra people)
- Text looks distorted - letters are garbled, unreadable, or changed during animation
- Logo looks different - your logo changed or distorted after animating
- Wrong branding - you see someone else's logo or the wrong text after remixing
- Subject didn't pop out - no 3D breakout effect
- Video won't render - stuck generating or failed
Click the relevant issue above for a step-by-step fix, or contact [email protected] from the email associated with your Breakout Clips account, and include the following:
- Your video ID
- The exact prompt you used
- A screenshot of the issue
- An explanation of what went wrong
- Whether you used multi-generation, and if so, how many variations had the issue
This information upfront gets you a quicker resolution.
Hmm, nothing matched that search.
Try shorter or different keywords, or browse by category using the filters above.
Still can't find what you're looking for? Reach out to our support team - we're happy to help.